Here is one of the cards I made for this months inspiration challenge.
Here is the link if you would like to play along too.
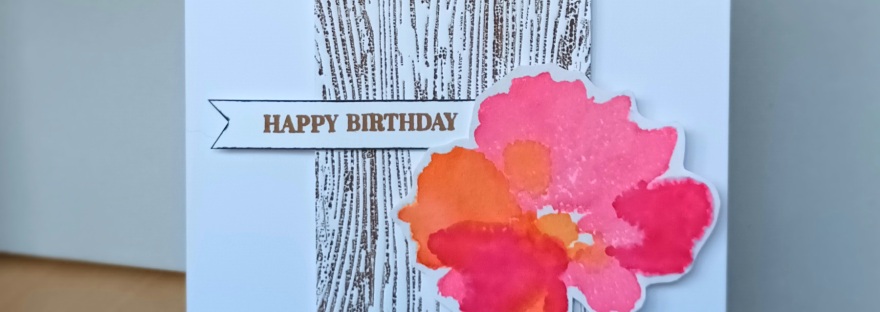
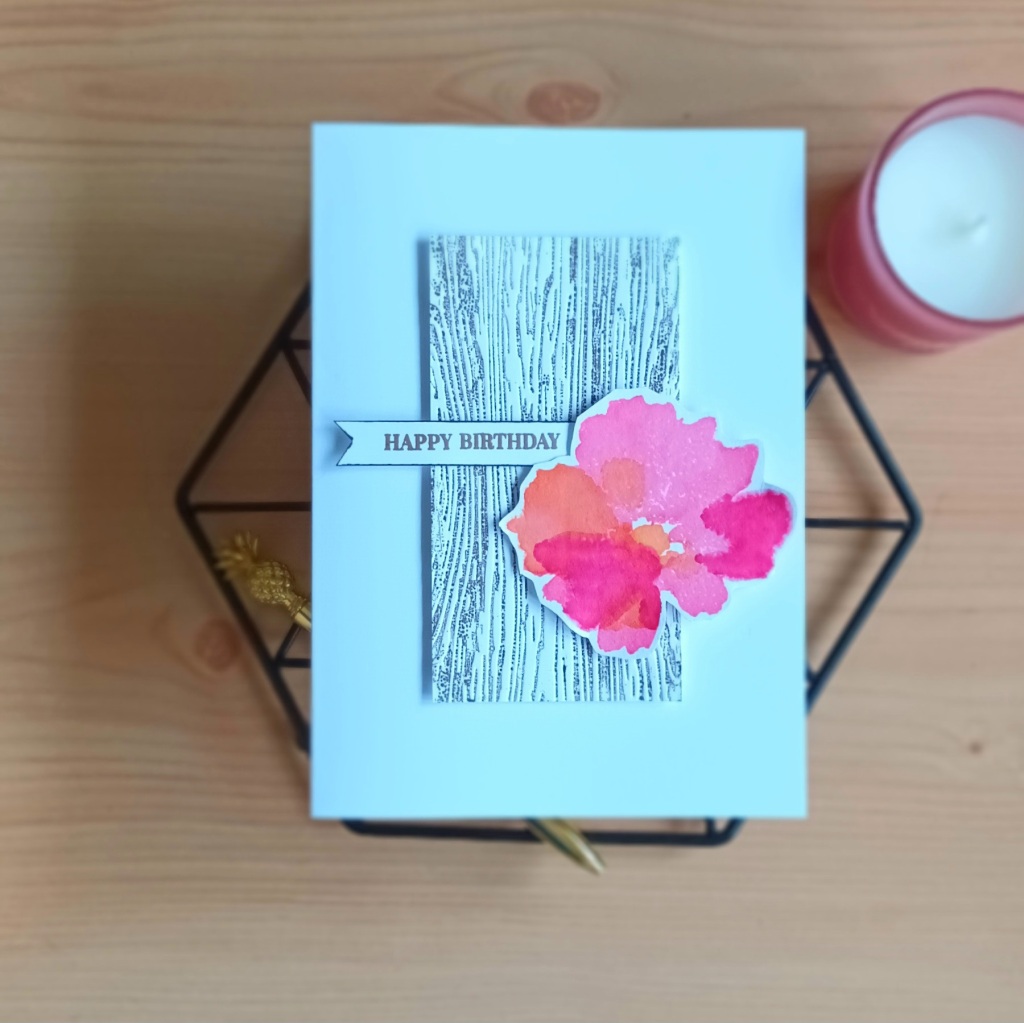
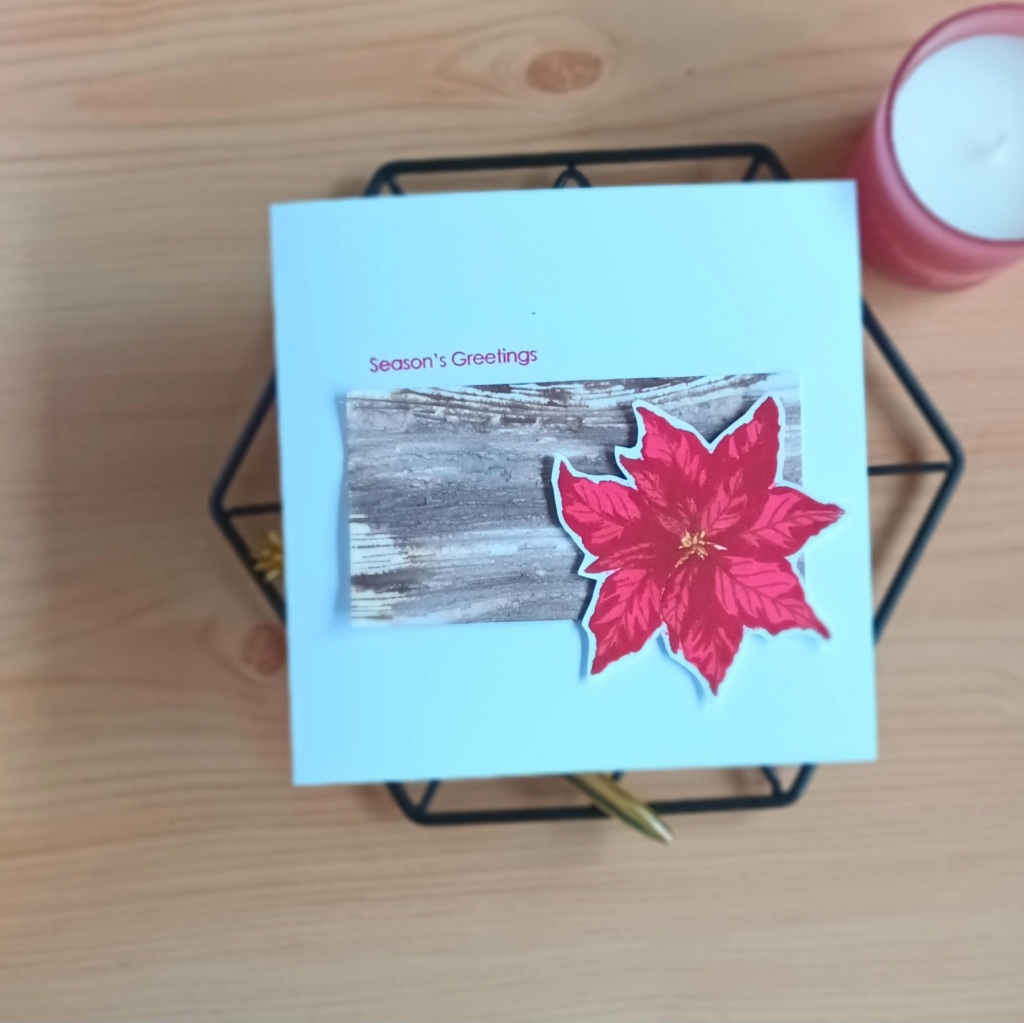
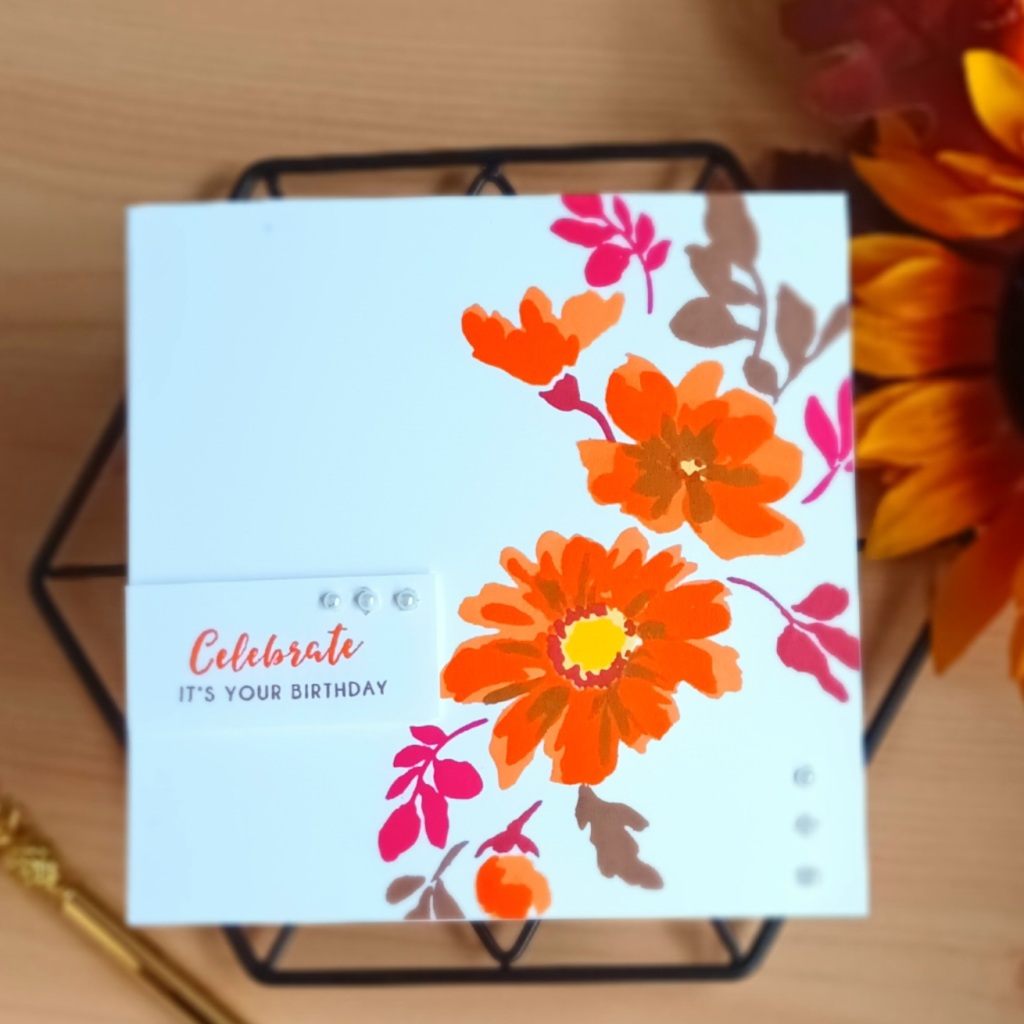
I started by stamping the large flower from watercolor wonders onto watercolor card stock using the colors cotton candy, orange cream and ruby red. I used water to blend the colour between each layer to give more of a watercolor look and let it dry between each layer.
To get a wood effect background like the inspiration picture I used an old wood embossing folder from crafters companion. I inked the embossing folder with the walnut stain distress ink before running it through my cuttle bug.
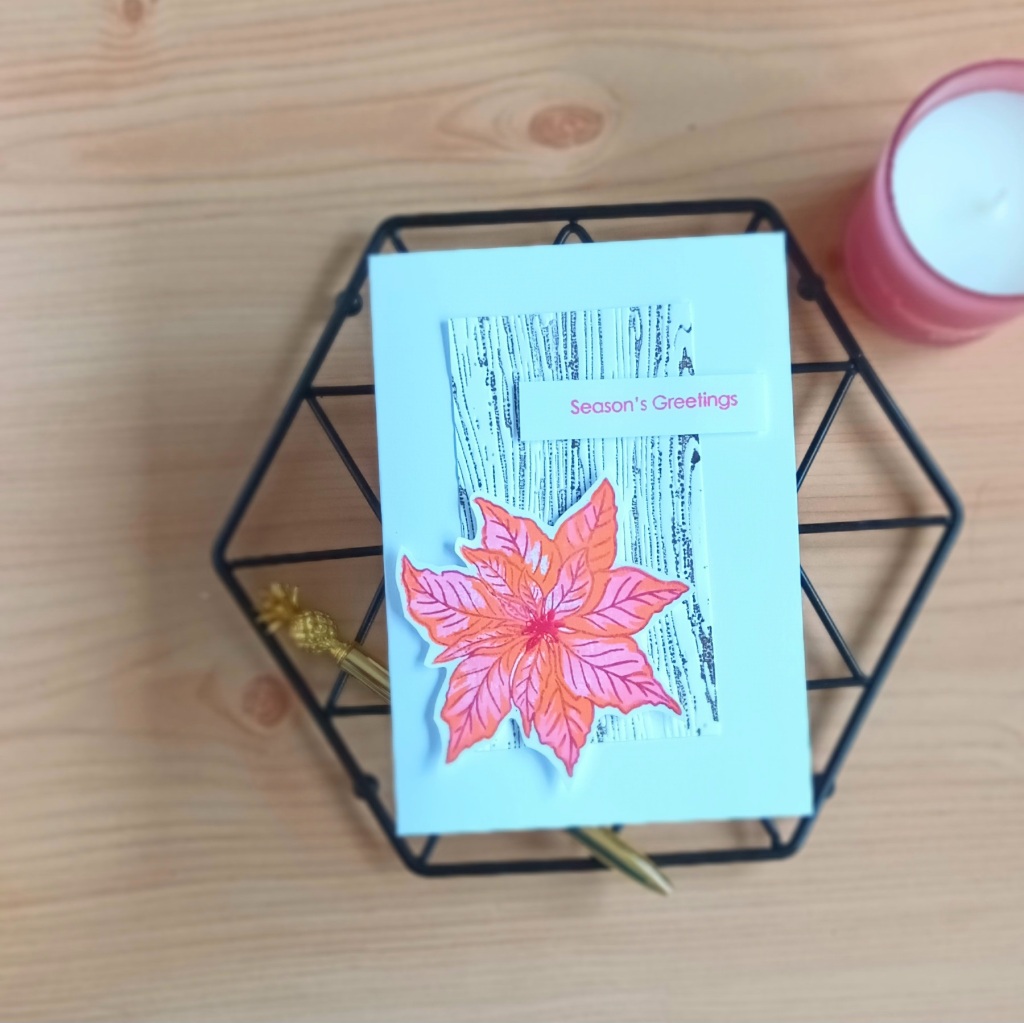
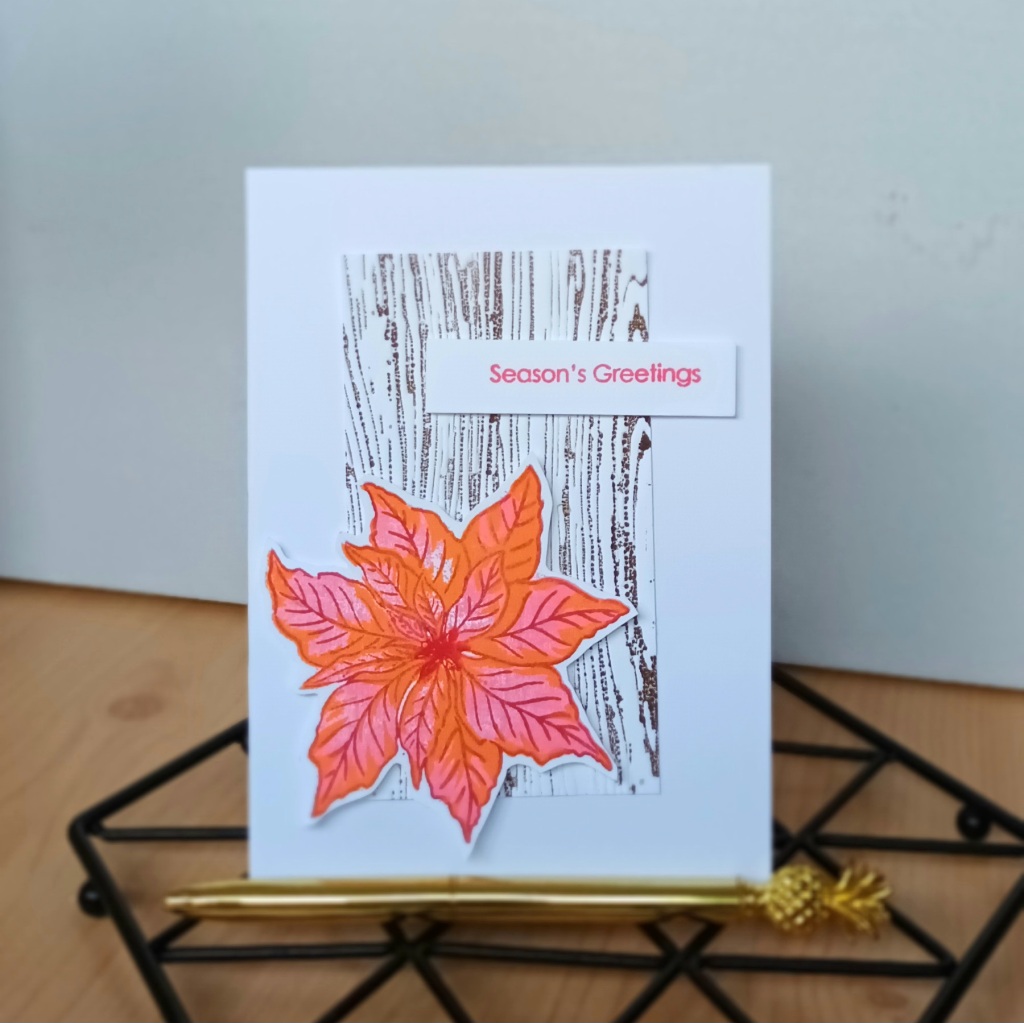
My second card is very similar, but I have used the poinsettia stamp from poinsettia and berries stamp set. I have decided it’s time to start making some cards ready for Christmas. I am sorry if it is too early for you, but I have a lot to make. I used the same three colours of ink and stamped the outline with grapevine ink.
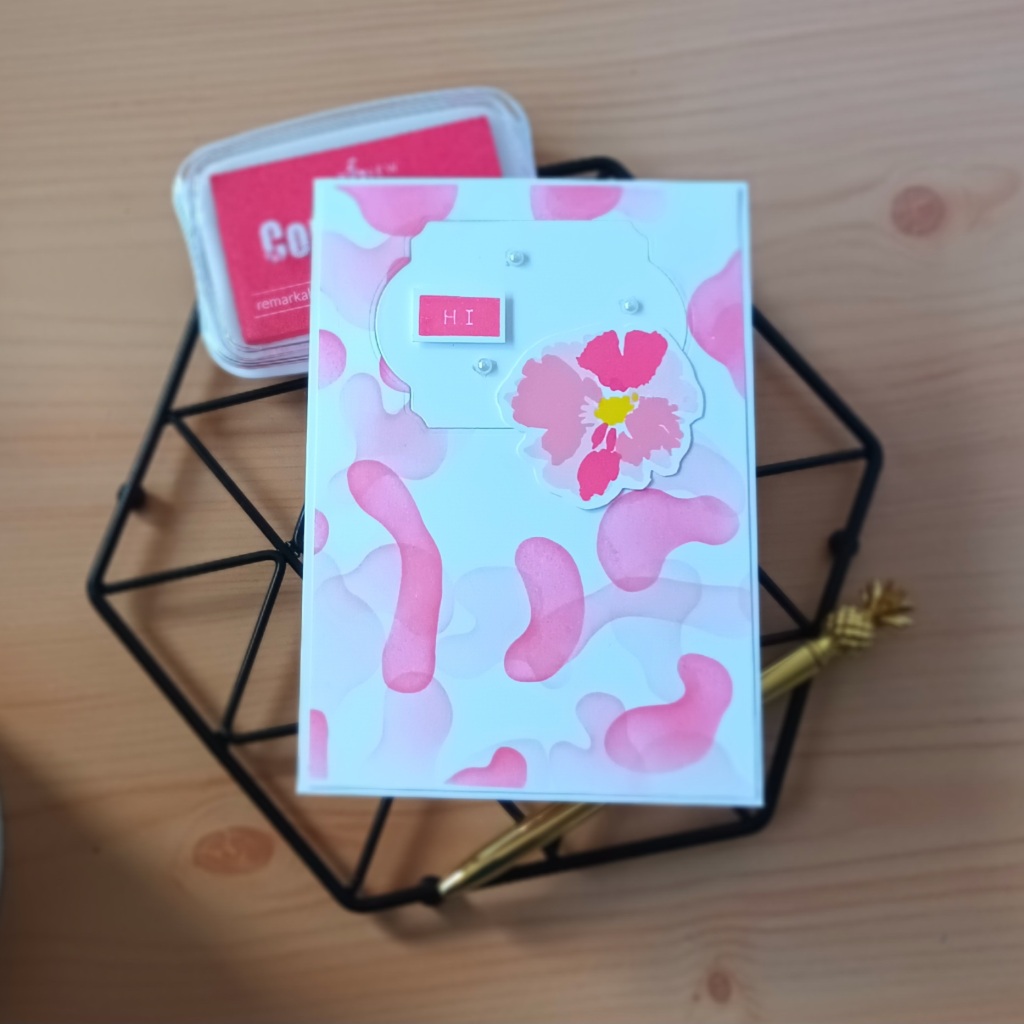
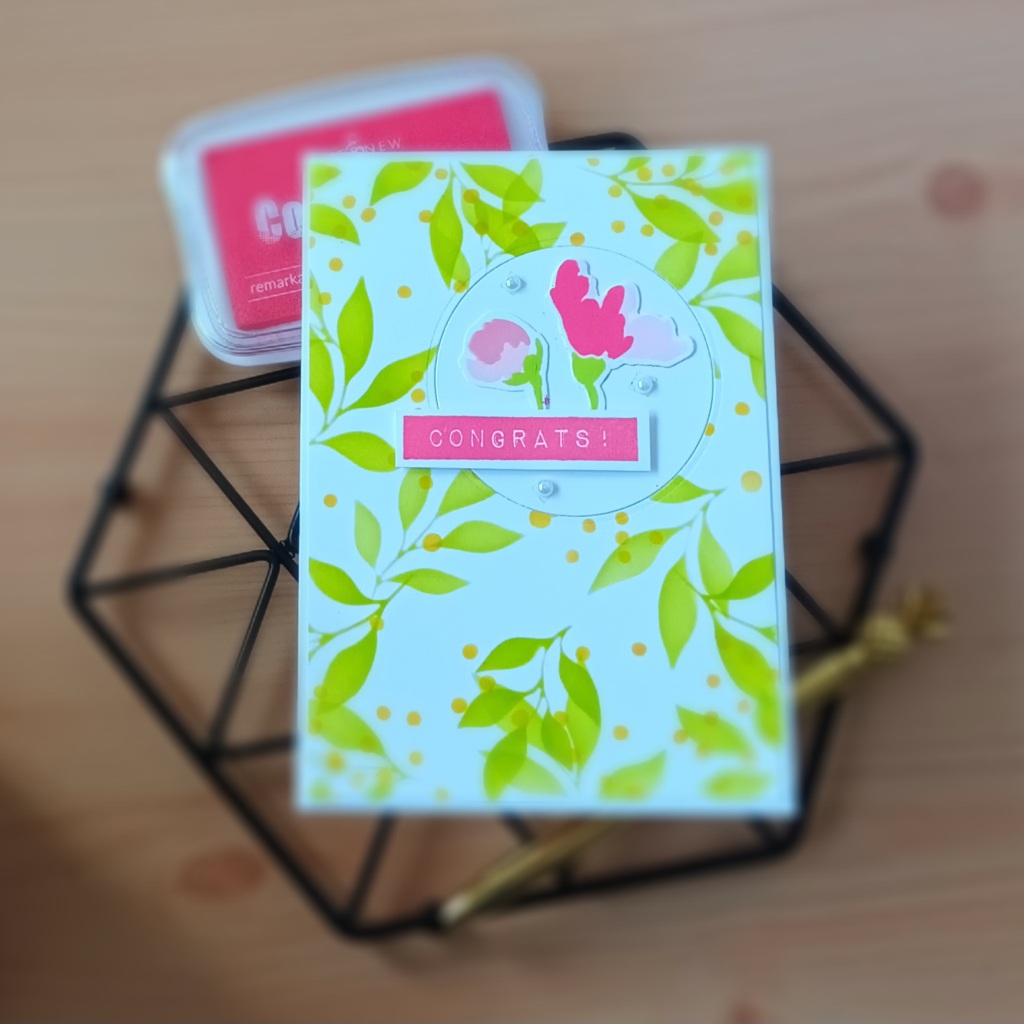
Today I have two cards to share that I made for the altenew academy class in the mood for color, that I am doing towards my level 2 Altenew Educator Certification program. You can find more information on this program here and I would highly recommend it.
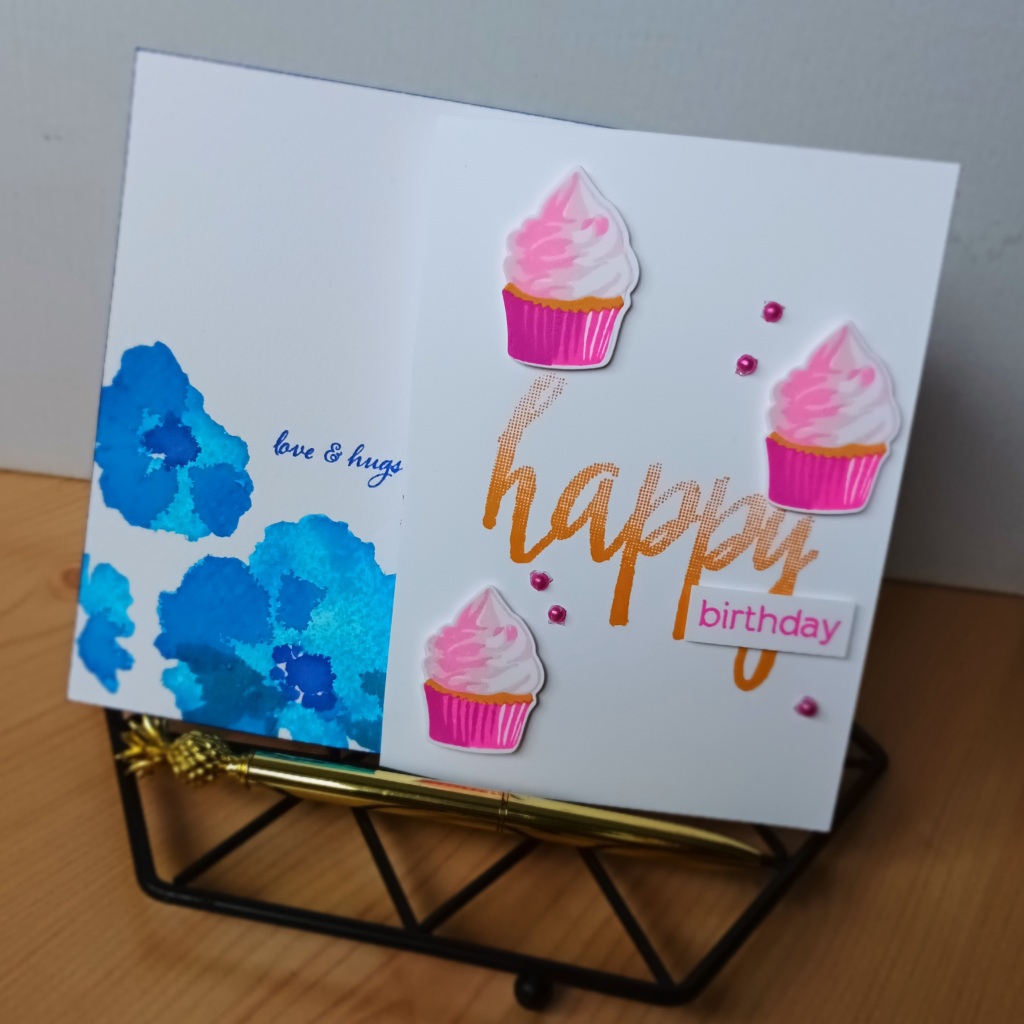
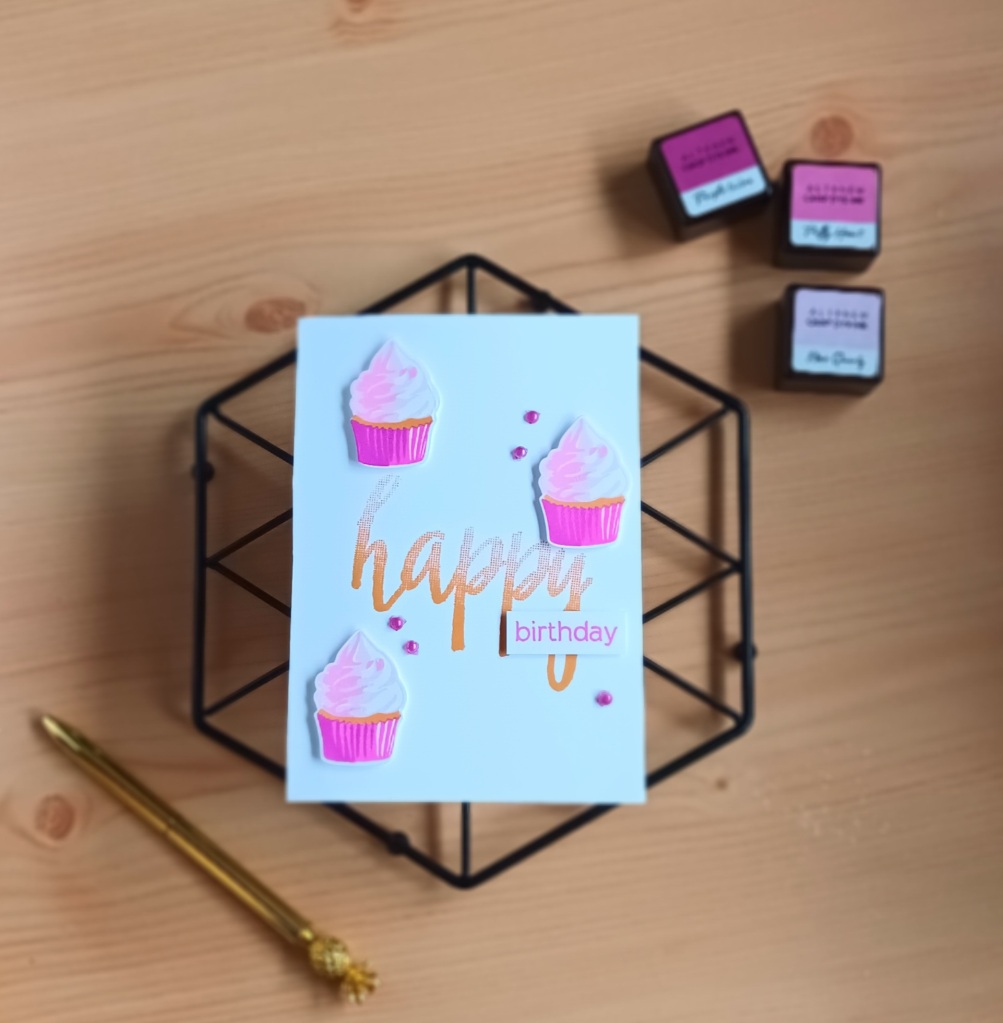
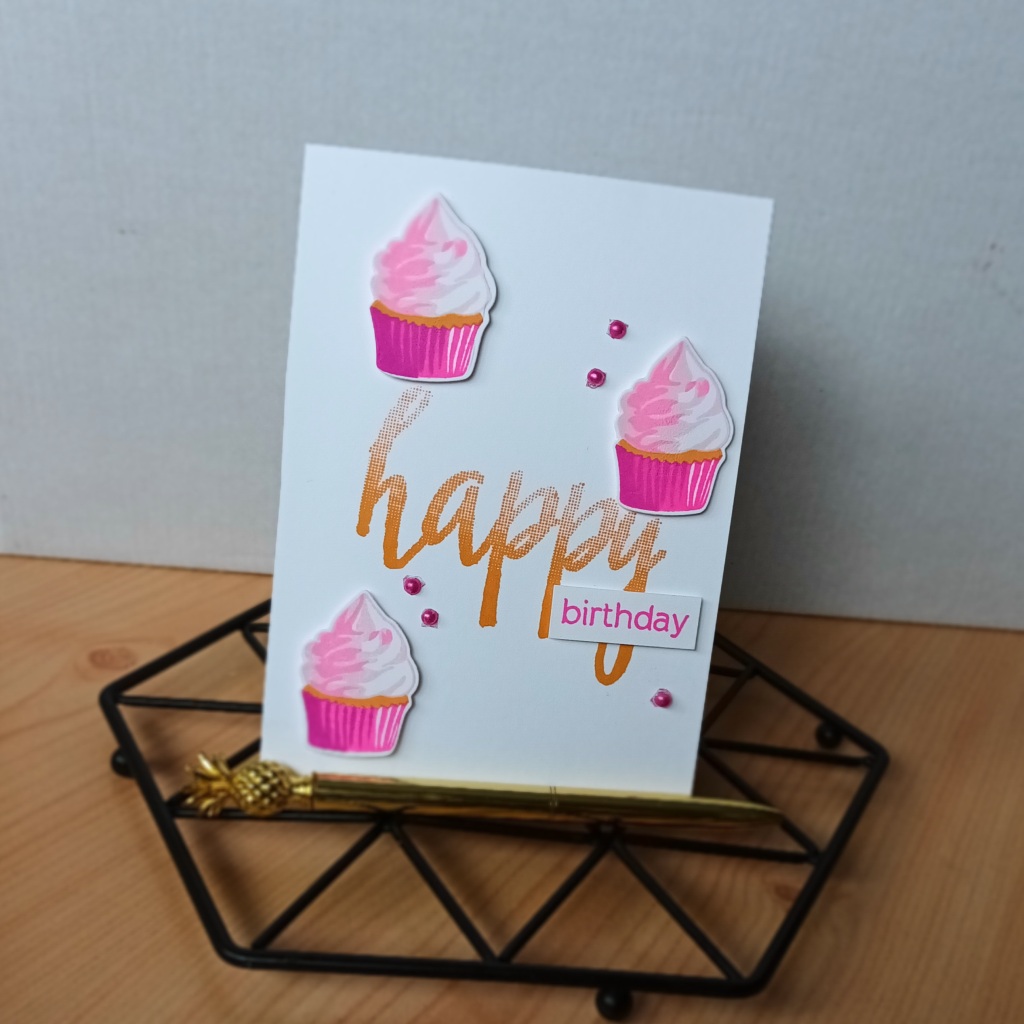
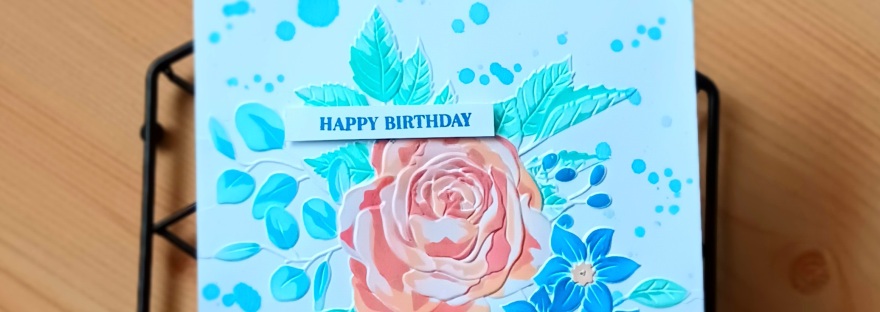
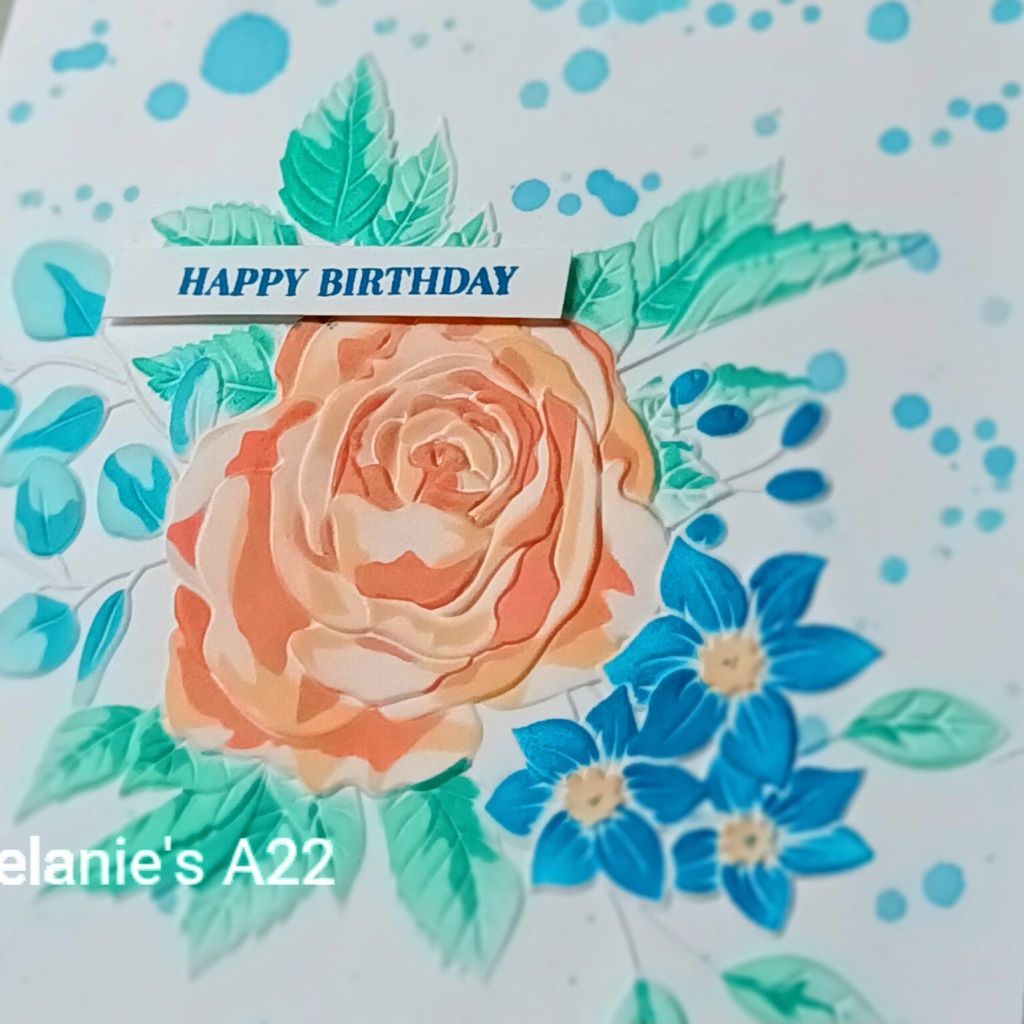
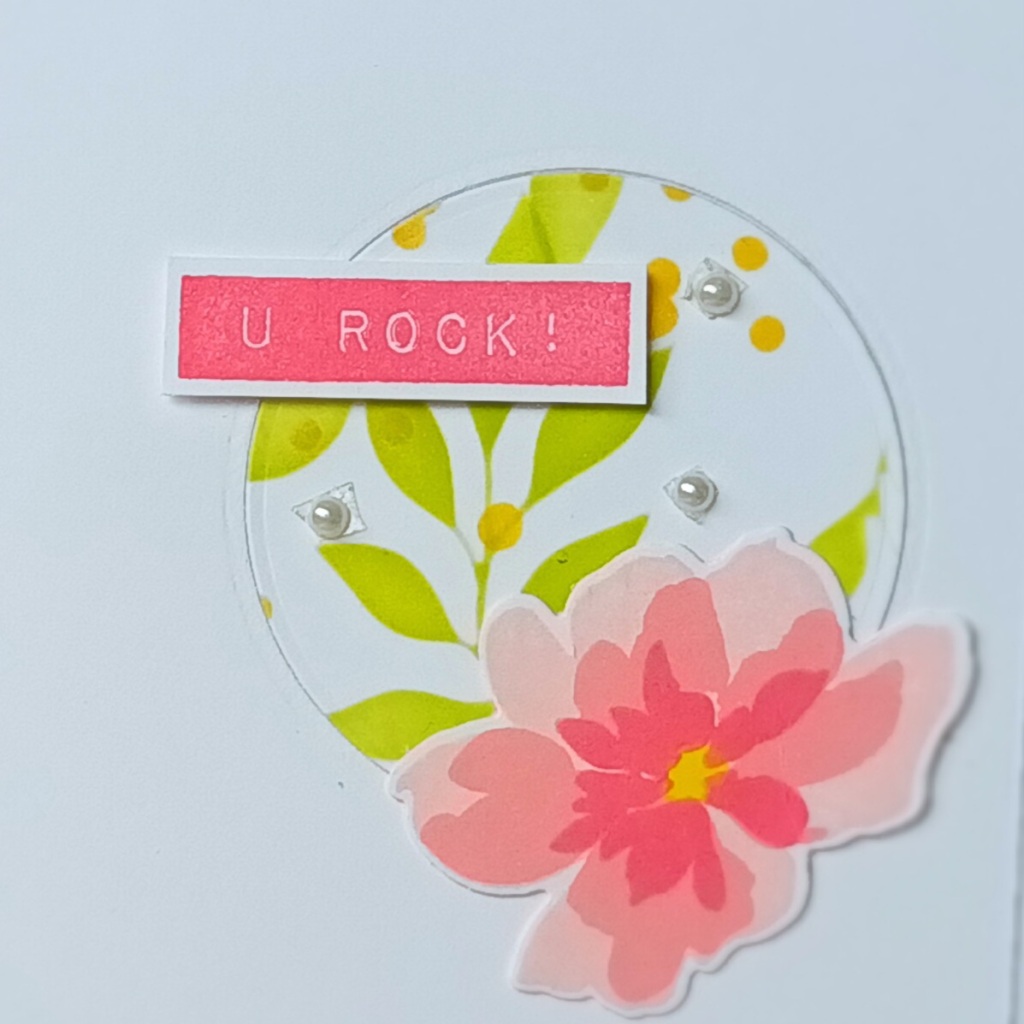
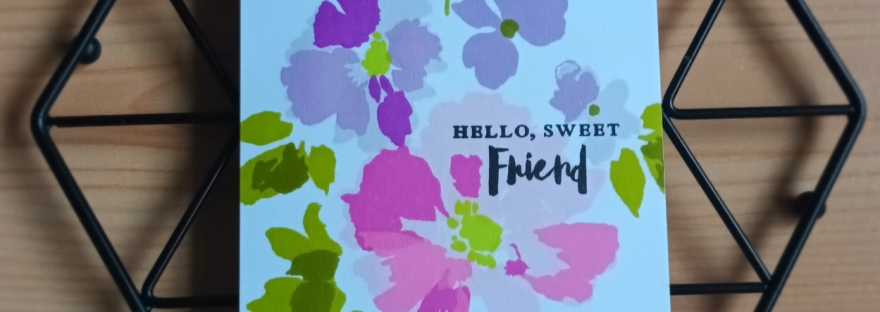
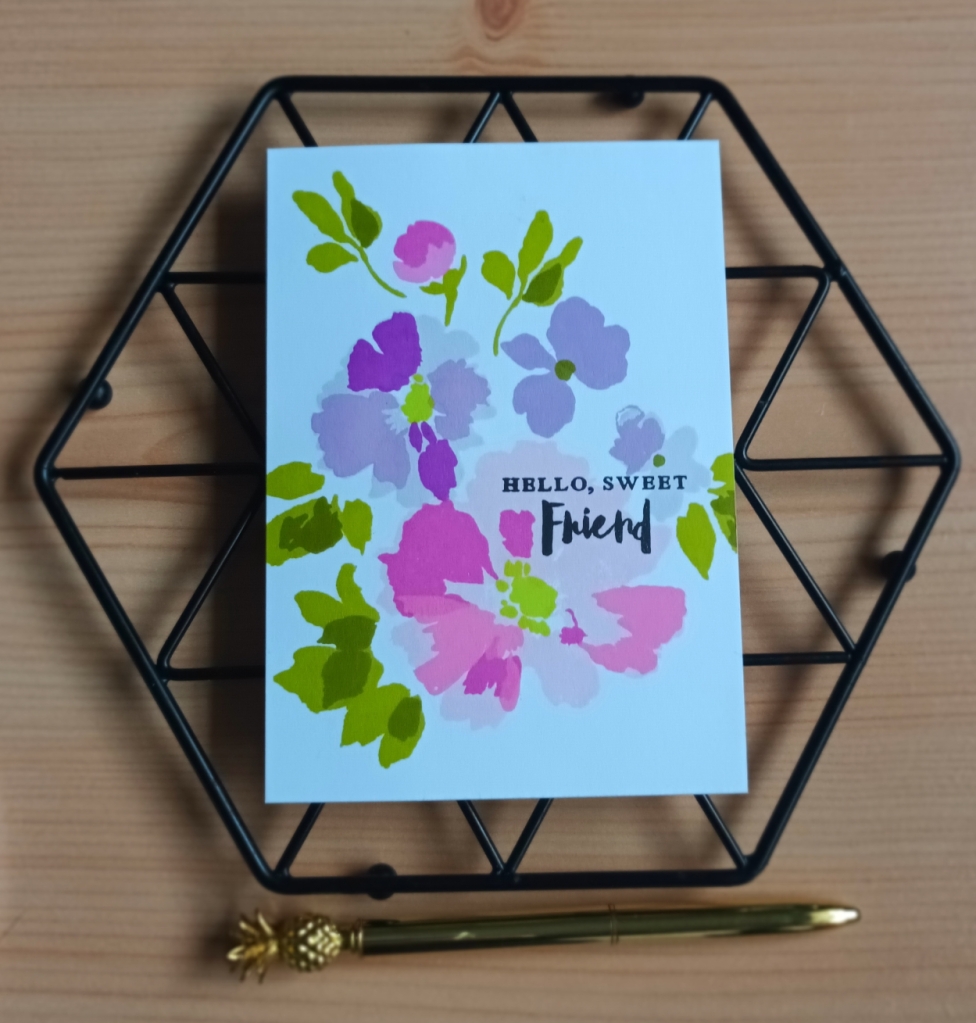
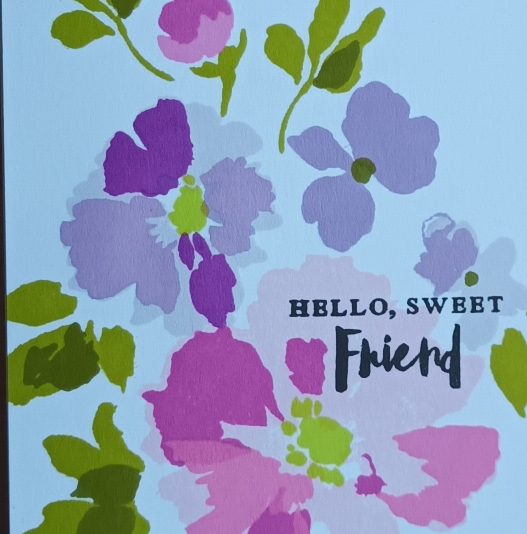
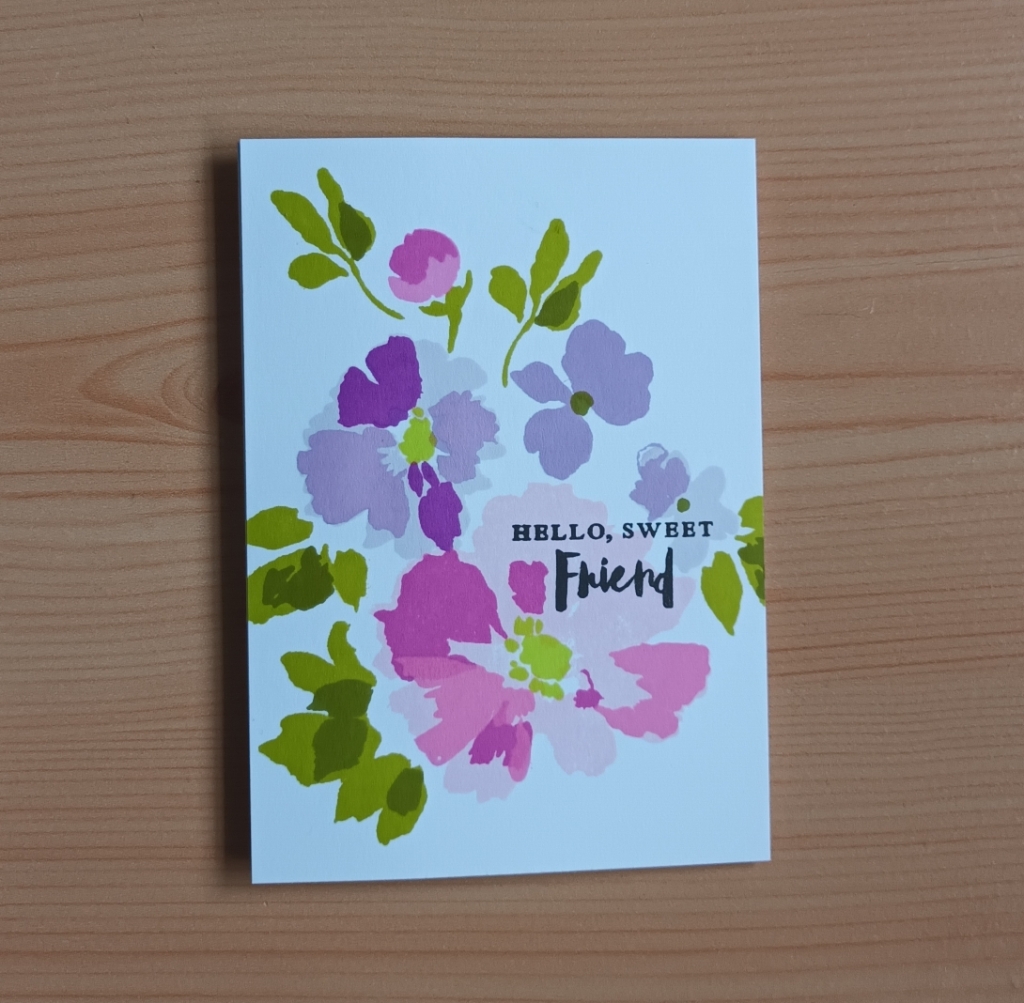
In the mood for color class looks at the moods colours evoke. This first card was inspired by lesson five – Pink – Sensitive, Caring, Sweet.
I then used the matching alcohol artist markers to colour in some pearls to add something extra to the card to finish off.
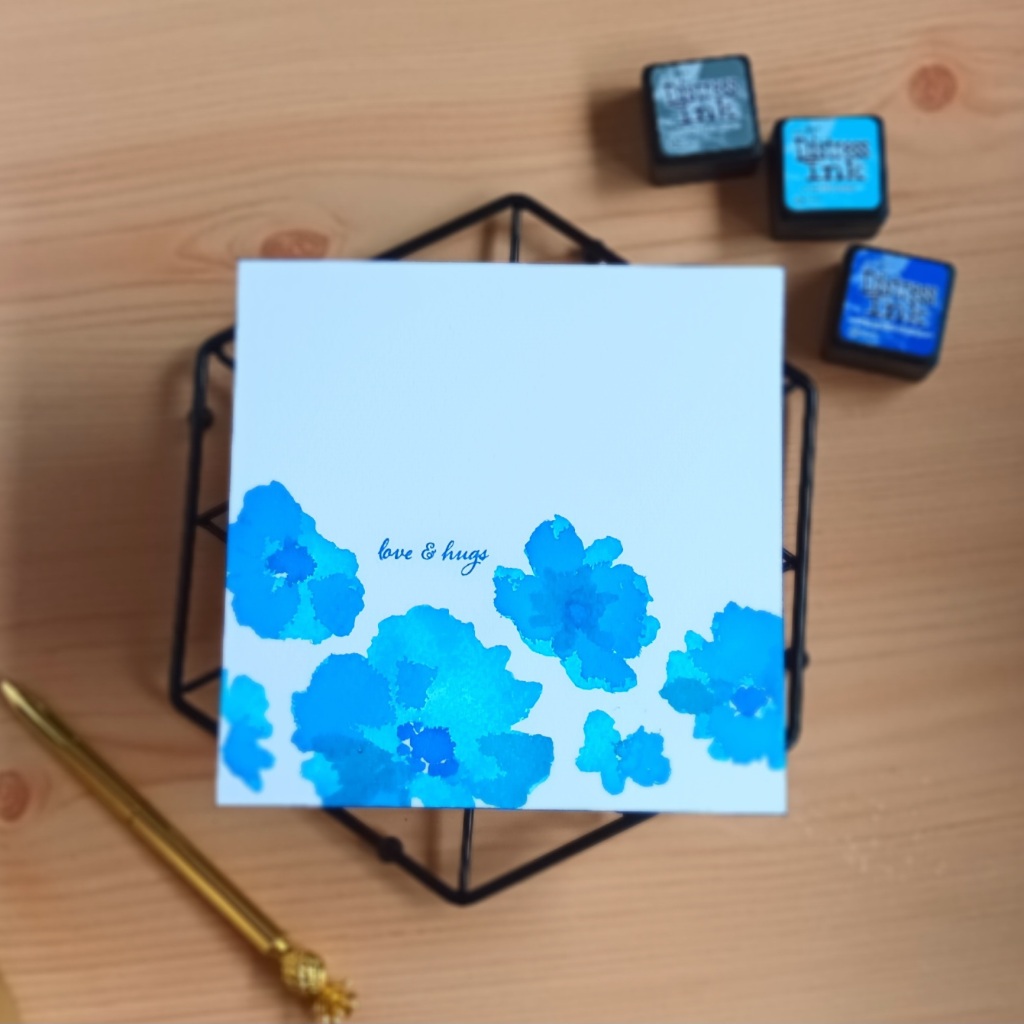
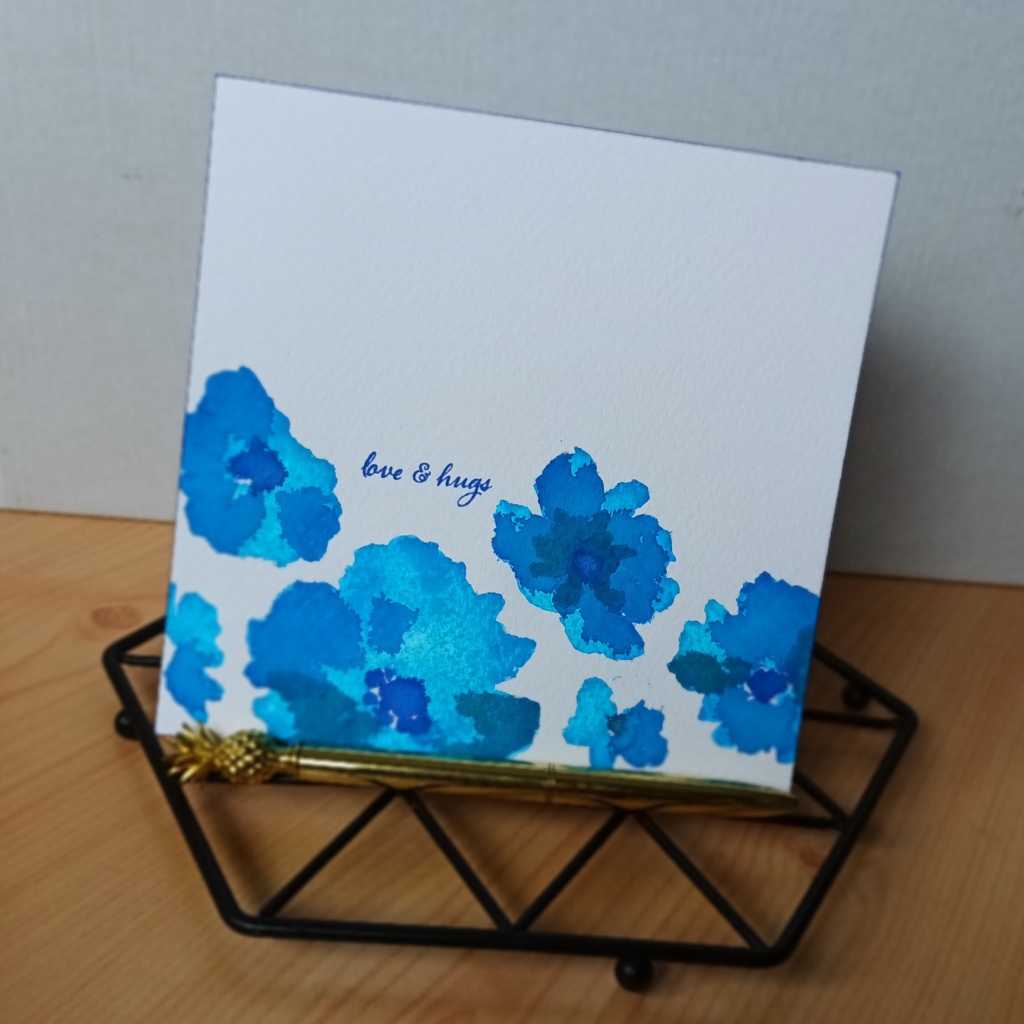
For my second card I was inspired by the class – blue – calm and tranquil but, used the techniques from the third class green – soothing, growth, natural.
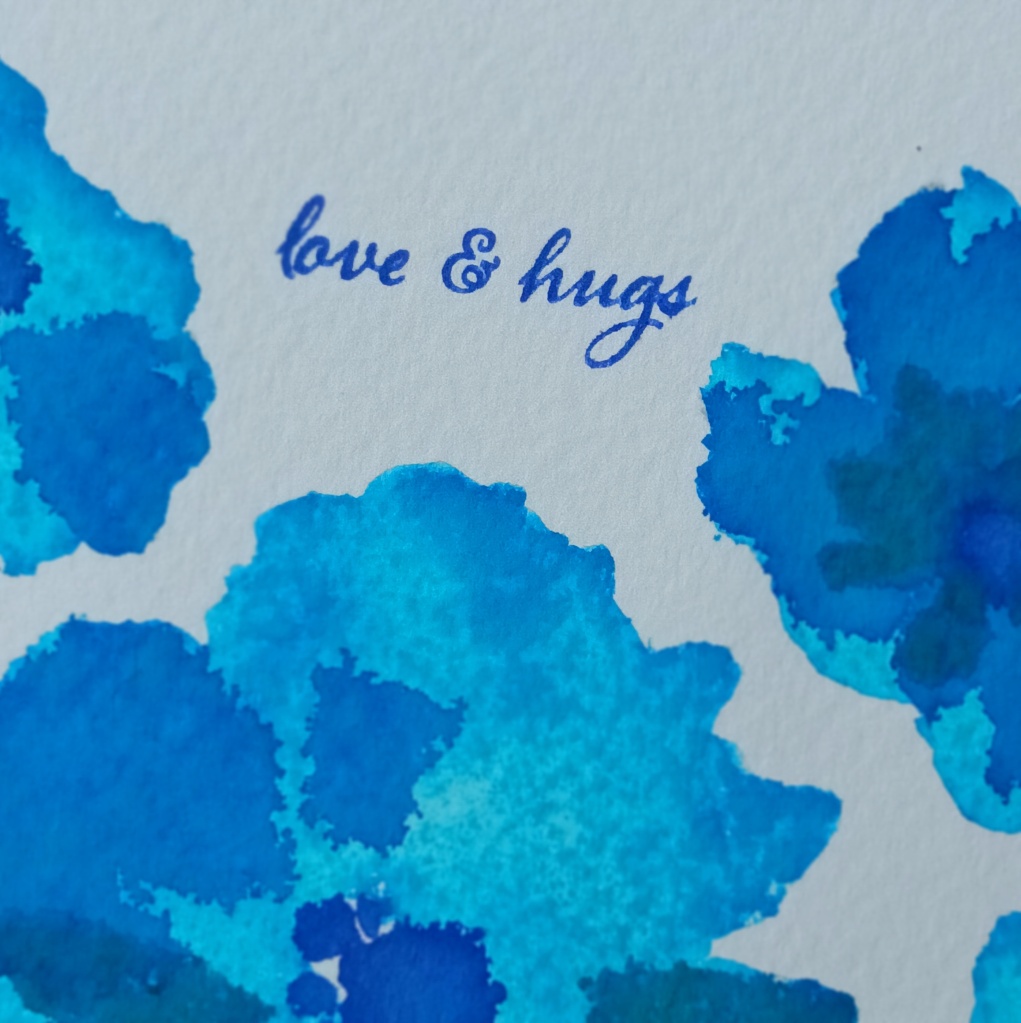
I used watercolor wonders and watercolor extravaganza stamp sets to stamp the flowers using distress inks. I stamped a layer onto watercolour card stock and then used water to paint it and give it a watercolour look. I then let it dry in between each layer.
Today I have two cards to share that I made for the altenew academy class beyond basic backgrounds that I am doing towards my level 2 Altenew Educator Certification program. You can find more information on this program here and I would highly recommend it.
This first card was inspired by Lesson two – repeating pattern. In the class Lydia showed us how to stamp a repeated pattern across a card by measuring out a grid with a ruler. I decided after recently purchasing the stamp wheel it would be an ideal time to try out using this tool to stamp a repeating pattern in a circle. I used two different sized circle stamps from the pattern play – circle stamp set. I stamped these circles in an ombre pattern using the inks from the sea shore crisp dye ink cube set.
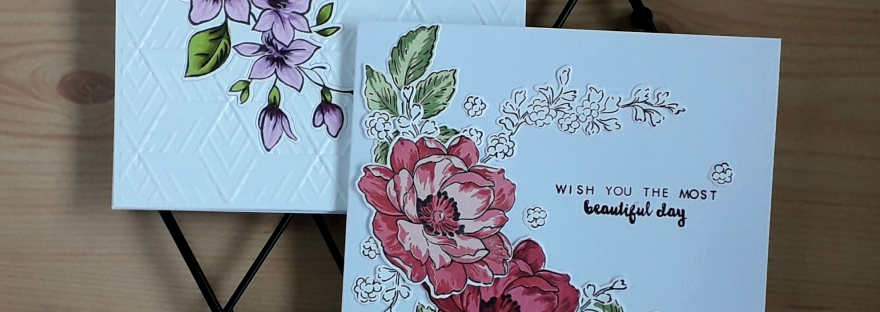
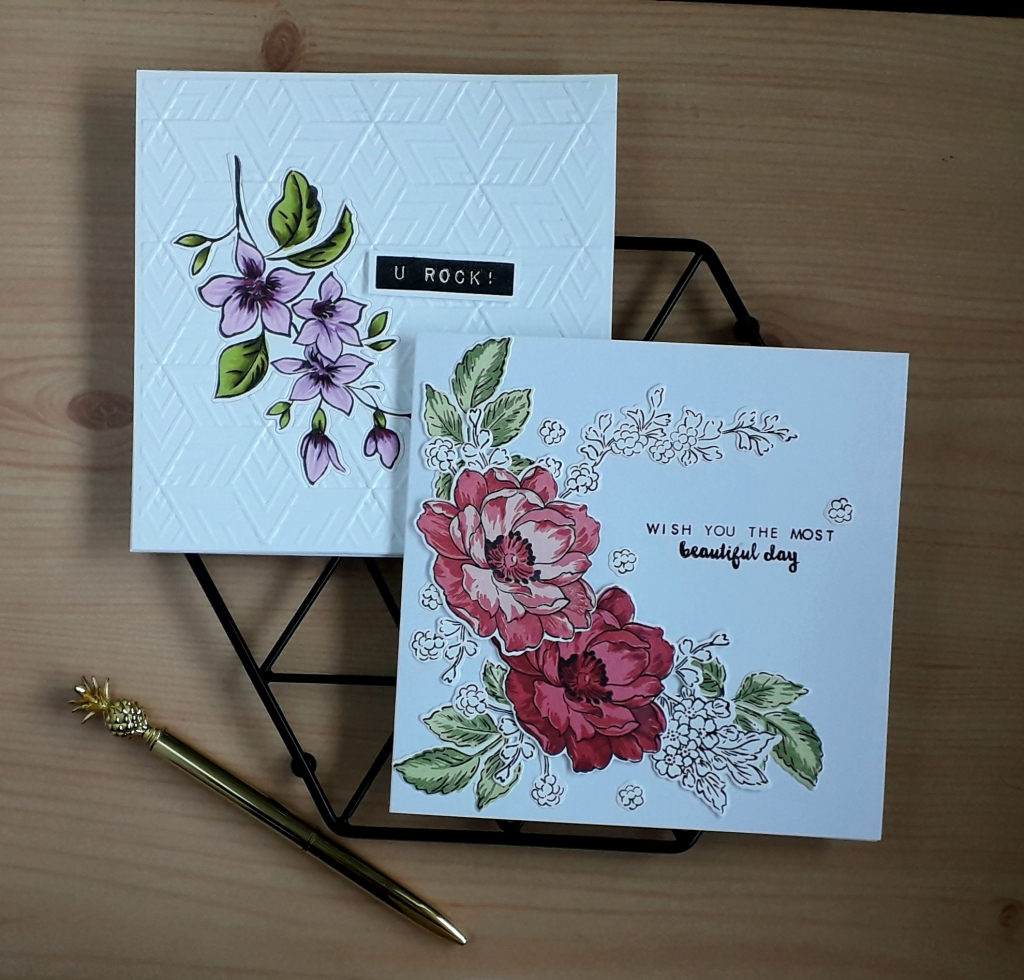
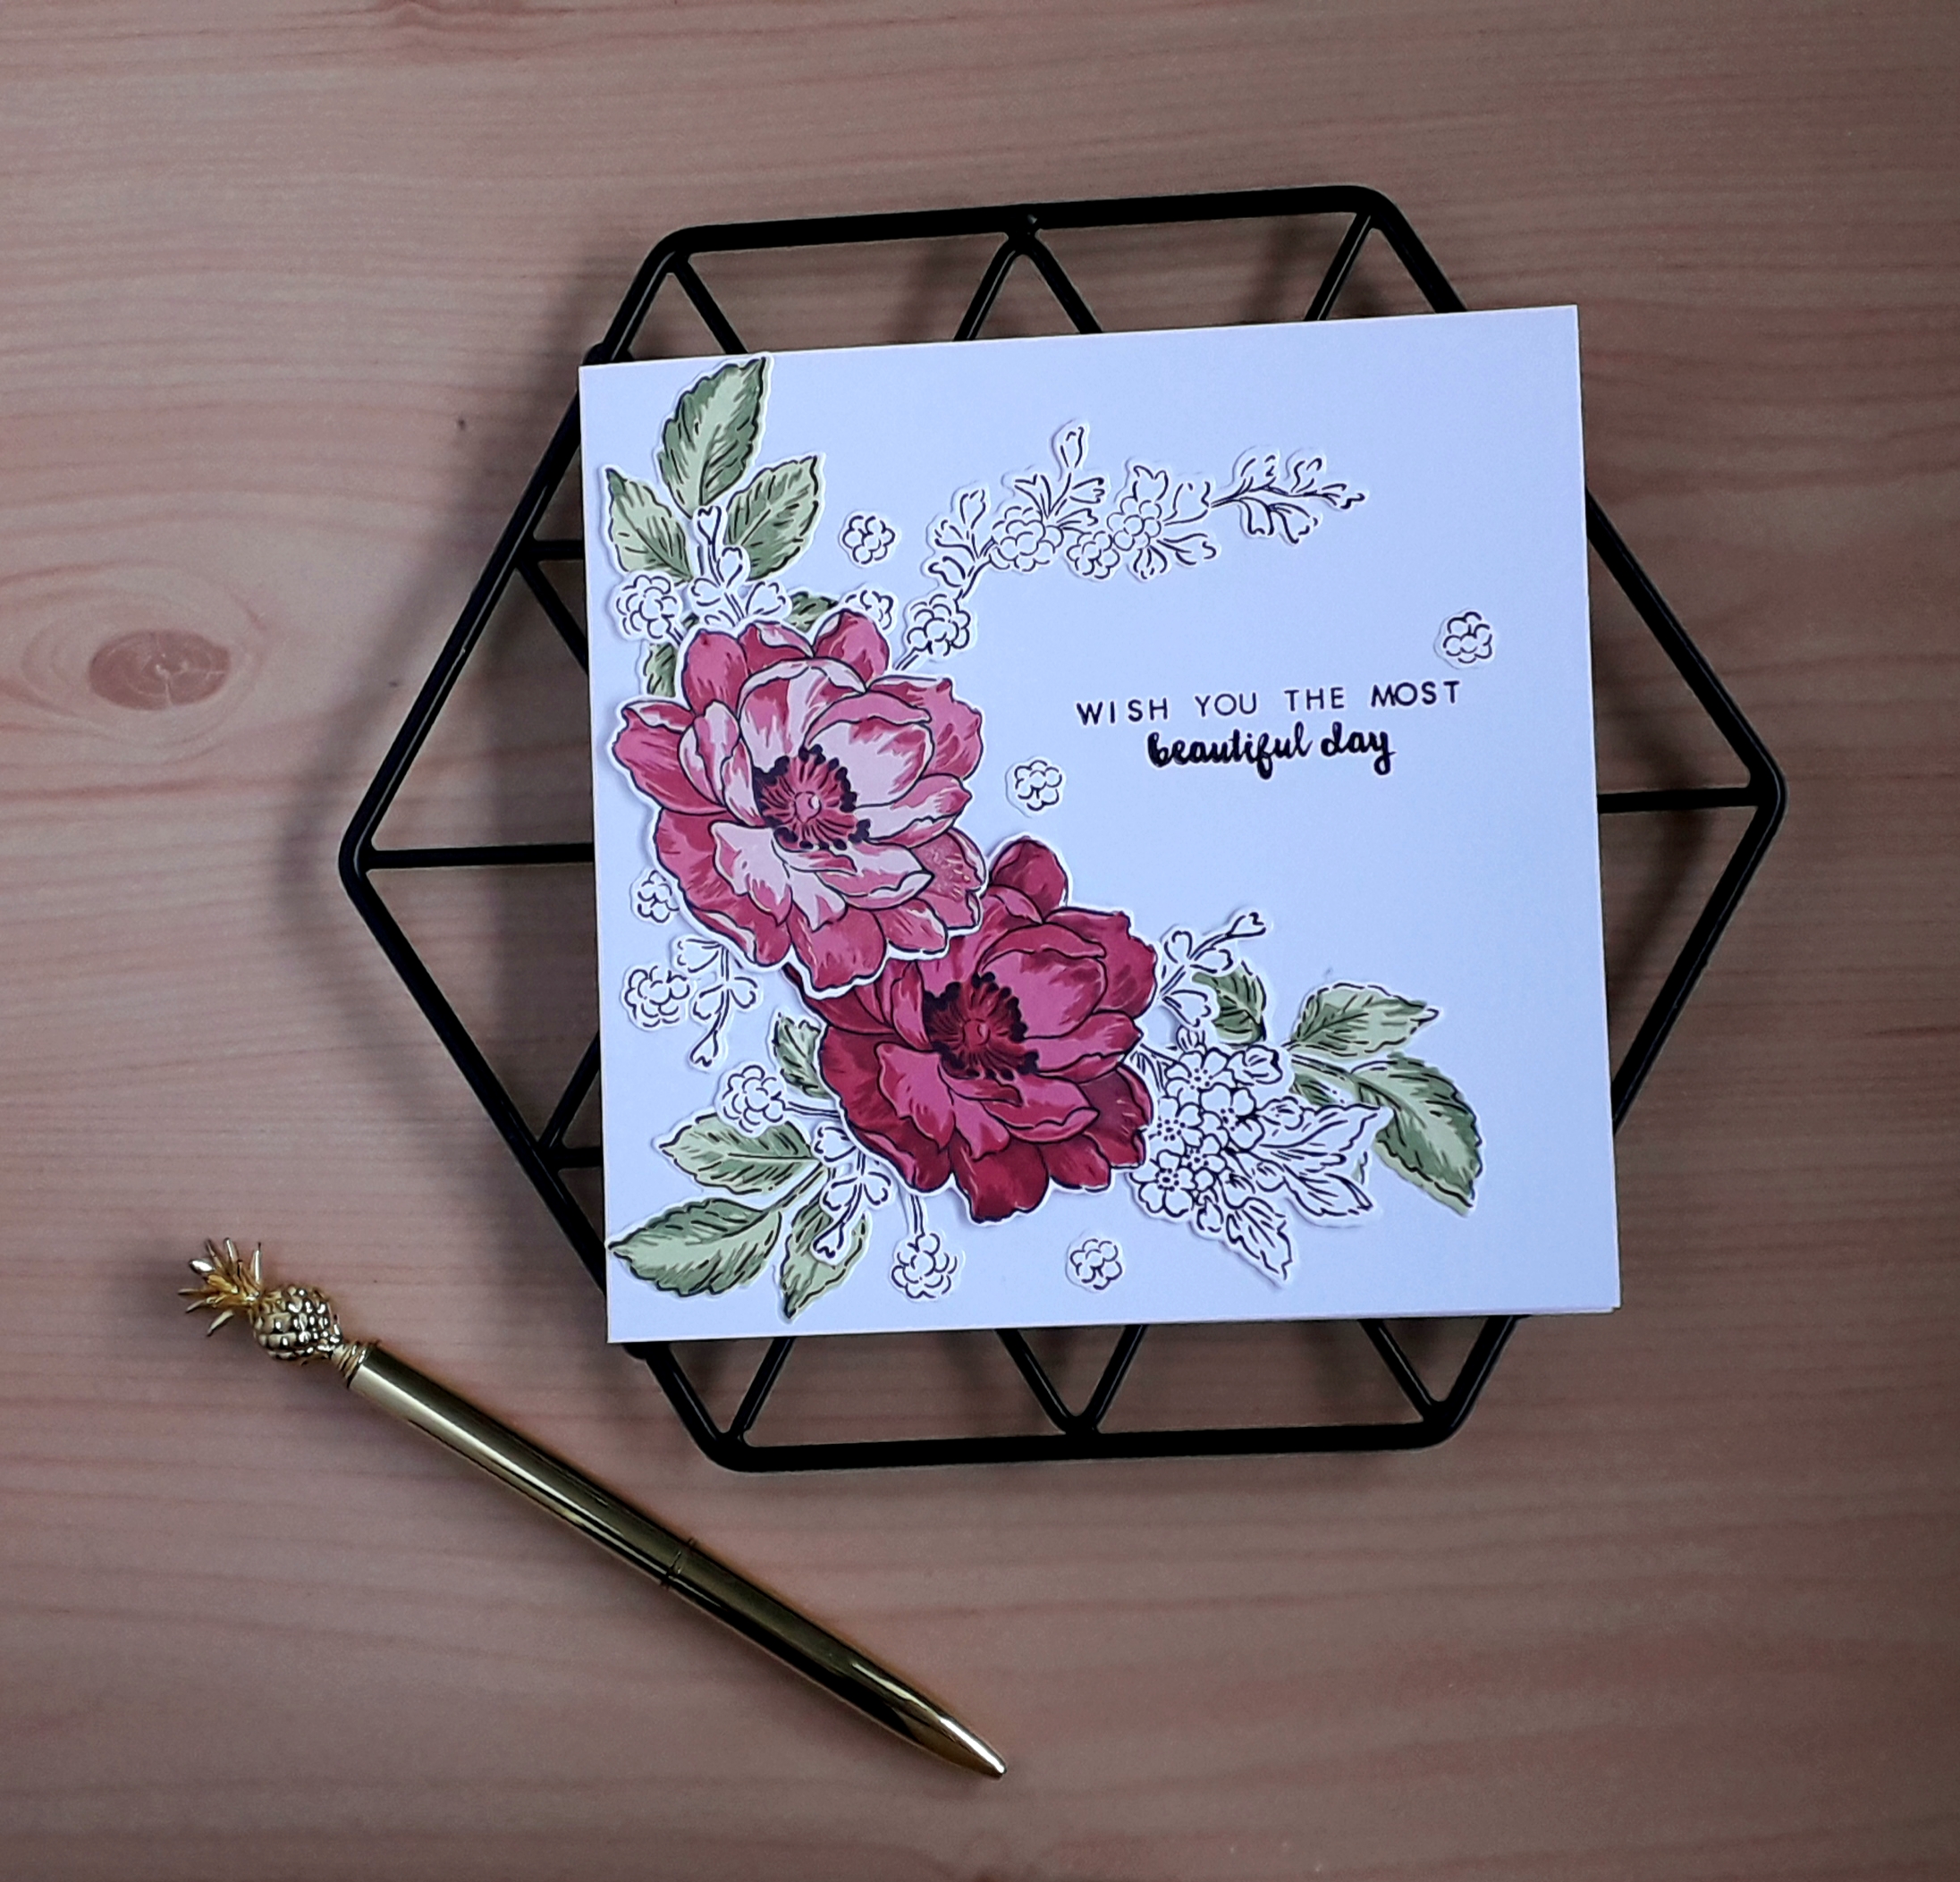
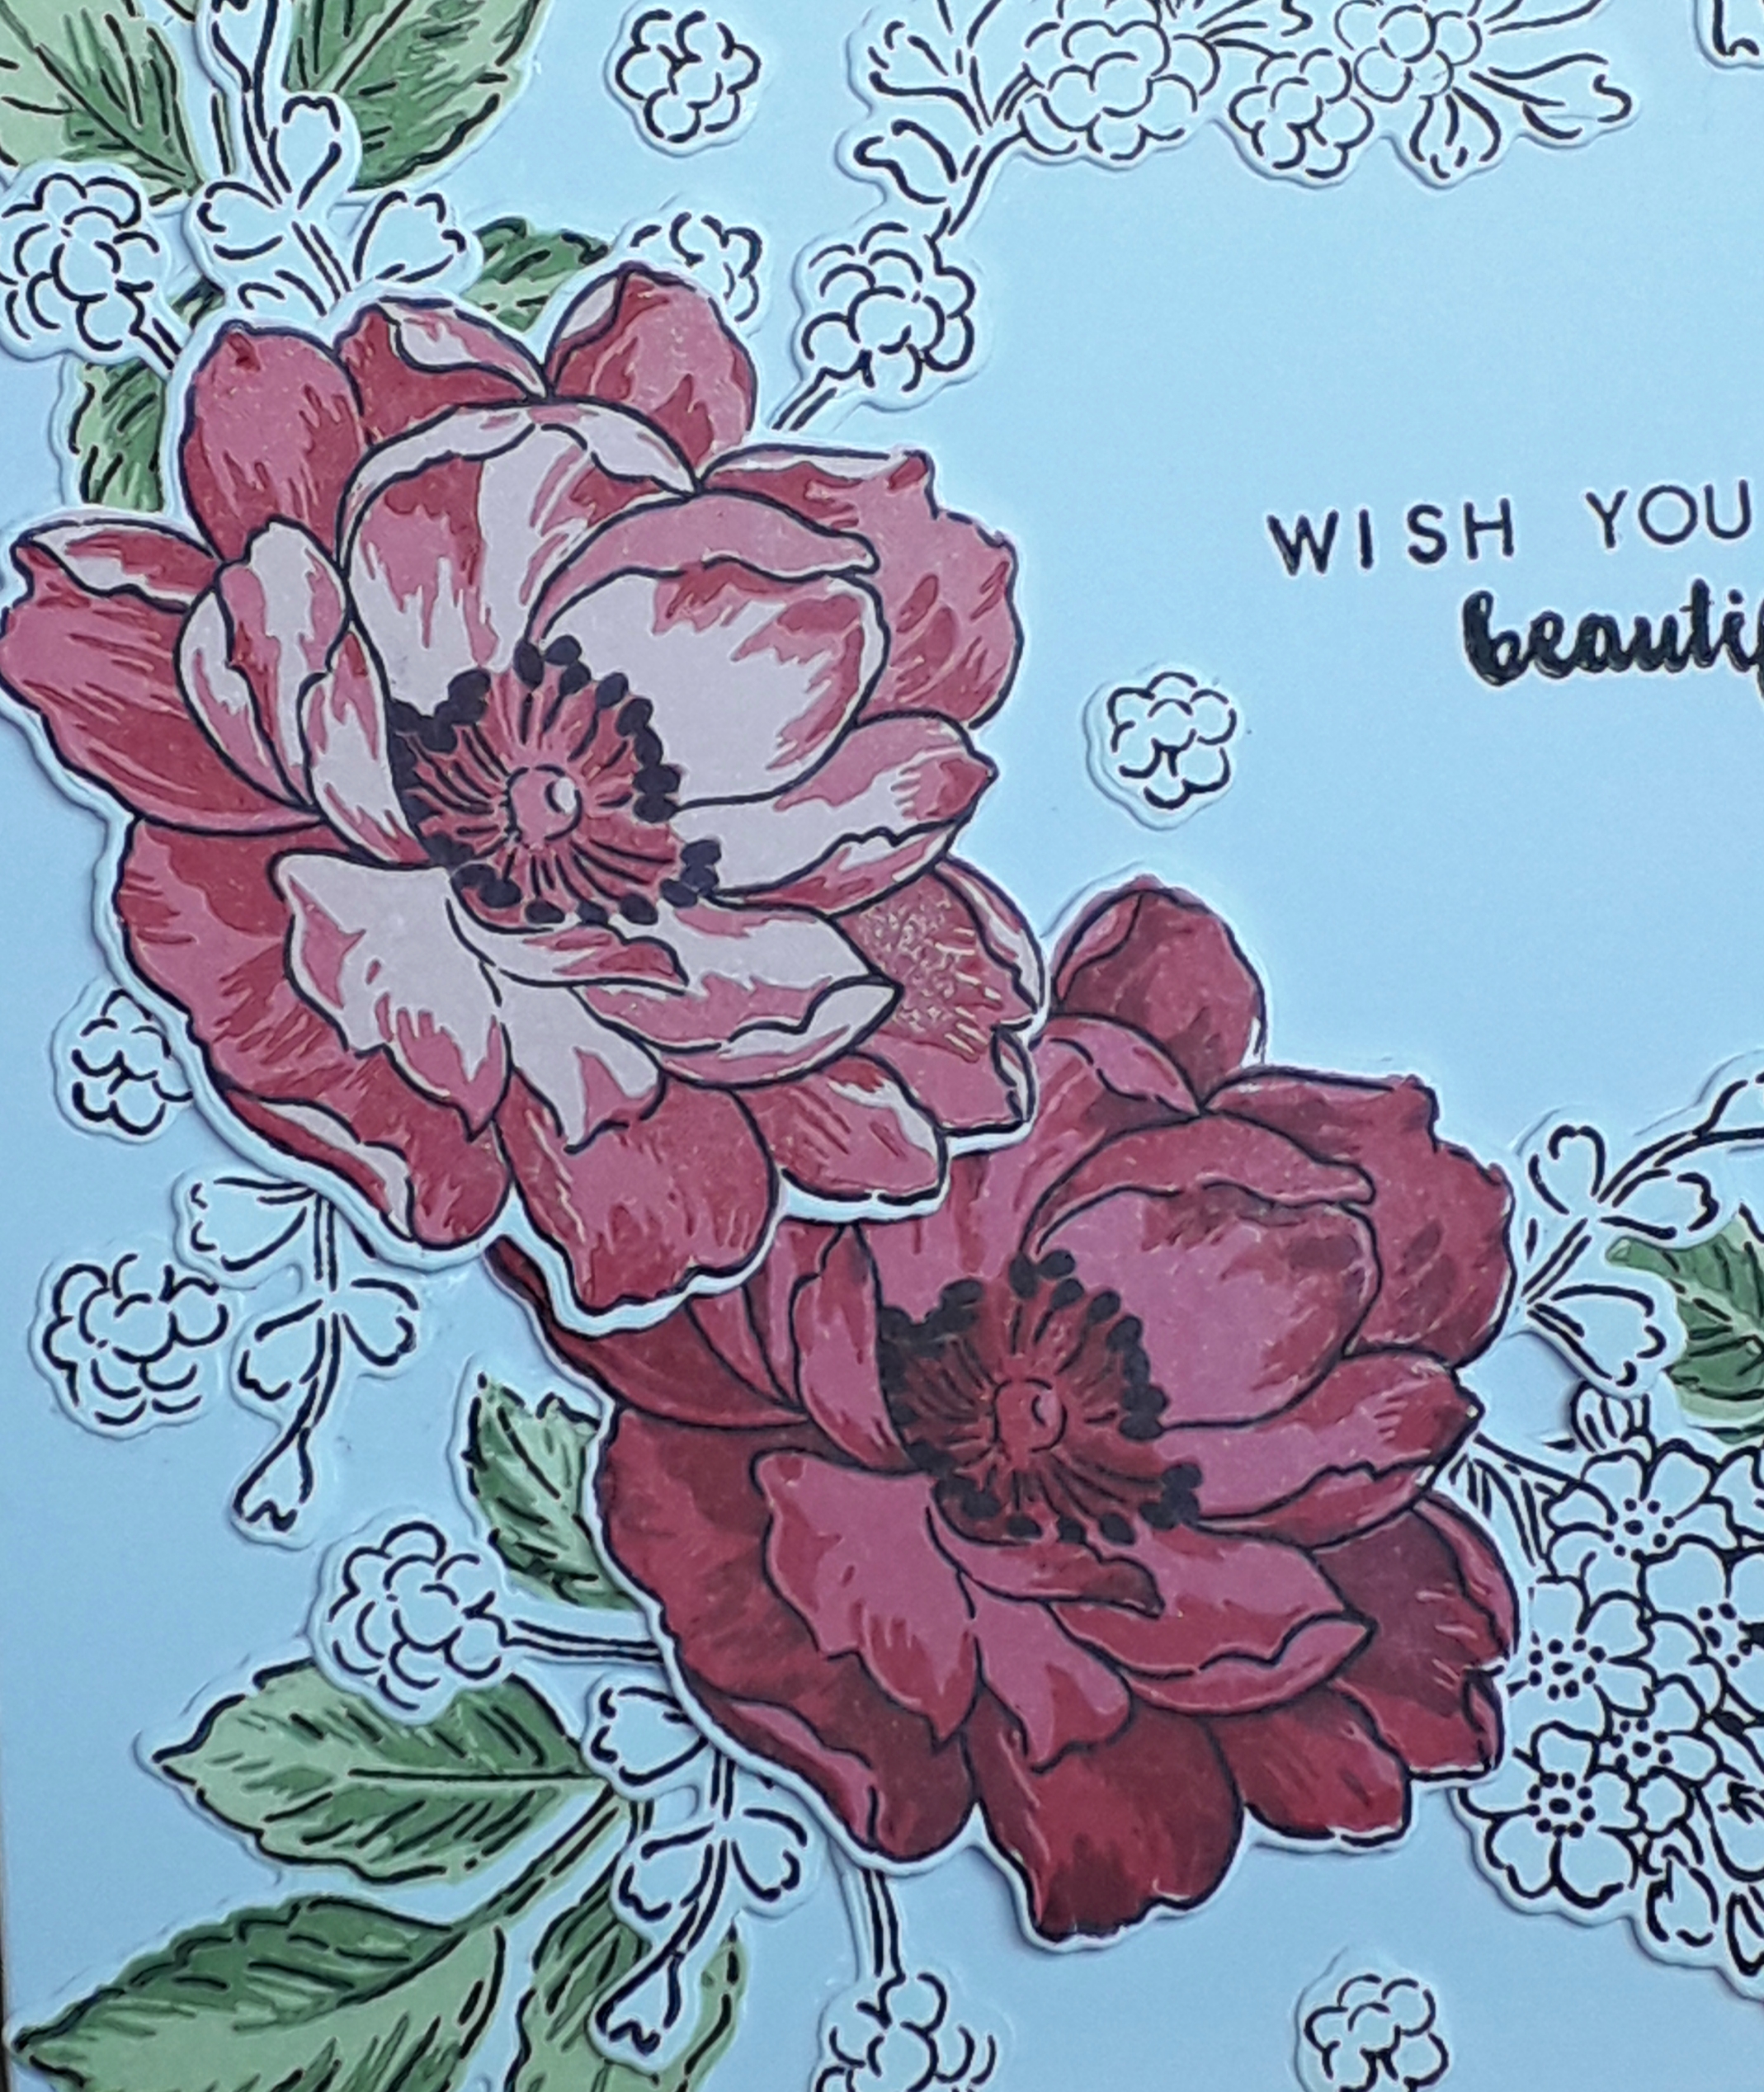
My next card is from lesson 3 and uses a technique to add foiling to a card without using any of those expensive machines. I liked the card shown in the extra inspiration for this lesson, so decided to do a variation on this card using beautiful day stamp set.
The foiling was done using a sticky embossing powder such as wow bonding powder. This embossing powder is used like other embossing powders, but you then stick your foil, (pretty side up) to the stickiness. If it doesn’t stick the first time you can reheat the embossing powder to try again.
I made a mistake and got a smudge of blue where I didn’t want it, so did some ink splashes in the background. The placement of the sentiment also, covered up a smudge.
I oved this colour combination and am enjoying using this craft kit. I really like the dimension with the 3D embossing folder.
I hope you liked my card today.
Affiliate links are used in this post and I make a small profit if you use this link at no coat to yourself.
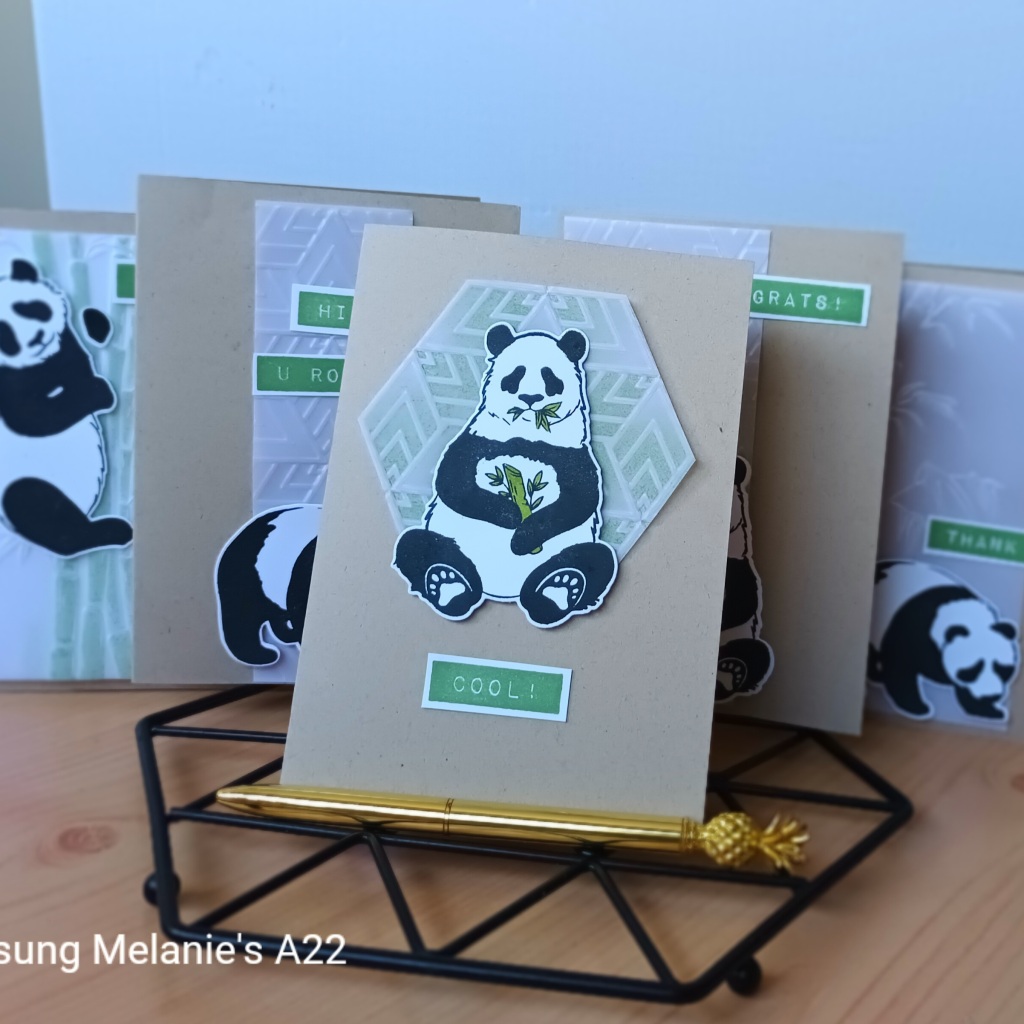
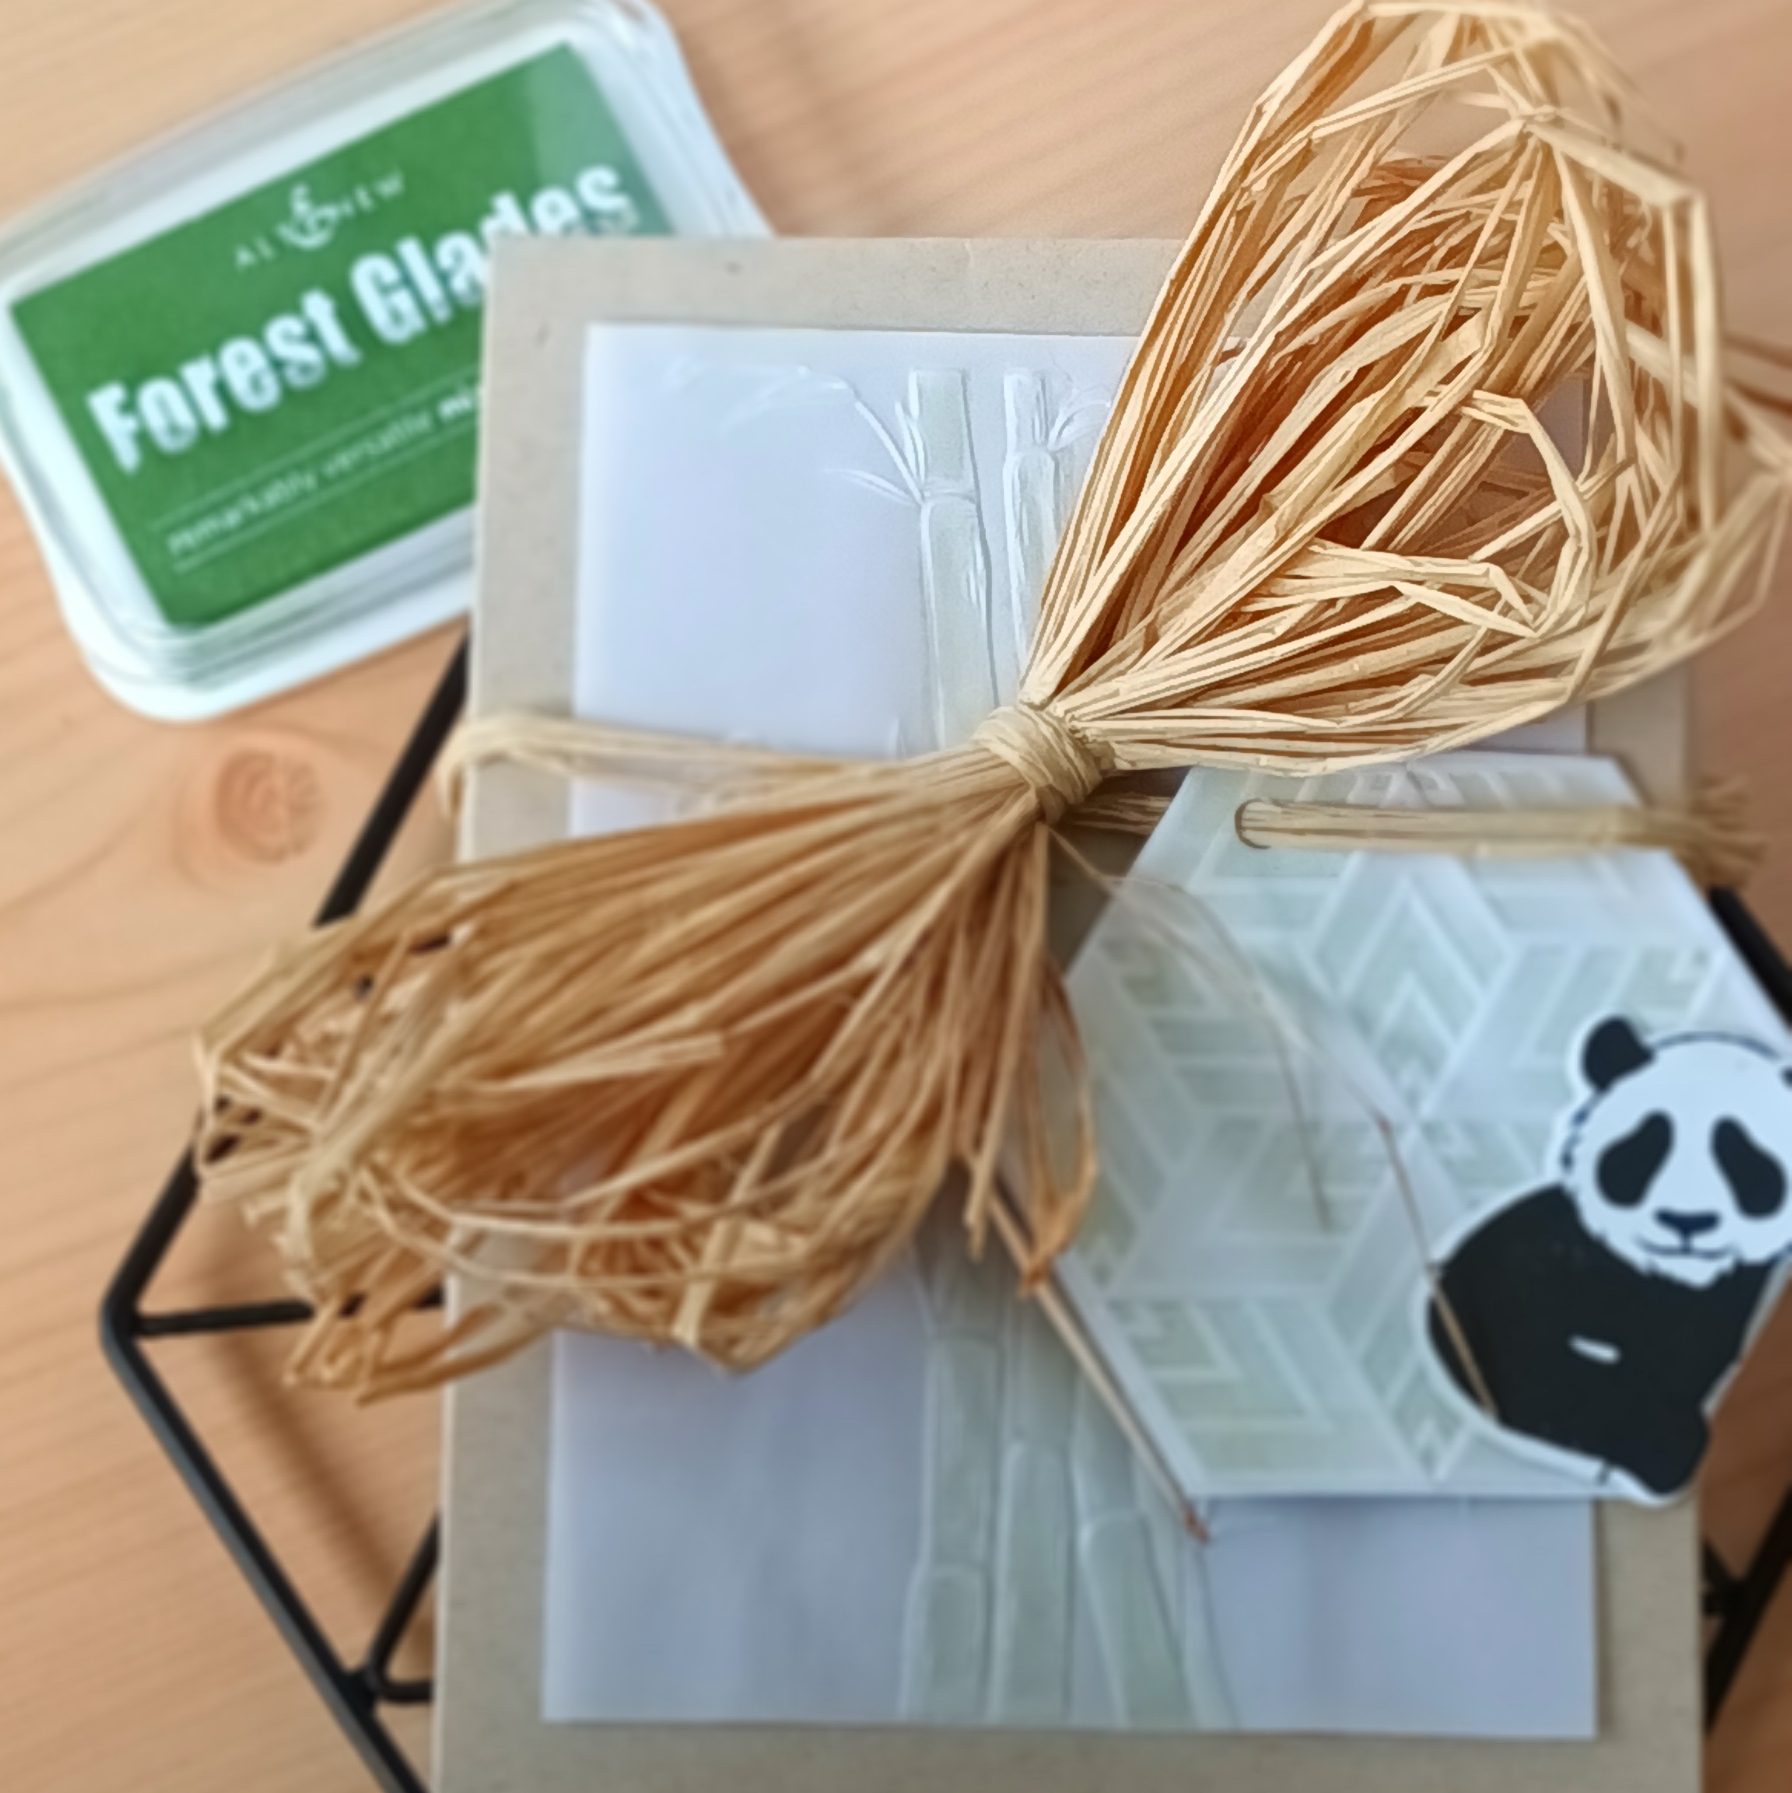
Hi, Hello and Welcome, This is my final project for the Altenew Educators Certification Programme.
I have been given the challenge of making two gift sets – his and hers. I have to select three components from the classes in level 1 and use one recycled element on a set or it’s packaging.
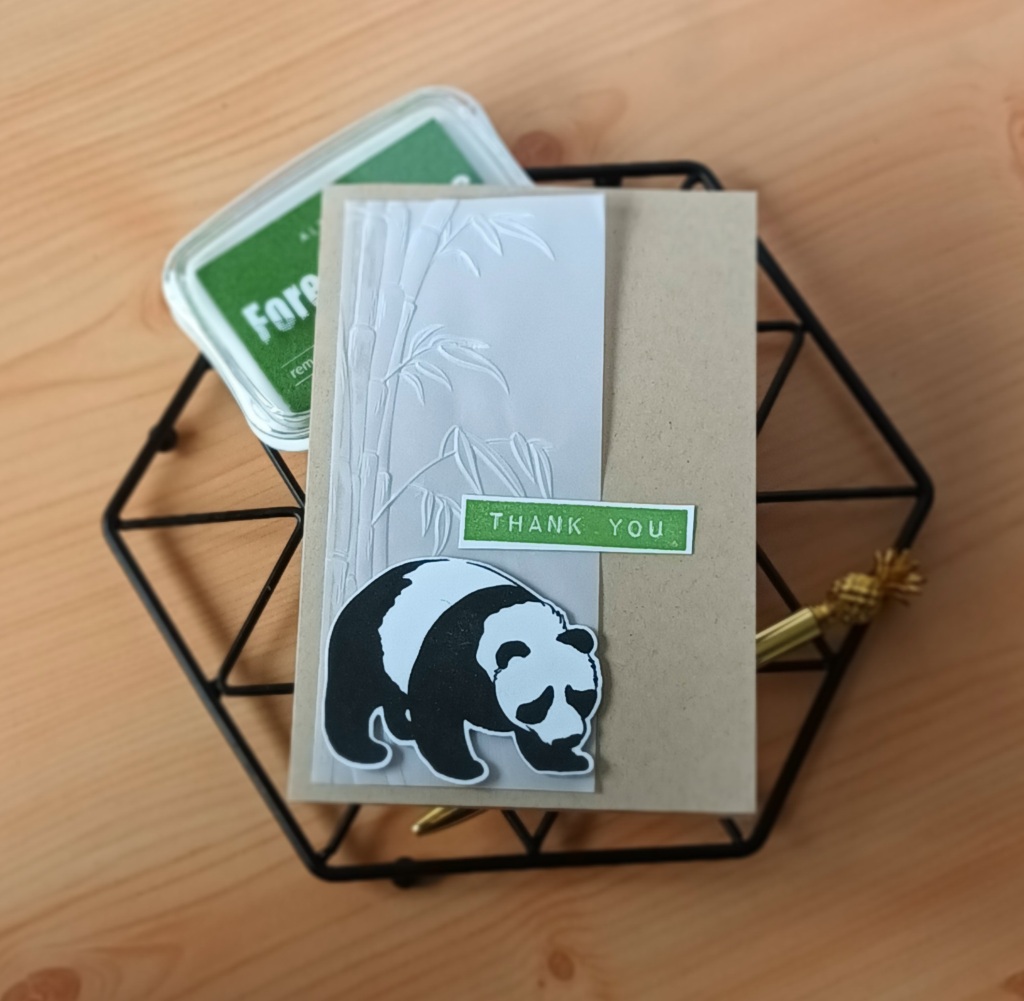
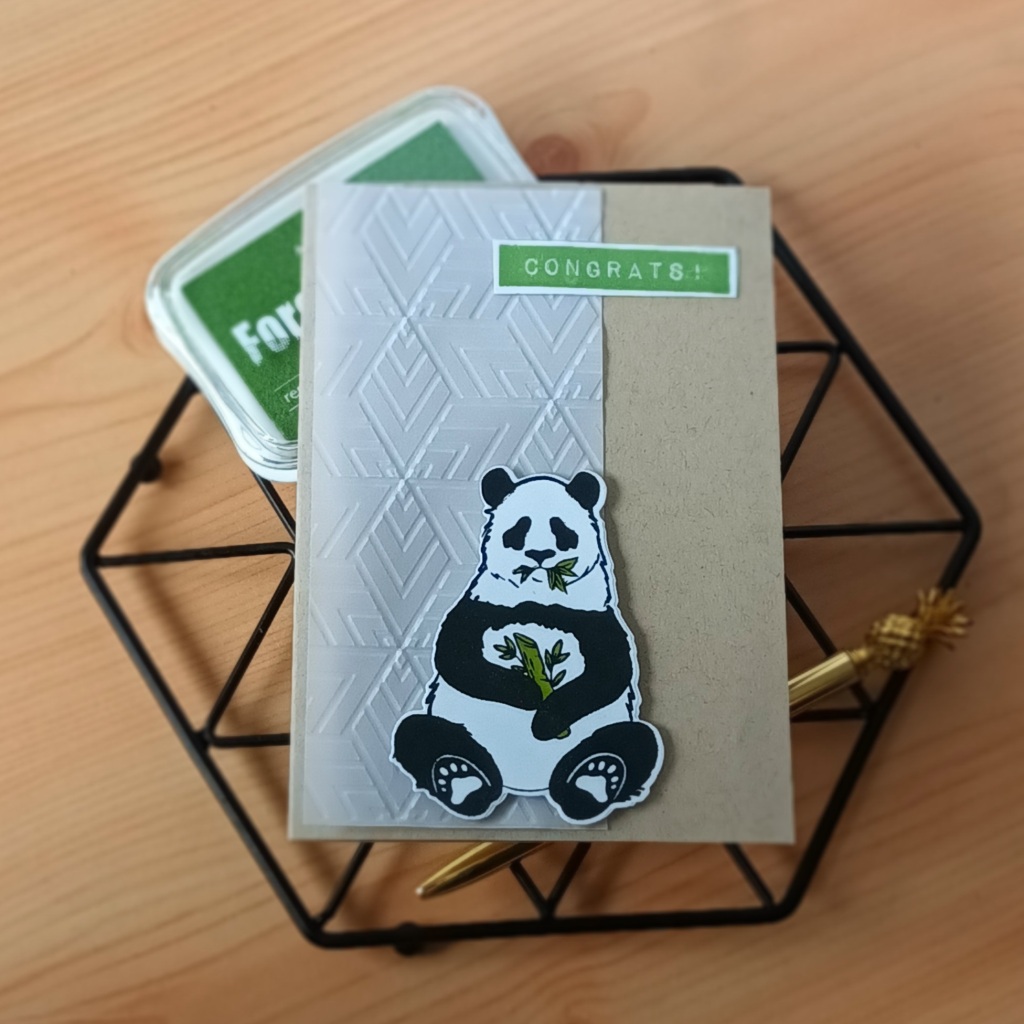
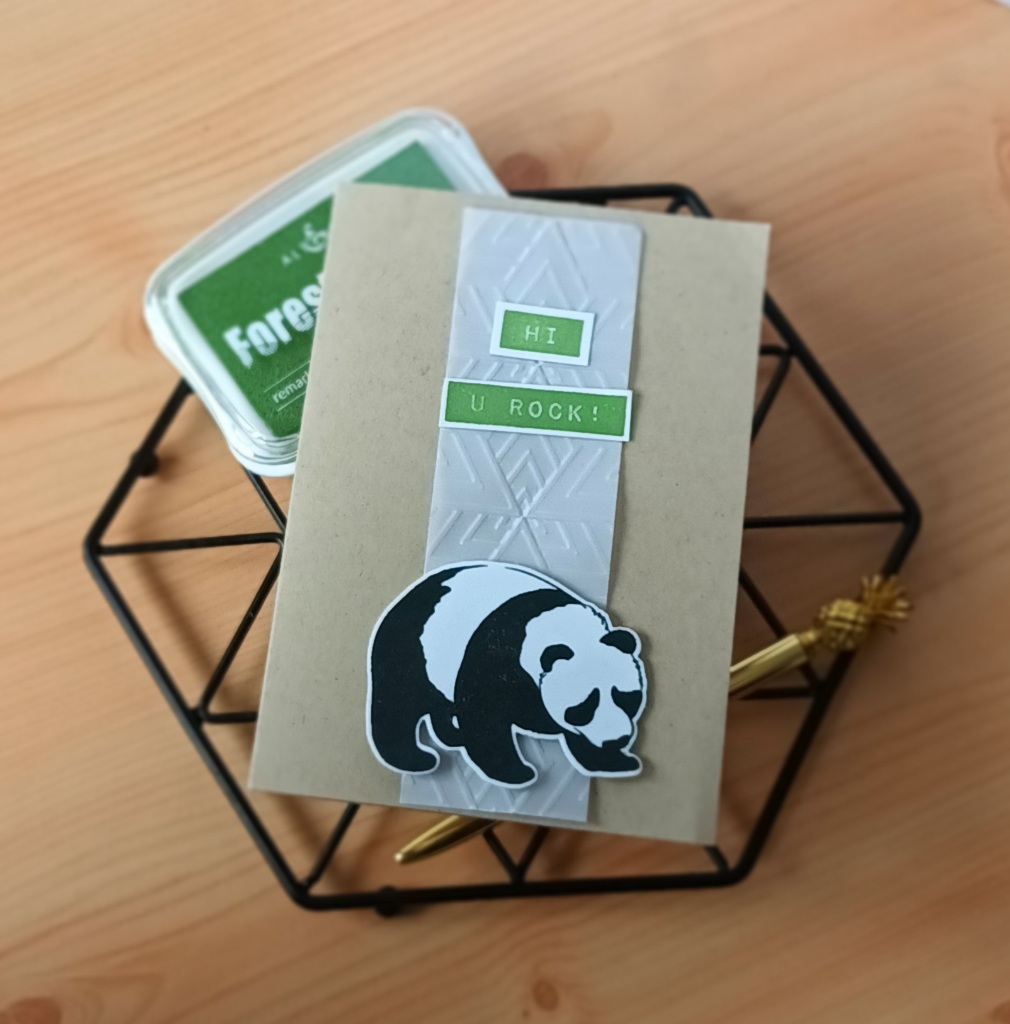
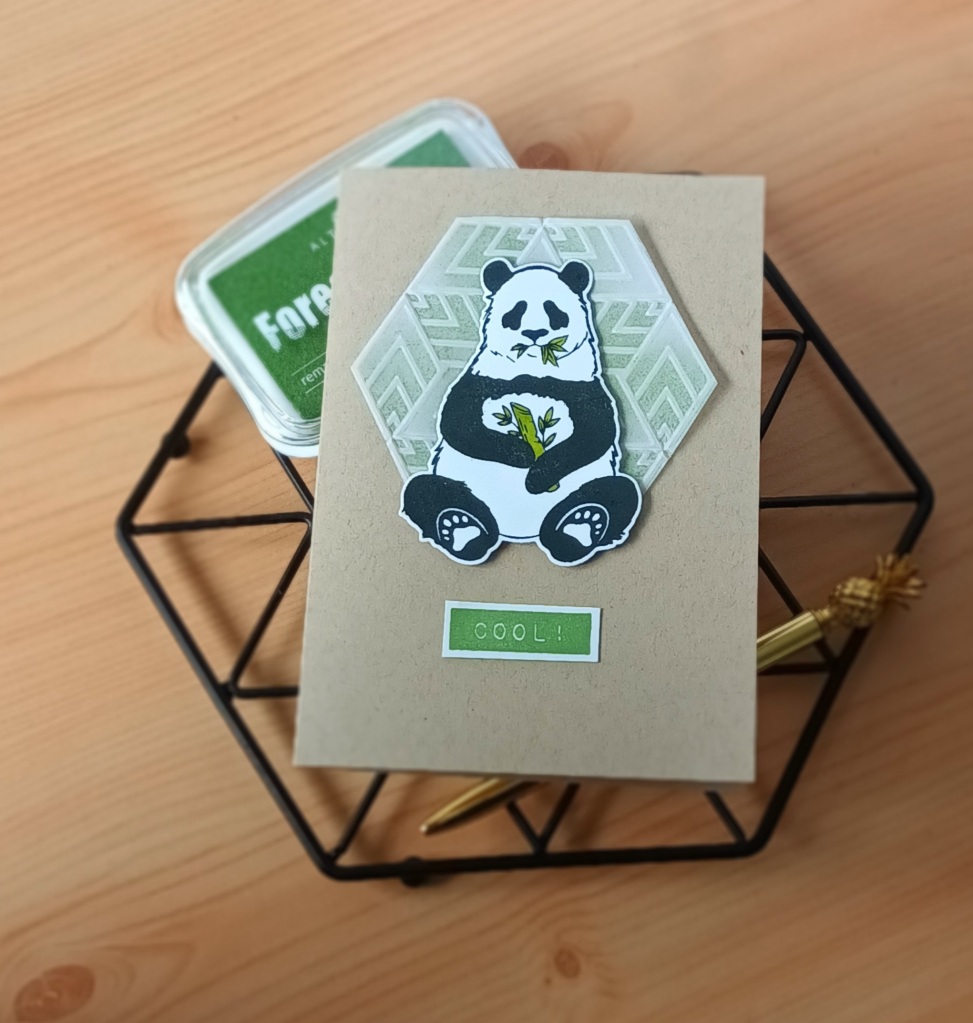
Starting with the masculine set, I decided that, to make it a cohesive set, I would pick a colour theme and use the same products, whilst changing up the design for each card. A few of the classes in level one used vellum on their cards and I had decided this was something I wanted to use on my final project. I also think kraft cardstock can give a masculine feel to a card.
The three classes I used were –
Easy die cutting techniques, For the guys and clean and simple boutiques cards.
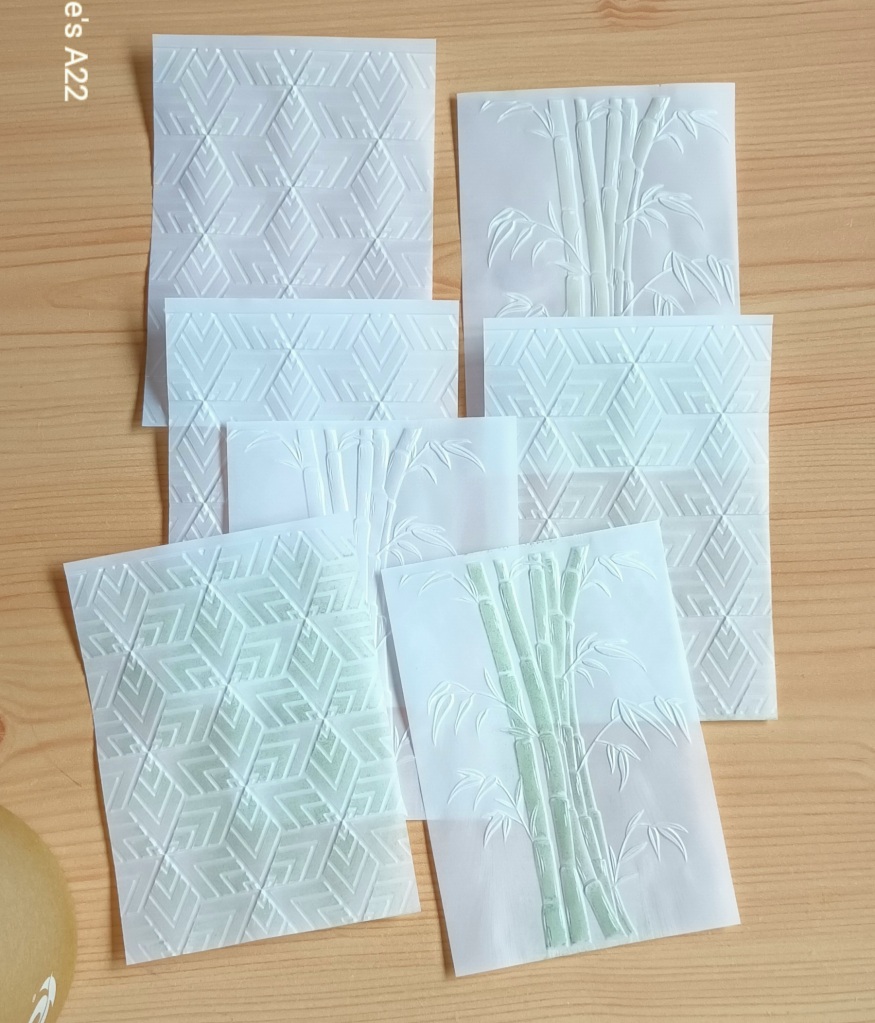
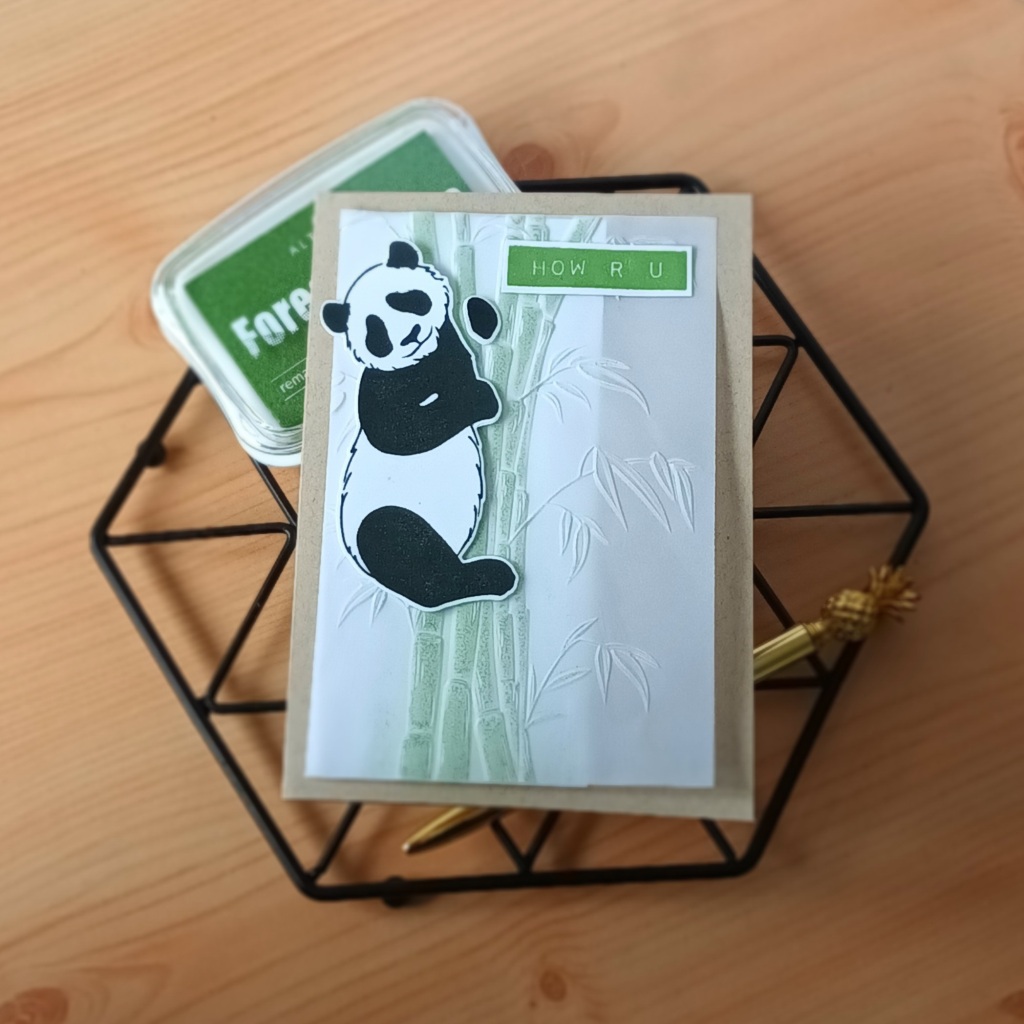
I started by using the embossing folders to make some vellum backgrounds. Inspired by the clean and simple boutique cards class I used a letter press technique on some of the backgrounds using Forest glades mixed media ink to ink the embossing folder before running it through my machine.
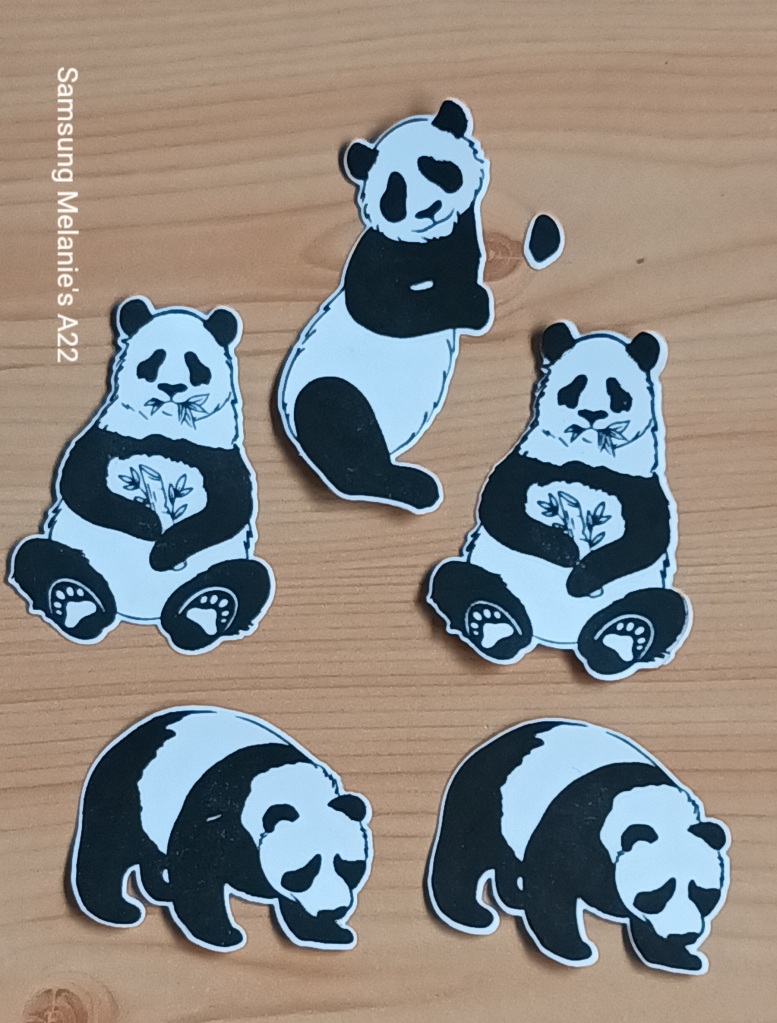
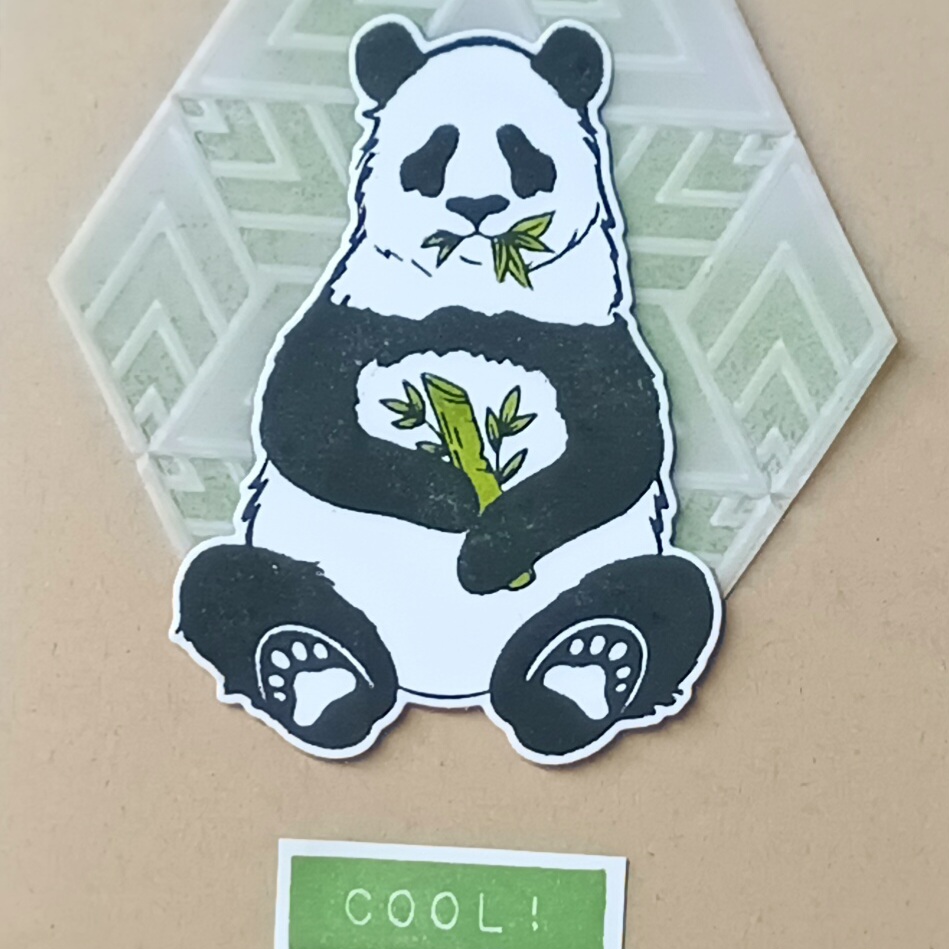
I stamped out the roaming pandas with jet black crisp die ink and then used the coordinating dies to cut them out, inspired by the easy die cutting class. I go into more detail about how I do this further down the blog post, as I used the same techniques for the feminine set.
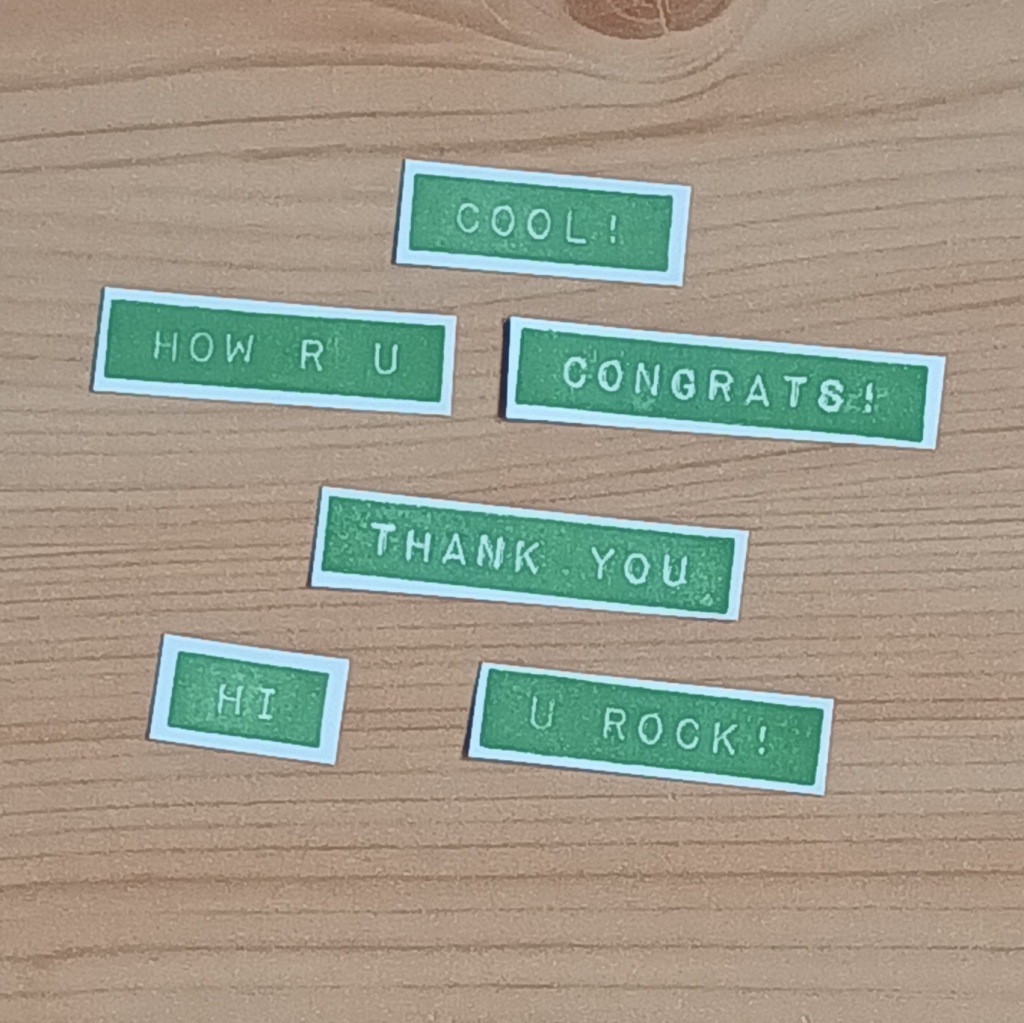
For the sentiments for the cards I used the forest glades mixed media ink and the label love stamp set. I love the sentiments on this stamp set and they helped add a pop of colour to my cards.
I now had all the elements for my cards and just had to put them together. For the card above I felt that it needed a strip of white card behind the vellum to make the ink pop. The next card didn’t have inking so it didn’t need it.
The next few cards all use the illusion triangles embossing folder and helped to change up these cards.
Vellum is notoriously hard to stick down without the adhesive being seen so I used the elements , ( sentiments and pandas) to hide the adhesive.
For the following card I cut out the hexagon to give a different shape to the background. I really like this card. I also coloured in the leaves on the panda using forest glade artist marker.
I then just had the box to make. I used white hammer card for the bottom of the box and kraft card for the lid. I then used some of the vellum elements I had left, using the geometric pattern to make a tag and cut down a die cut panda to add to it. The big raffia bow was something that came with a bunch of flowers and is the recycled element on this project.
Here is a close up of my favourite card from this set. I popped up all the pandas on these masculine cards put stuck down the sentiment flat.
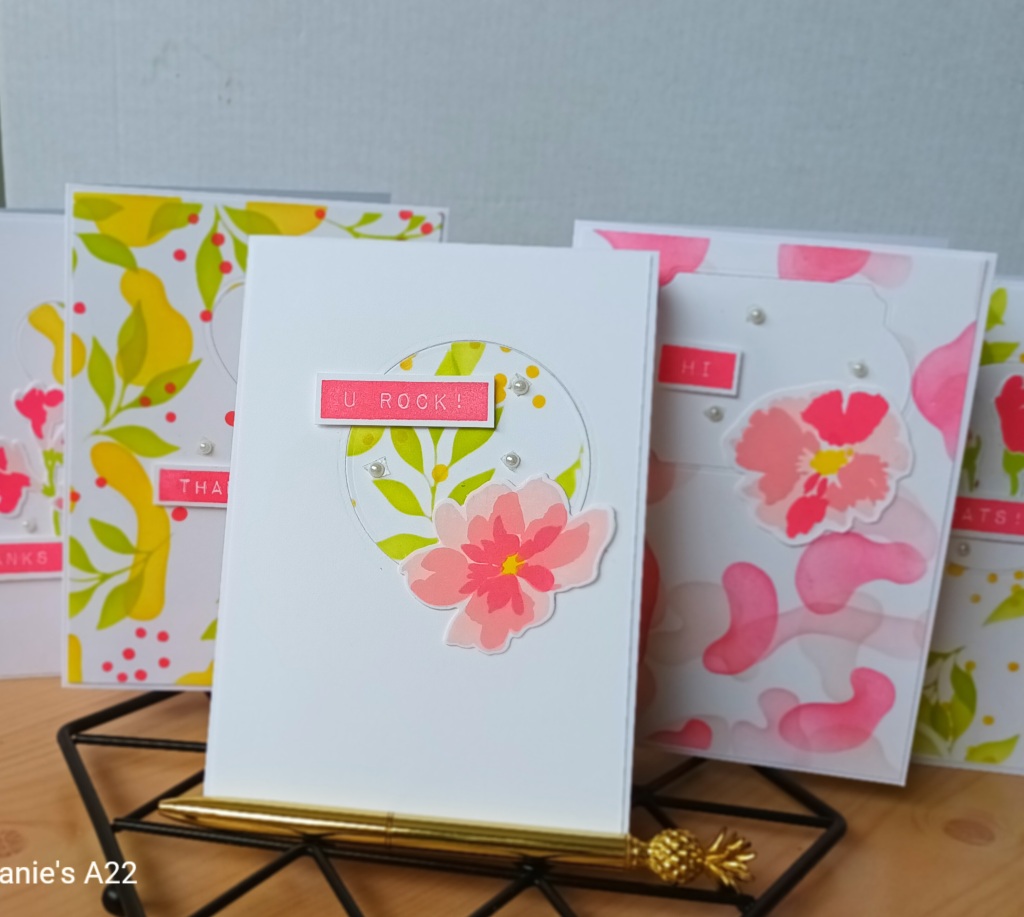
Now onto the feminine set.
The classes that inspired this set were –
Easy die cutting techniques, All about layering one and Celebration stencil techniques.
Whilst I had the label love stamp set out for the masculine set, I also stamped some sentiments for the feminine set, but this time I used the coral berry mixed media ink
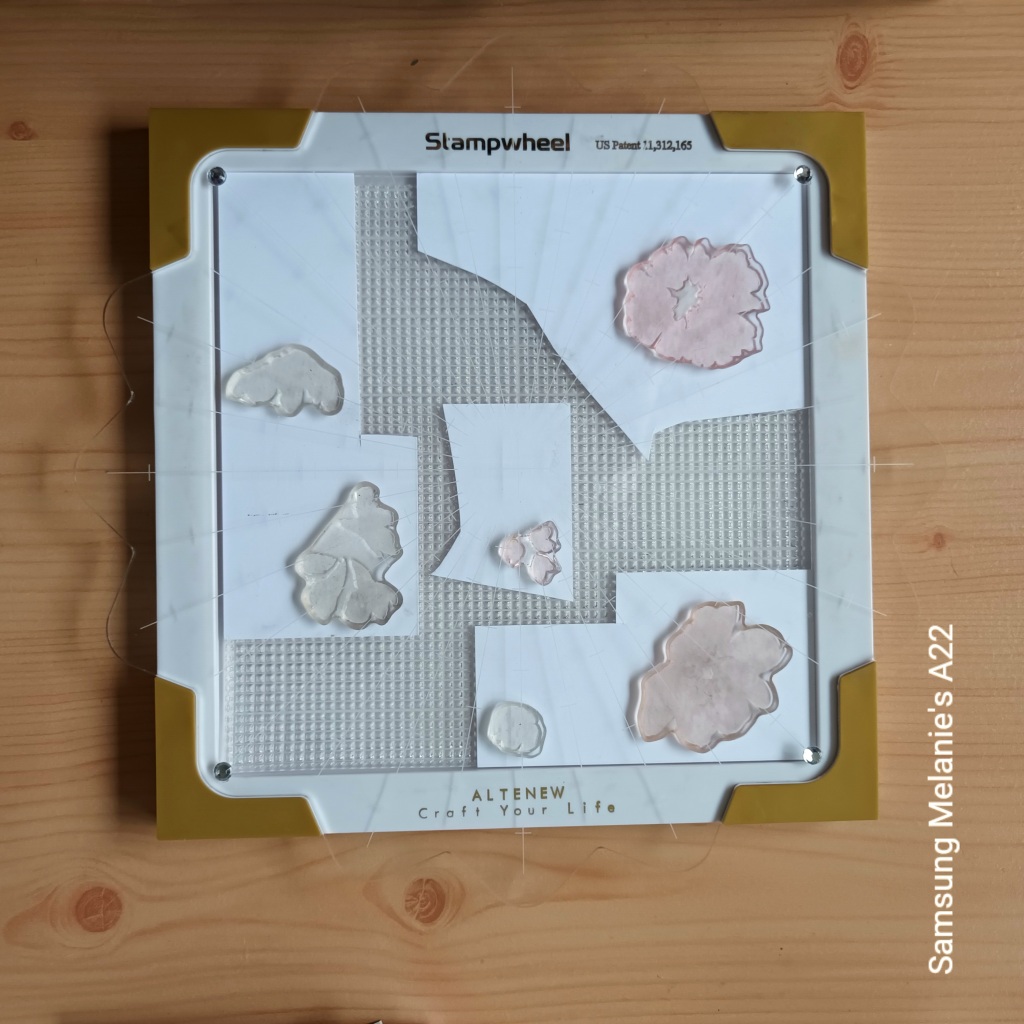
I then stamped out some of the smaller flowers from watercolor wonder and watercolor extravaganza stamp sets using some scraps of card. I love my stampwheel for stamping multiples all in one go.
I can’t remember where I first learned this next technique for lining up stamps and dies. I recycled an old tissue box. Cut out the dies of the flowers and then use this as a guide to stamp the flowers. Some flowers with long stems can be bent slightly and then wouldn’t fit inside the die and this technique helps me get perfect results every time.
I also used cardboard guides to die cut out the pandas. You can cut out the dies with the guides in place and then you know exactly where you are cutting.
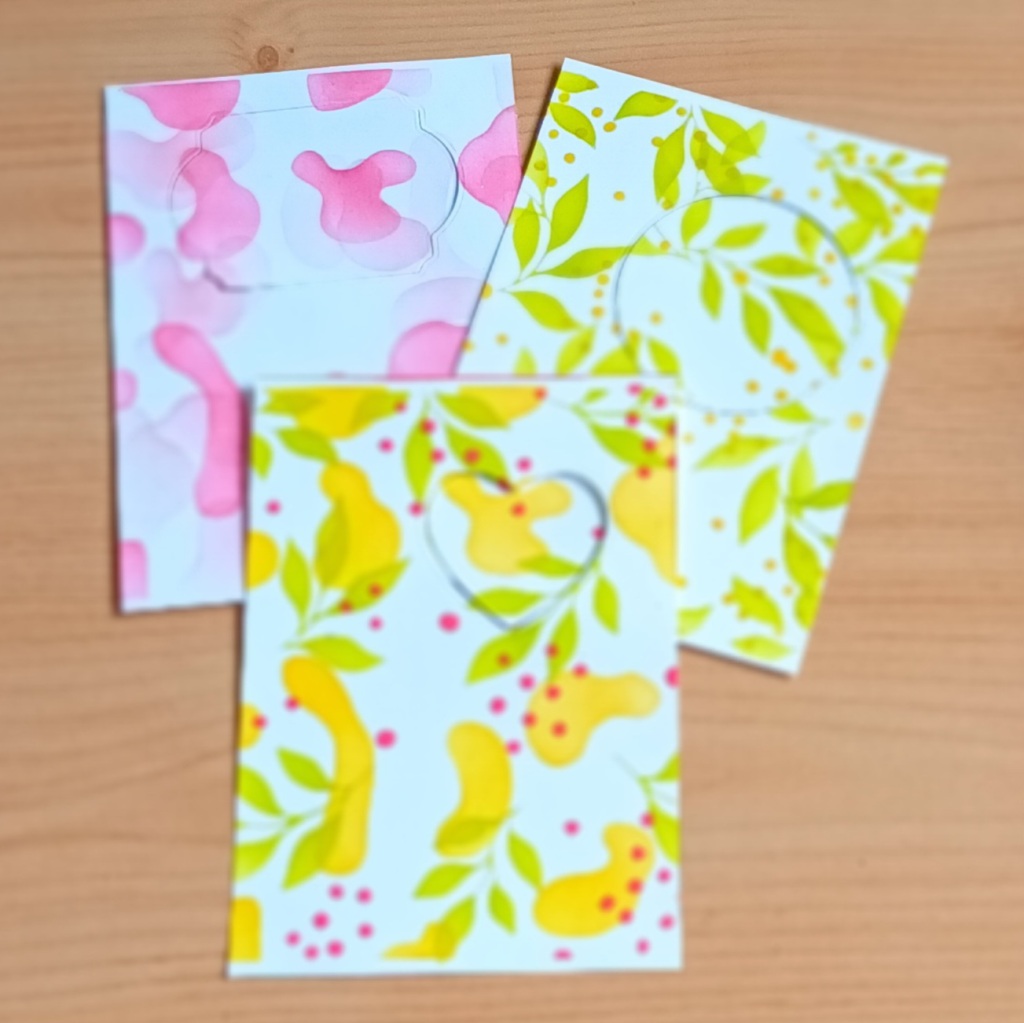
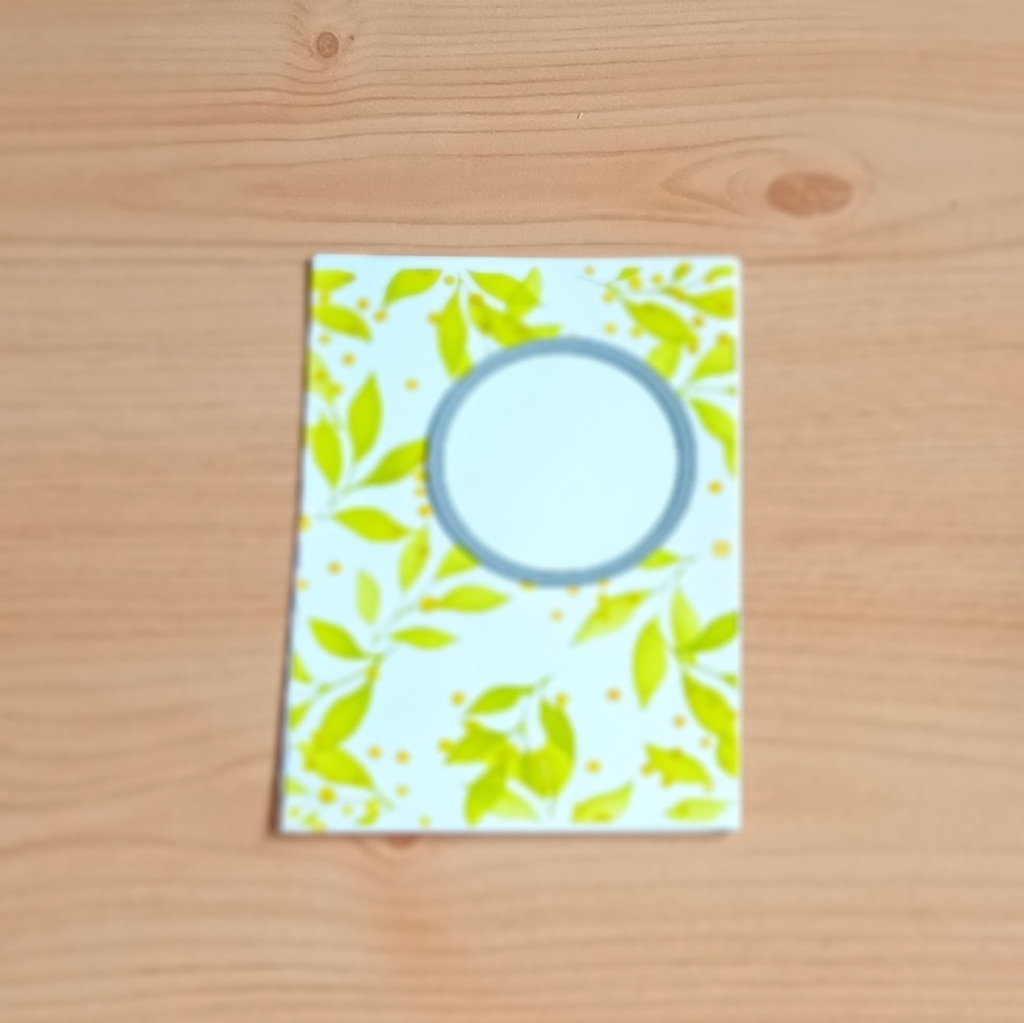
I then had to make some backgrounds. I used the same colours in different combinations using the playful patterns stencil set. I find this stencil set very useful. Not only can you mix up the designs by using different colours, but by mixing up which of the four stencils you use, you can create a variety of designs.
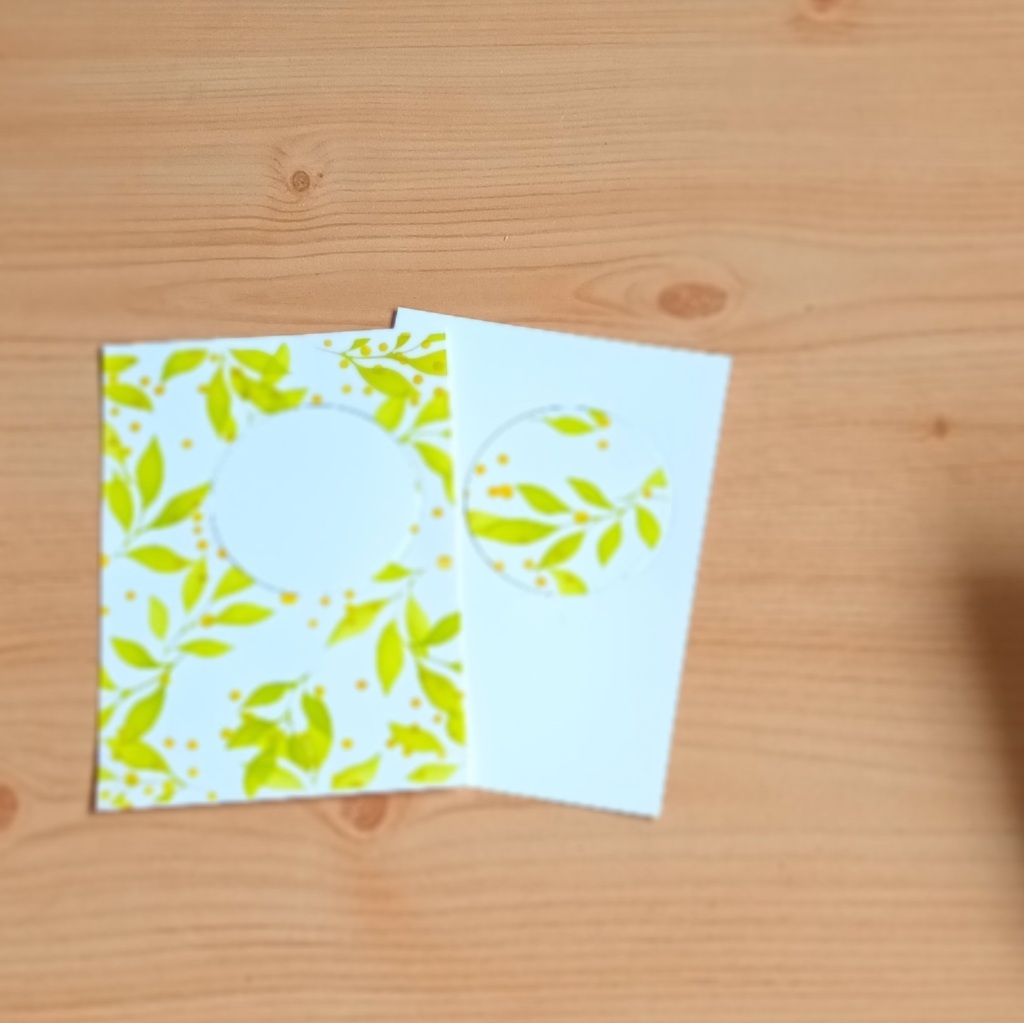
Once I had inked the backgrounds I then chose three different shape dies from my stash to cut out some apertures. I then used this die cut background to cut out the same shape in the same place from a piece of white cardstock
This gave me two backgrounds from one inked piece of cardstock. Inspired by the easy die cutting class I used the inlaid die cutting technique to give a flat background for my elements.
It was then time to assemble the cards.
With this card I thought the small sentiment balanced out the big flower.
The next card is a lot busier and I felt needed three pink elements to balance it.
Using the aperture from the previous card this card has a lot more white space and I like it a lot.
I have popped up the sentiments on all these cards with foam tape.
Once I had finished the cards I felt they were still missing something so I added three pearls to each card to set them off.
Here is a close up of my favourite card, from this set.
I then had to make a box for this set too. I also had a pink bow from another bunch of flowers that was perfect for this project. It just goes to show hoarding does pay off occasionally.
As with the masculine set I also used some left over elements to make a tag and set the box off.
I hope you liked my projects today.
Affiliate links are used in this post and I make a profit if you use this link at no cost to yourself.
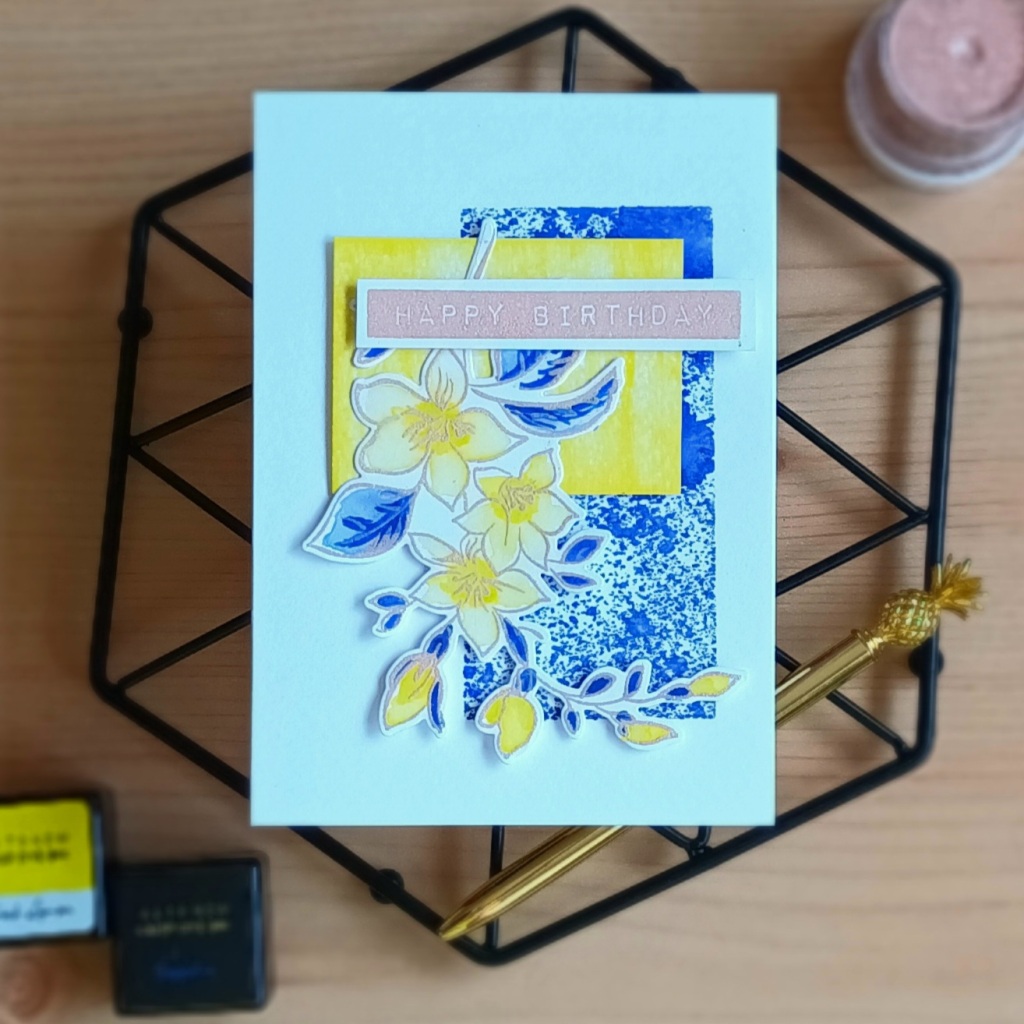
Hi, Hello and Welcome. Today I am sharing a card for the final class in my Altenew Educator Certification Program Level 1. I have had a big pause from this course and am now ready to finish off level 1. Get my final project done and start working toward level 2.
This class was called irresistible inking techniques and was a chance to get messy with my altenew inks. I started with the technique of block stamping where I inked up an acrylic block with sapphire ink and sprayed it with water and stamped it down onto a piece of watercolor card, positioning it to the side.
For the second technique I used a brayer to ink some fresh lemon ink onto another piece of watercolour card stock. I then used direct to paper technique to ink around the edges of the card with the sapphire ink.
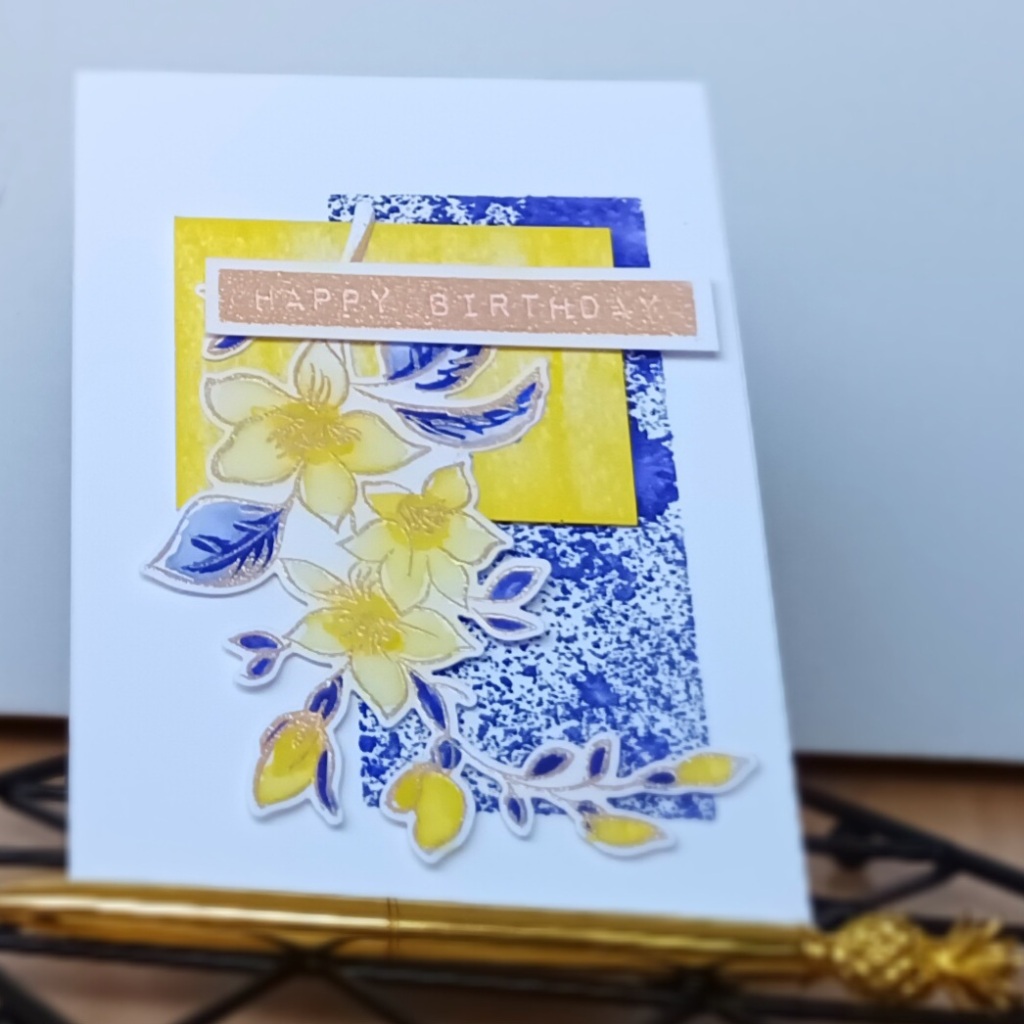
The third technique is one of my favourite techniques and a favourite for many crafters. The technique is embossing. I used versamark ink and golden peach embossing powder to stamp and emboss both the sentiment from label love stamp set and the flower image from best mom stamp set. I then used the sapphire and fresh lemon ink to watercolour the flower image. Once it had dried I die cut the flower image, using the coordinating die.
I then assembled the card using foam tape to pop up the different layers as shown in the picture.
I hope you liked my card today.
Affiliate links are used in this post and I make a profit if you use this link at no cost to yourself.
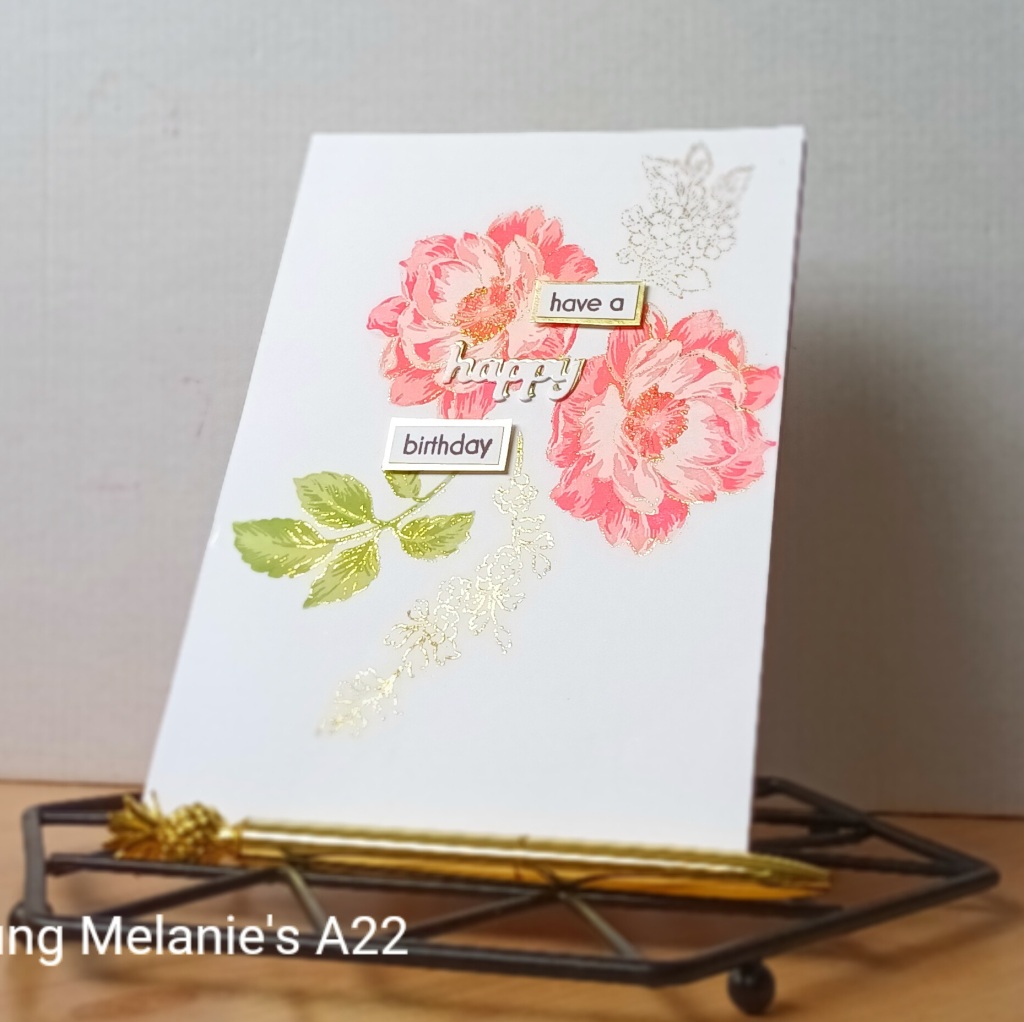
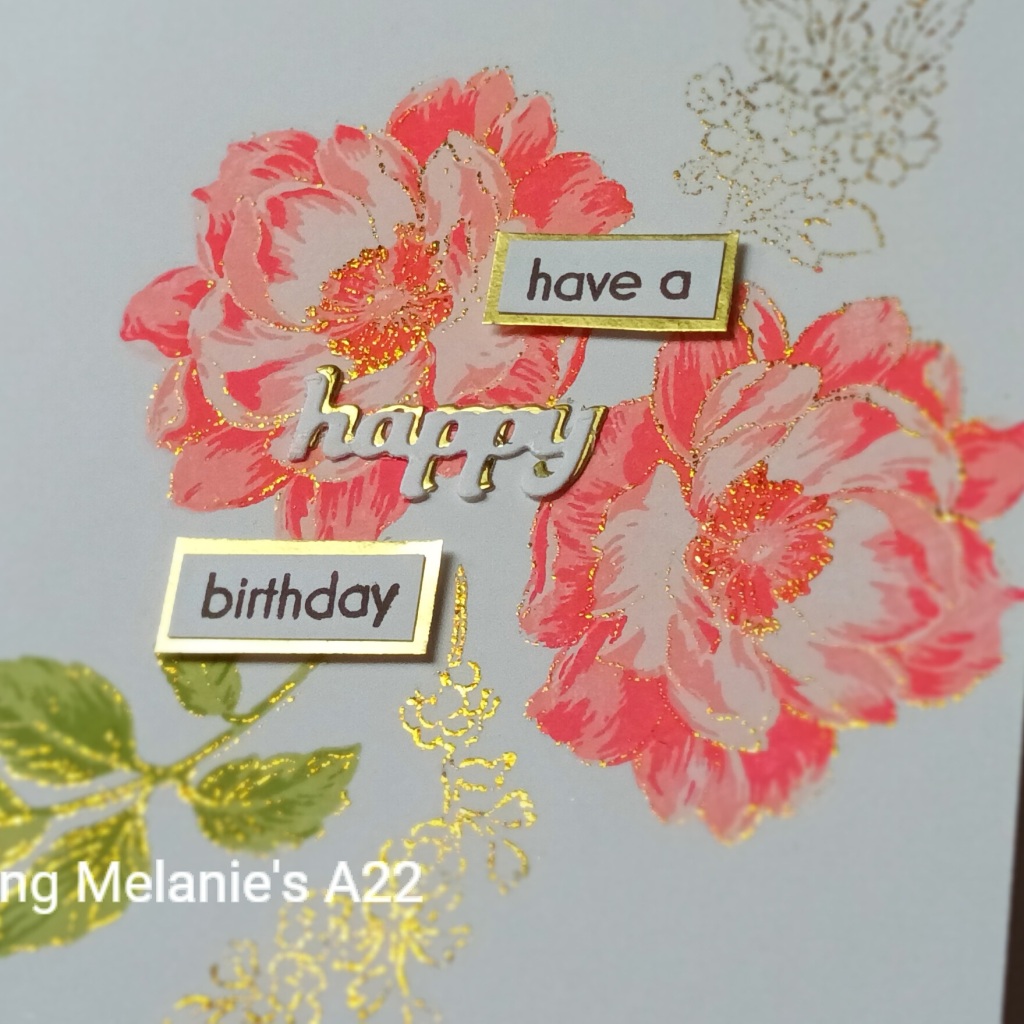
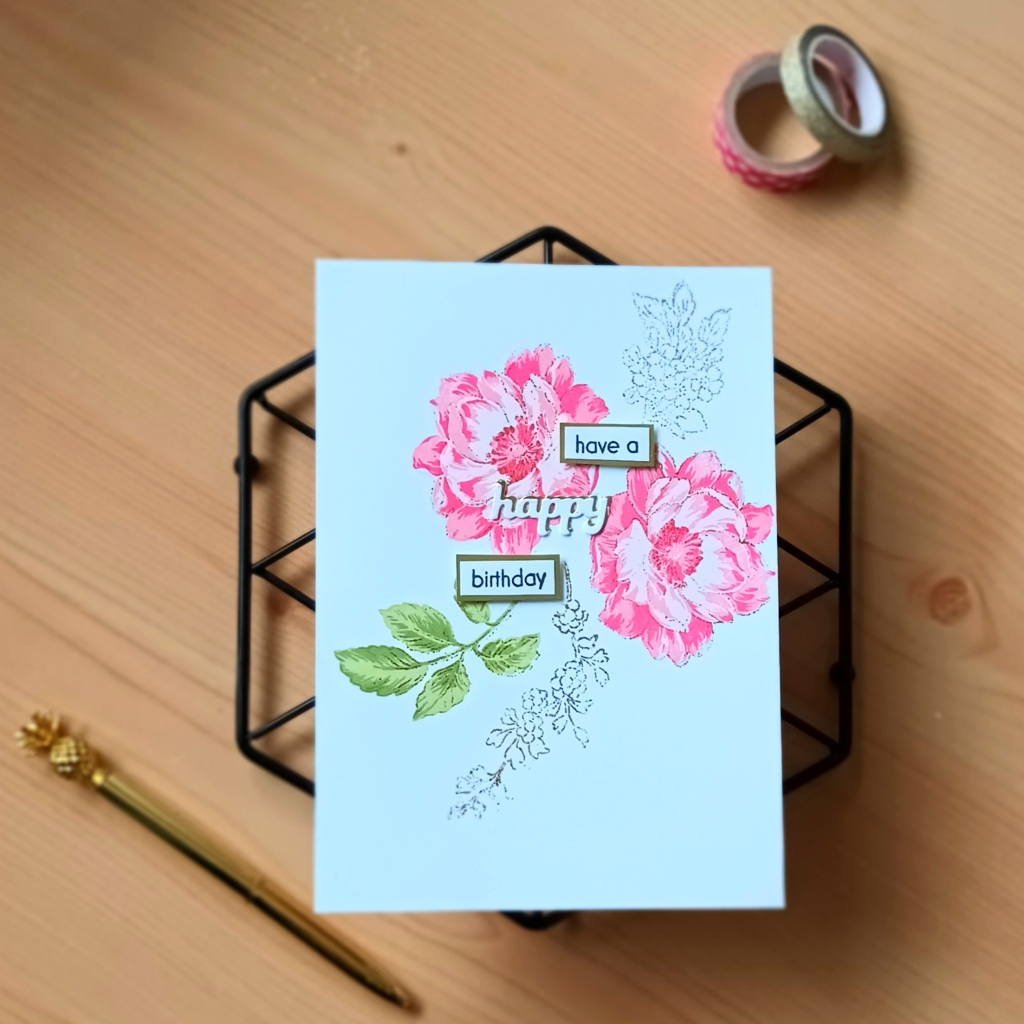
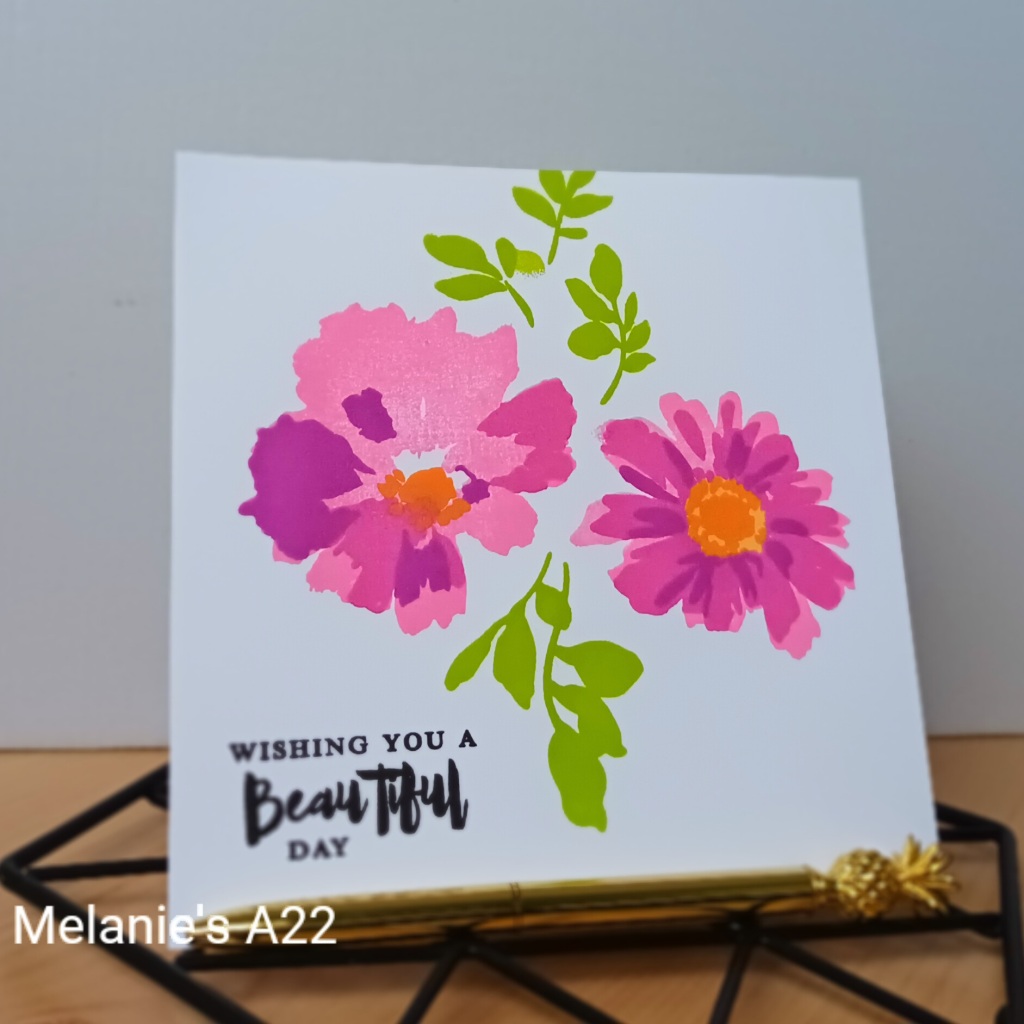
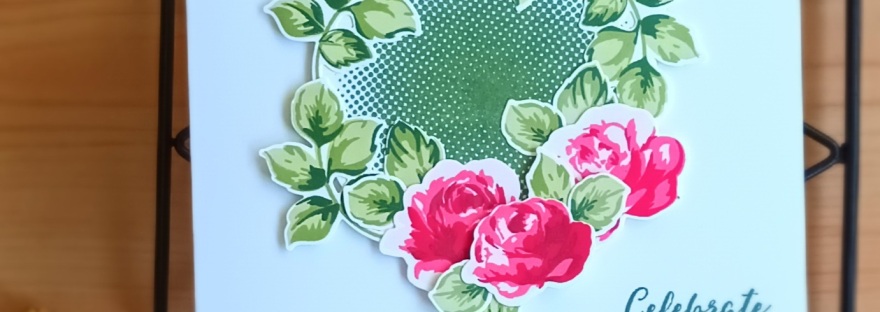
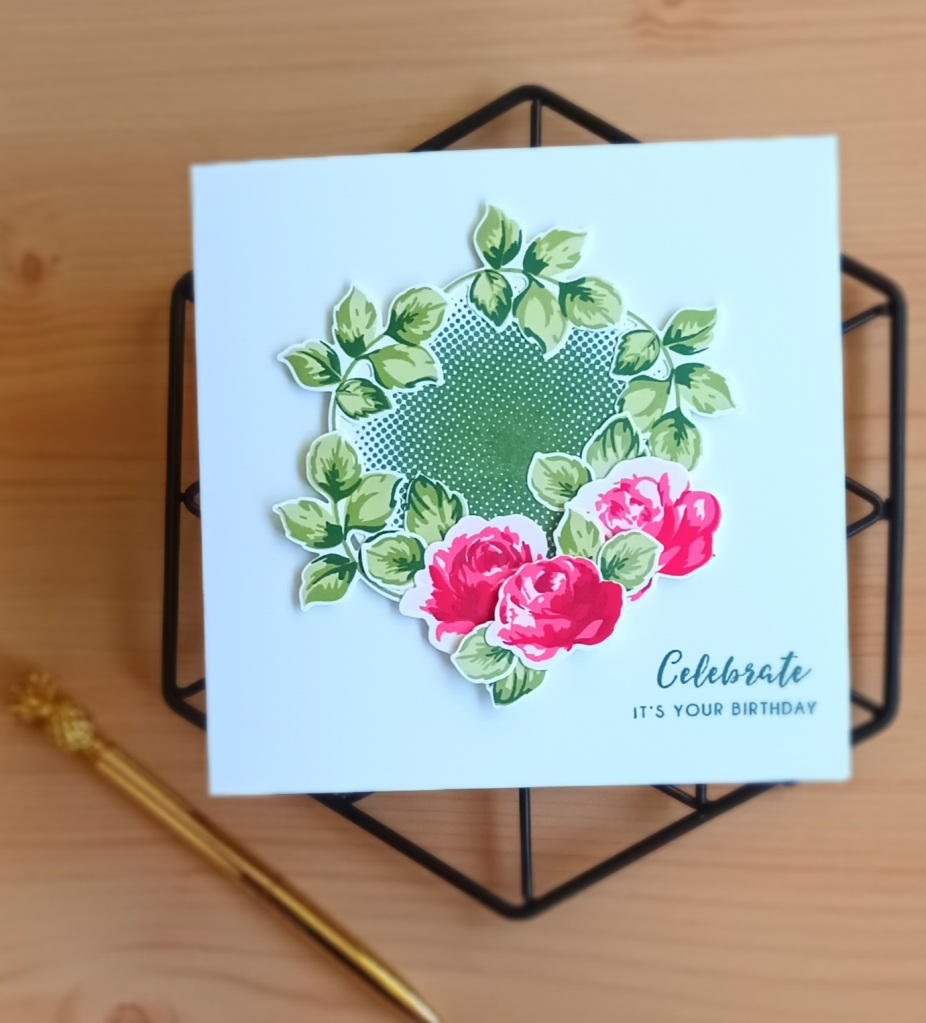
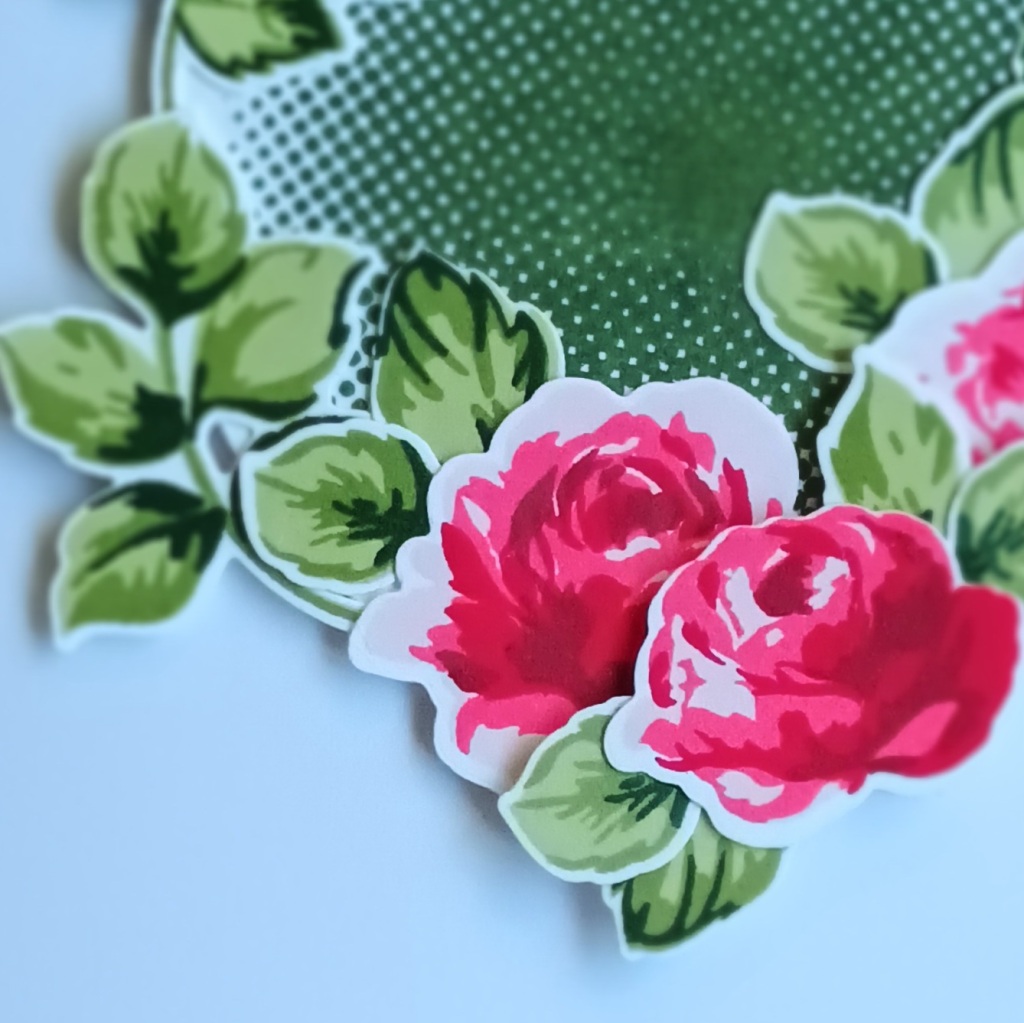
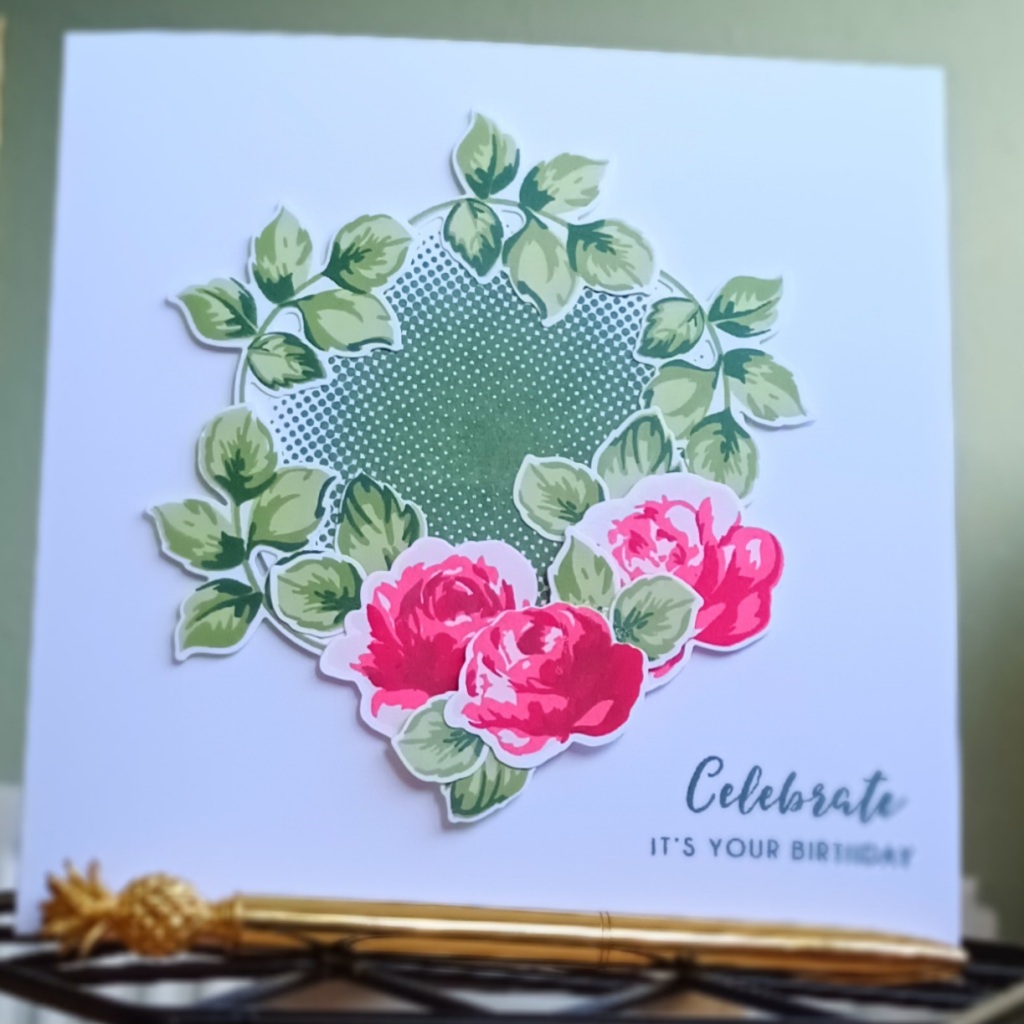
I started by stamping the two largest flowers from each set using Puffy Heart for the bottom layer, Purple wine for the middle layer and Cosmic berry for the top layer.
I then stamped a circle in the middle of piece of card using halftone circle stamp and evergreen ink. I arranged the leaves around the circle to crate a wreath and popped the roses up using foam tape.
I was up in Yorkshire at the weekend and we had a flutter of snow for a few minutes. It has gone cold again at the moment here in the UK. I really love these bright cold days. The February Inspiration challenge reminded me of these cold days when you have lovely sunsets and sunrises.
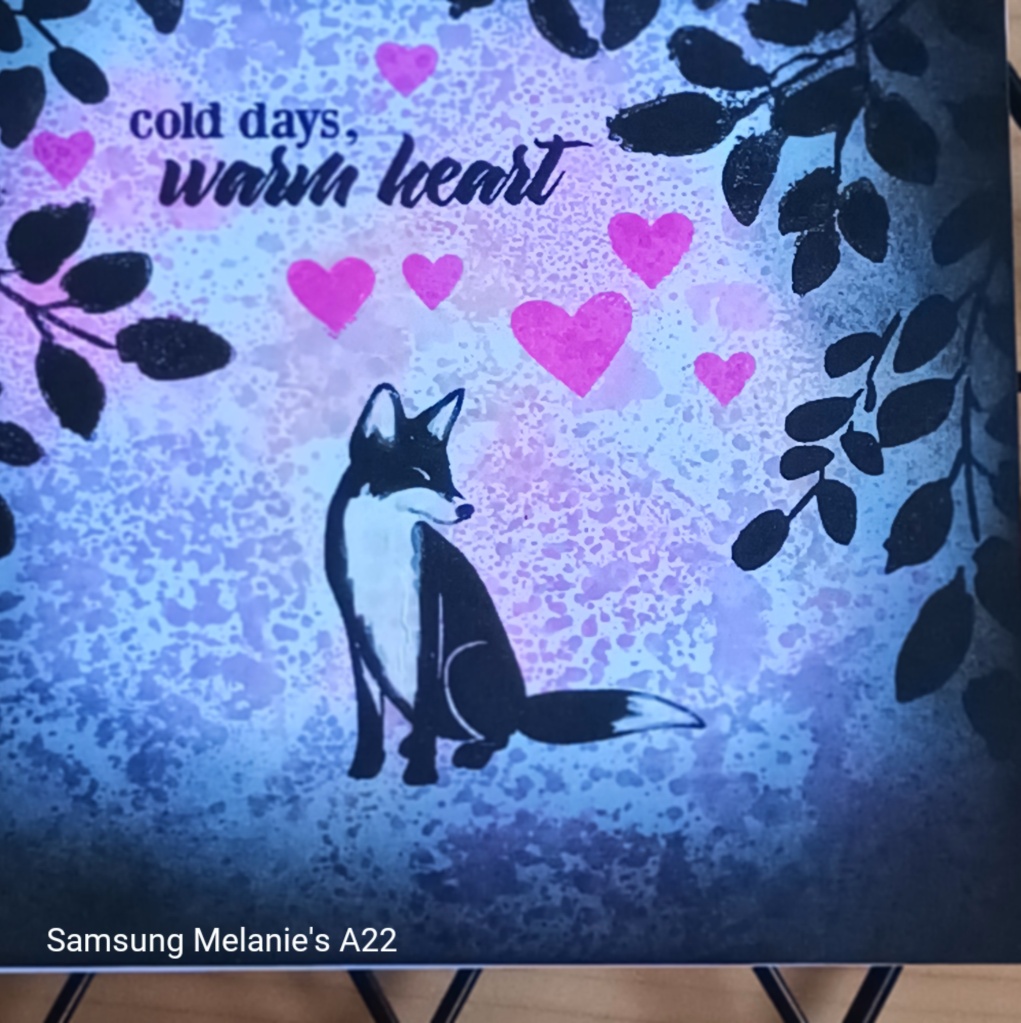
I made this card for Valentines day and have had difficulty photographing it to do it justice. I used an acrylic block inks and a water spray bottle to make an inky background. Ink colours used were Lavender Fields, Peach perfect and Puffy Heart.
I used the stamp sets Modern fox and Floral shadow and Versafine onyx black ink to stamp the images and also stamped the hearts with puffy heart ink. I then blended black soot distress ink around the edge to give it a dark moody look.
I hope you like my card. I think I have let it a bit late for you to join in now, but I hope you will be inspired to join in the challenge in the future.
Here is my submission for the class Easy die cutting techniques. I made two cards.
For the first card I stamped lots of images from Beautiful day stamp and die set using the lovely mixed media inks from Altenew. I used black for the outlines and then stamped the leaf layers in frayed leaf and forest glades. The lighter flower was stamped with frosty pink, coral berry and ruby red. The darker flower was stamped with coral berry, ruby red and grapevine. I then cut them out using the tips and tricks from the class.
The nice thing about cutting out all your images, it is easy to play around with the arrangement on the card. I stamped the sentiment, also from Beautiful day stamp set, with versafine onyx black directly onto the card front. I then popped up the two flower images with foam tape, and tucked the other die cuts under the flower images and glued them into place.
The second card I took my inspiration from the fifth lesson – inlaid die cutting. I stamped the image from Best Mom stamp and die set and then coloured it with Artist markers from sets D and E.
I cut out the image with the coordinating die. I then wondered what to do. Do I pop up the image or pop up the background? In the end I decided to emboss the background with Illusion triangles 3D embossing folder. I loved this idea, because it gives some dimension to the background without detracting from the coloured image. Also it leaves the card flat for posting. I did pop up the sentiment, which is from label love stamp set.
I hope you like my cards. I really enjoyed this Altenew Academy class and would recommend it for learning some different ways to use your dies.
Here are my submissions for the Altenew academy seasonal scene building class. I really enjoyed this class. It covered a lot of great masking techniques to create a scene.
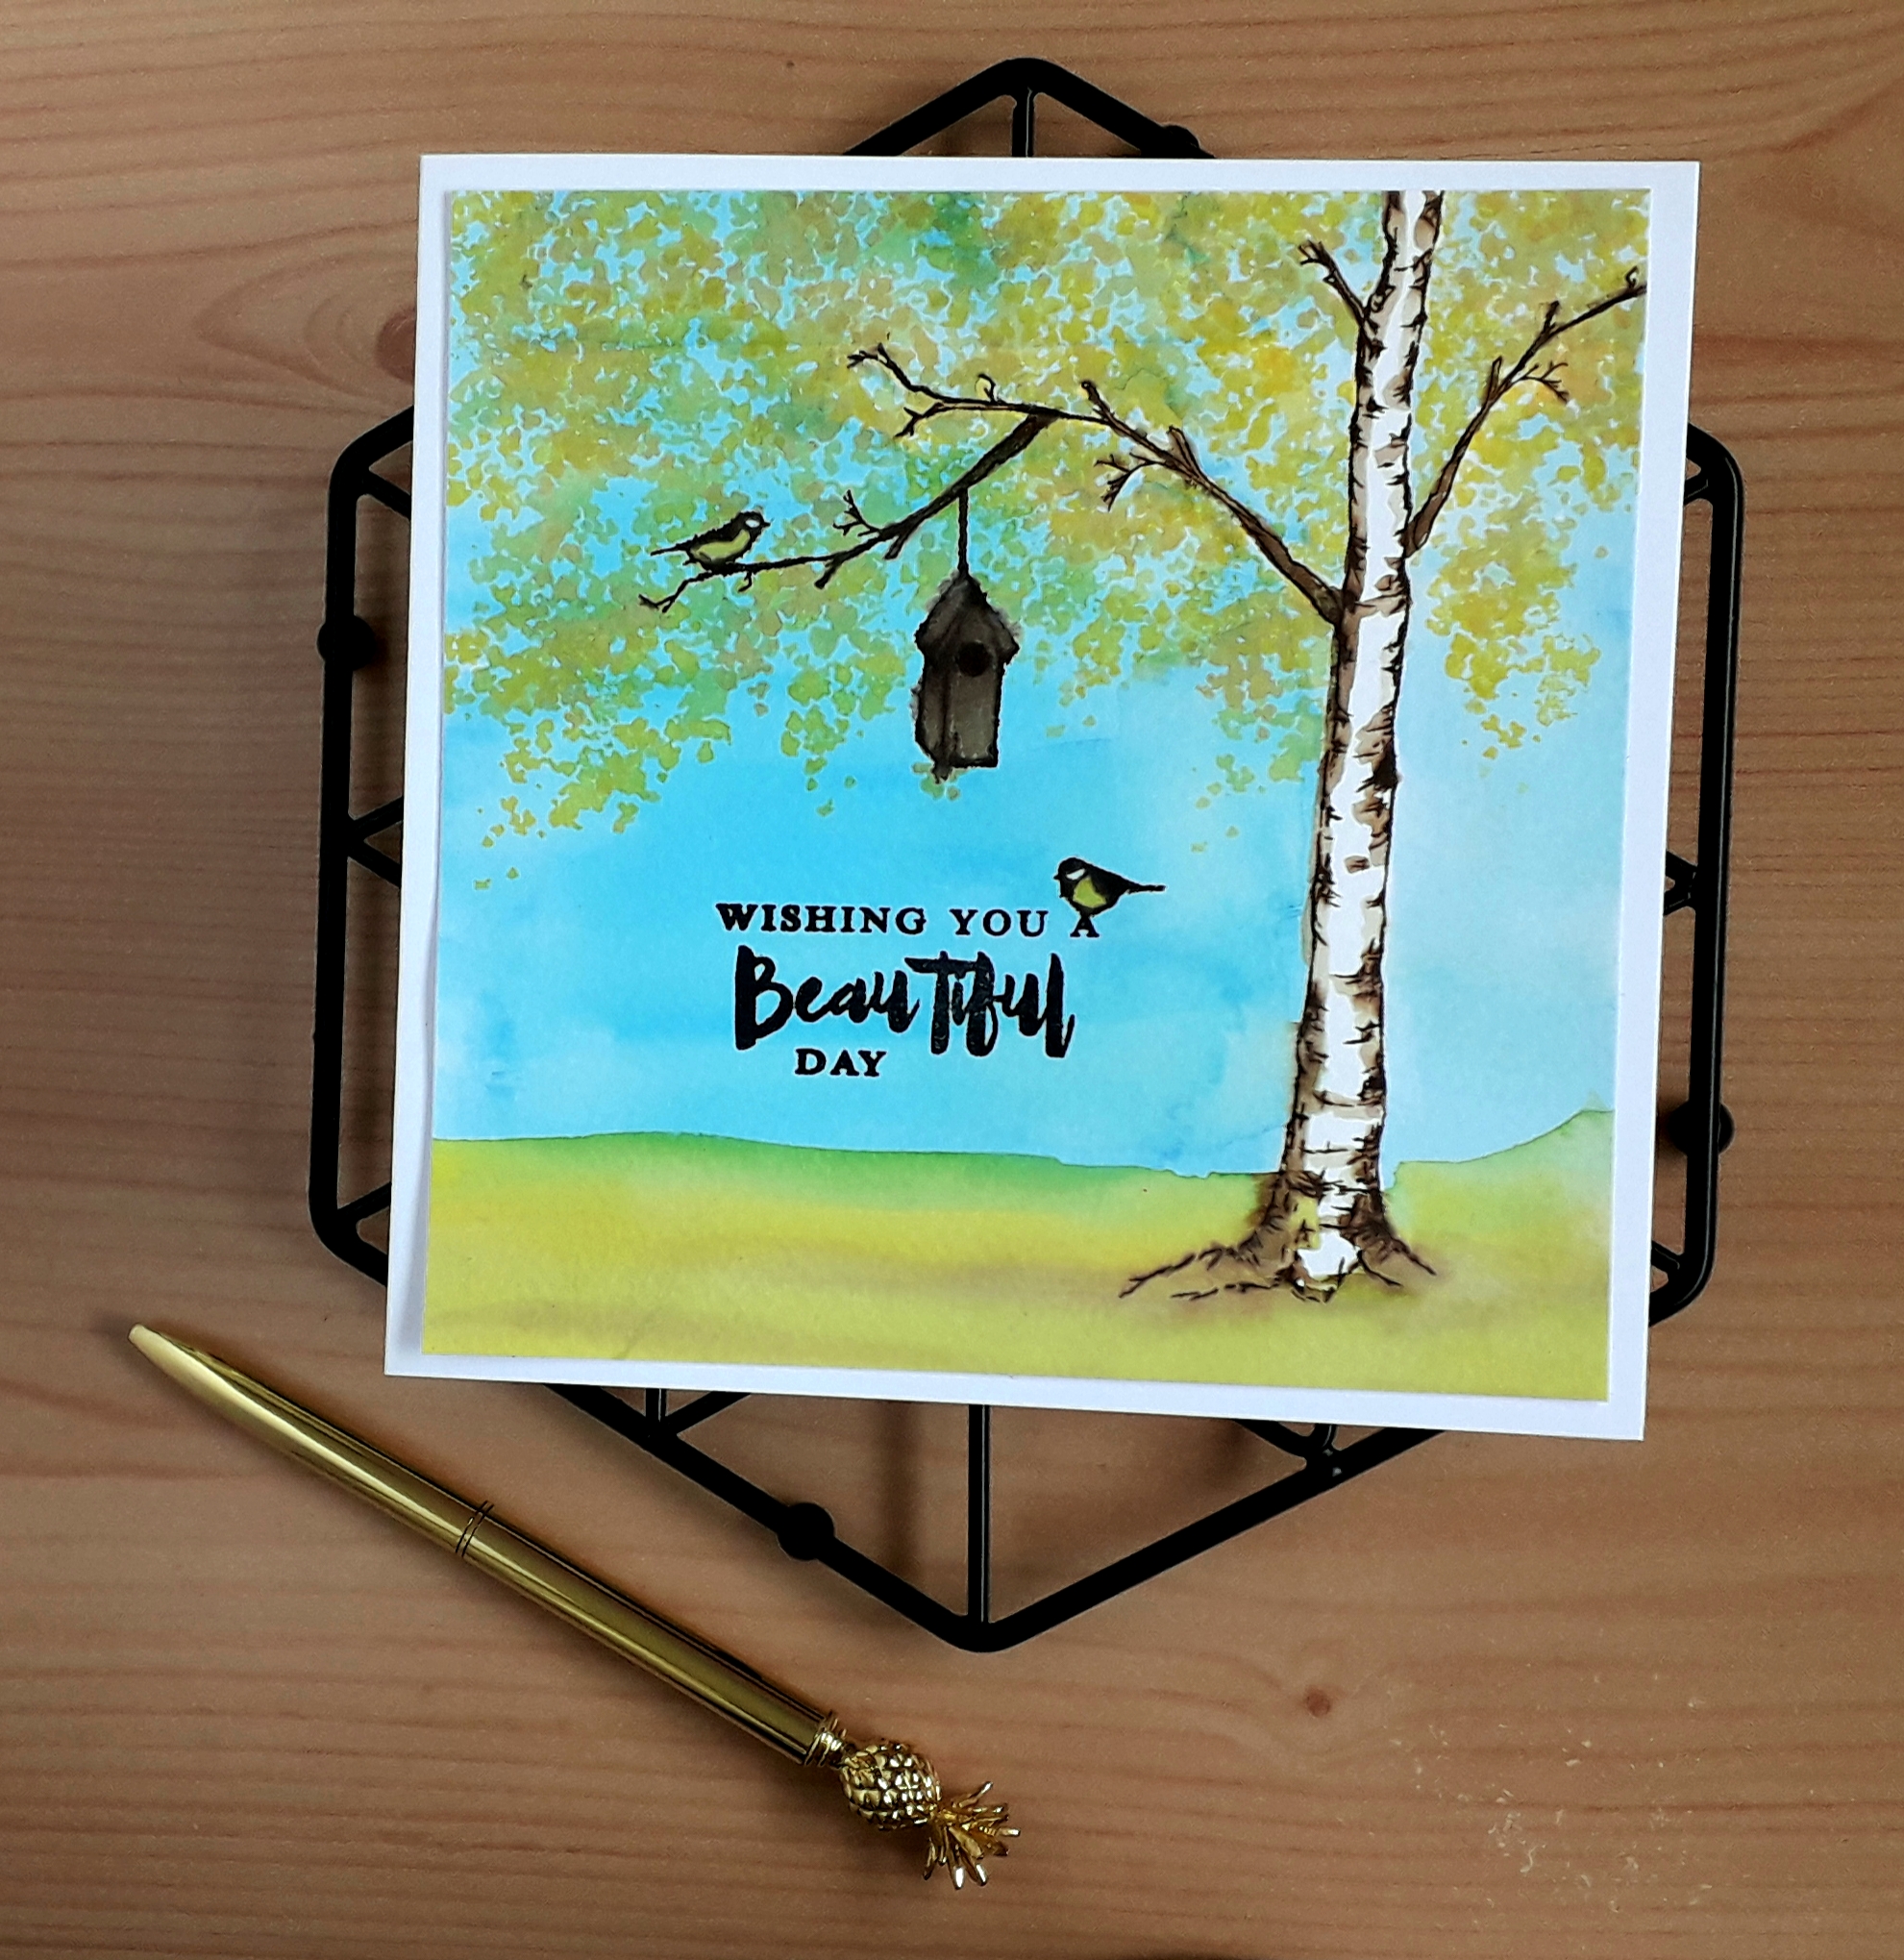
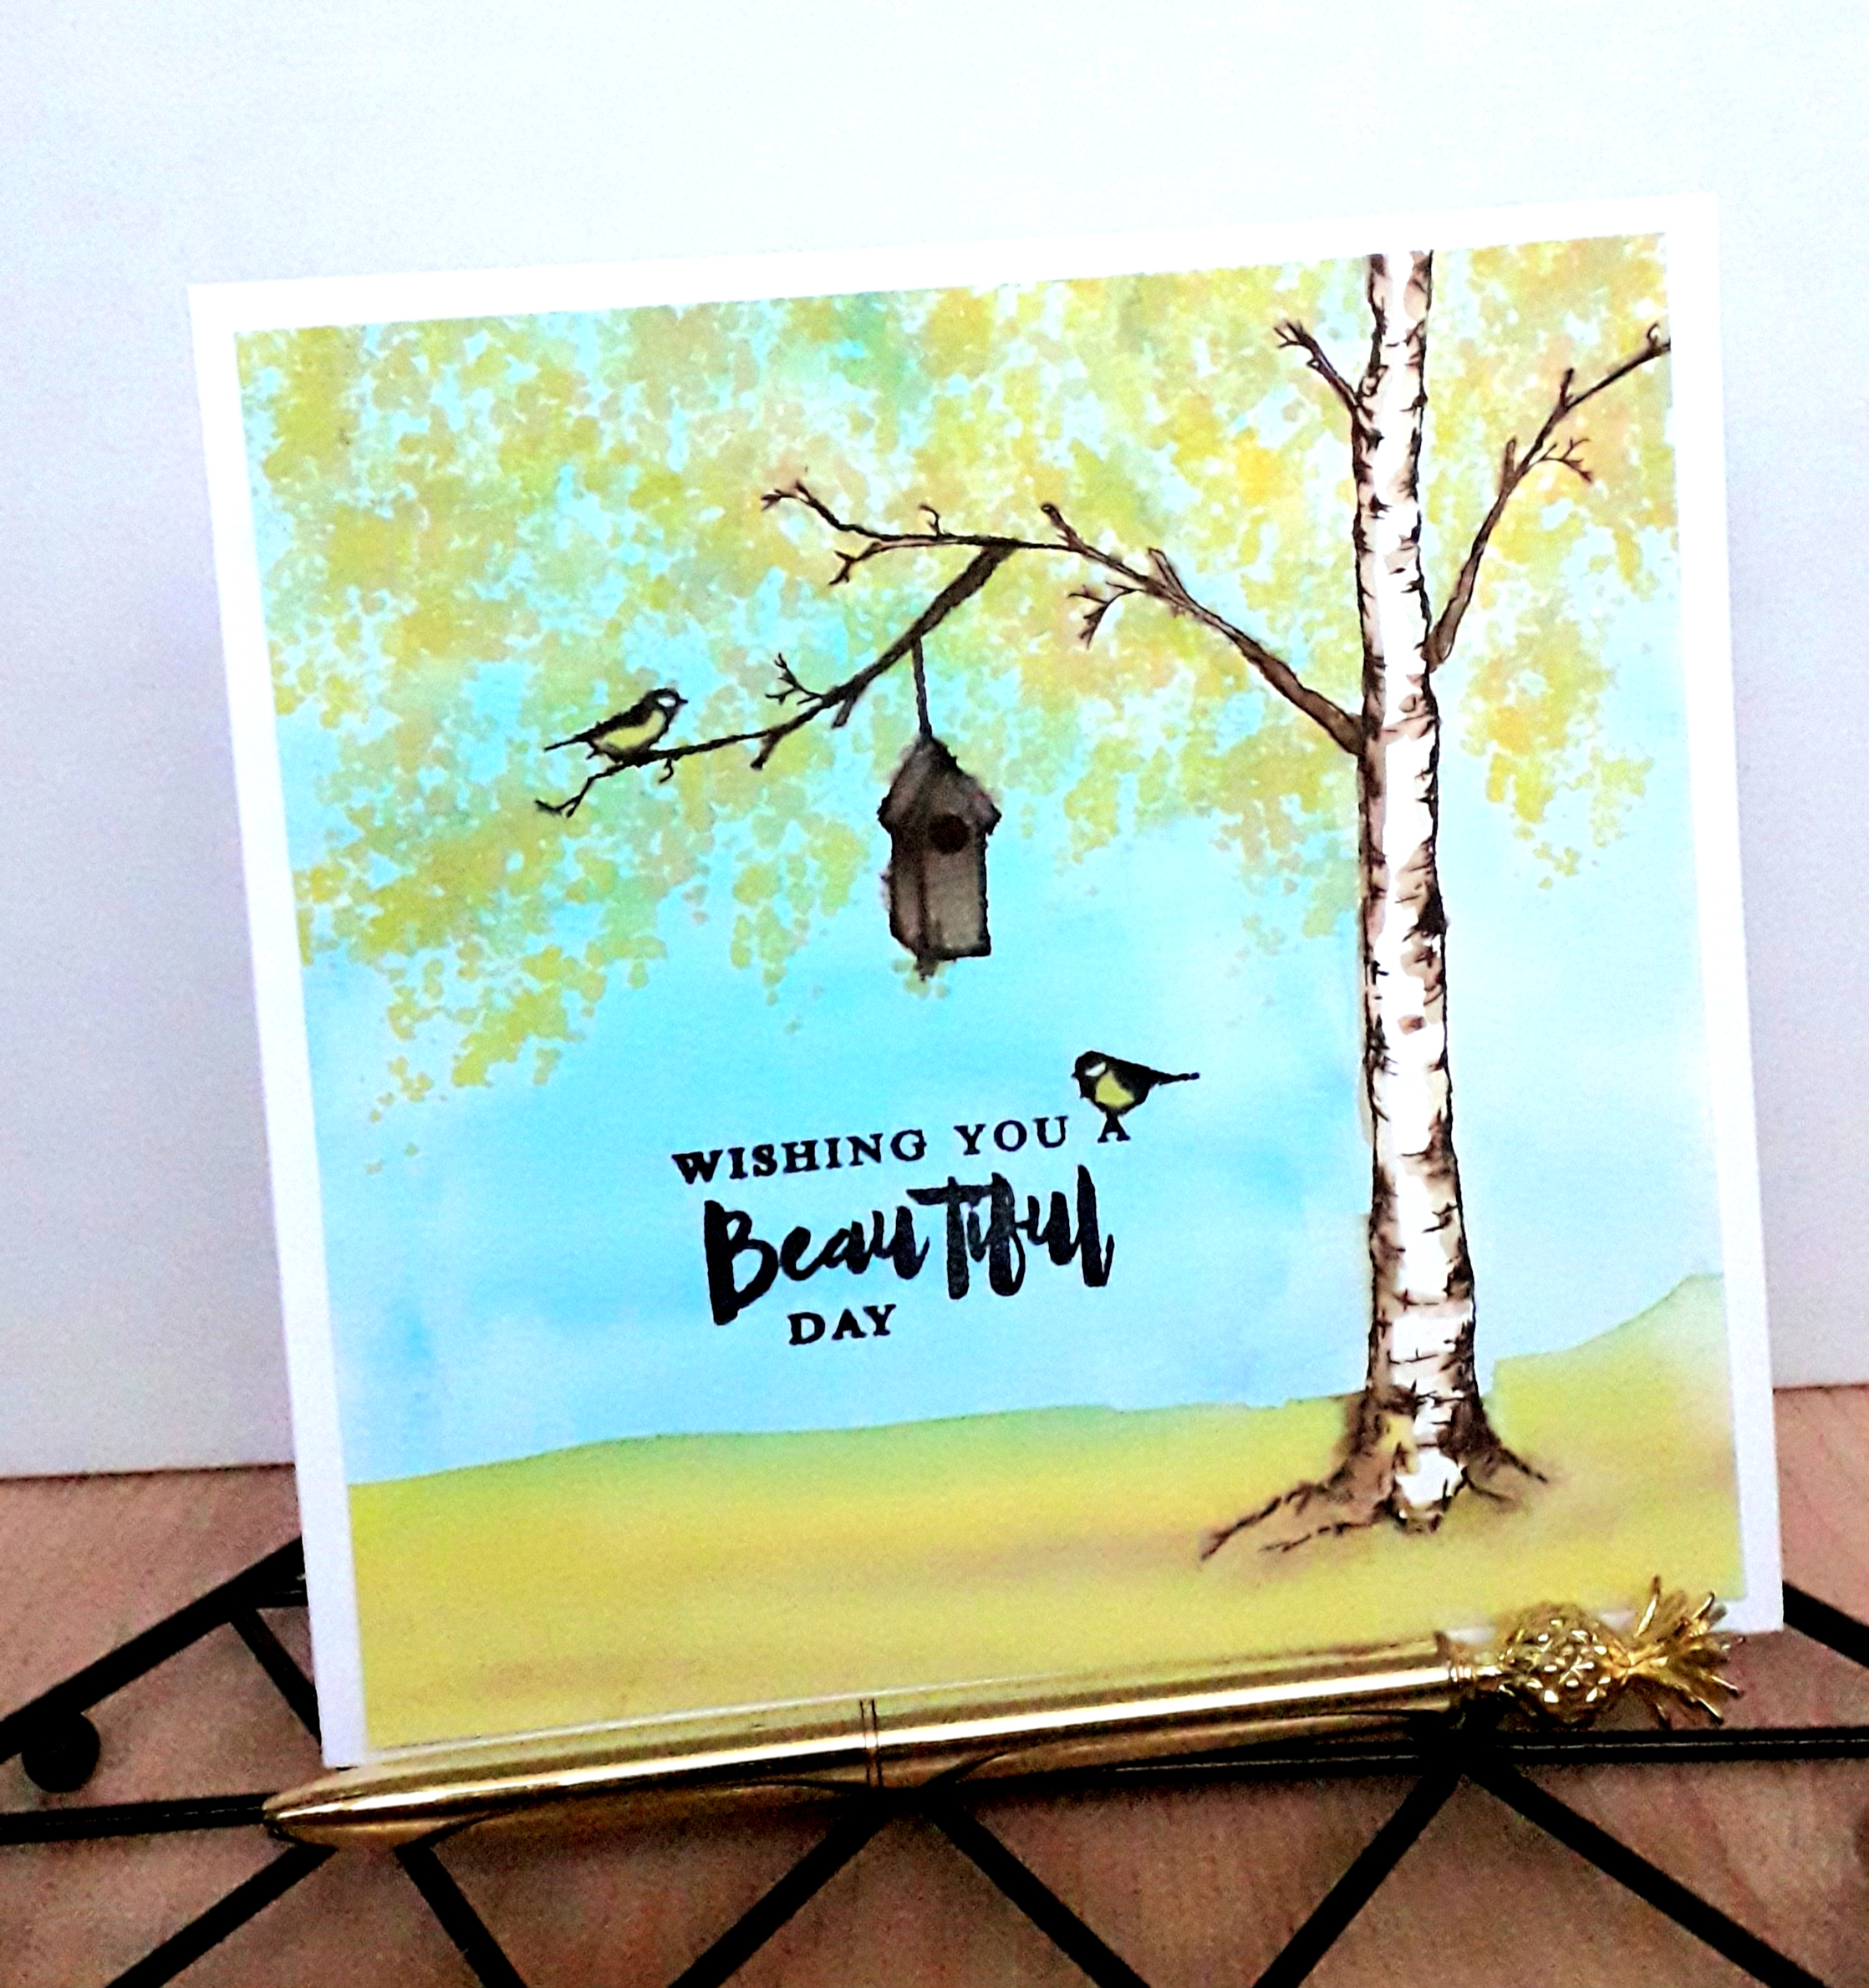
My first card uses the Birchland stamp set. The card in the class was a beautiful spring card, but I decided to change up the colours to make it more of an autumnal card. I started by stamping the trunk with ground espresso distress ink. I then masked off the trunk before doing a wash of salty ocean distress ink. I did a wash of mowed lawn, mustard seed at the bottom of the card. I then shaded the trunk and coloured the branches with Walnut stain ink.
I left the trunk mainly white to give the colouring of a silver birch, one of my favourite trees. The leaves were stamped with Butternut, Sunkissed, Misty moor and warm sunshine inks. The sentiment is from Watercolour extravaganza and was stamped with versafine onyx black.
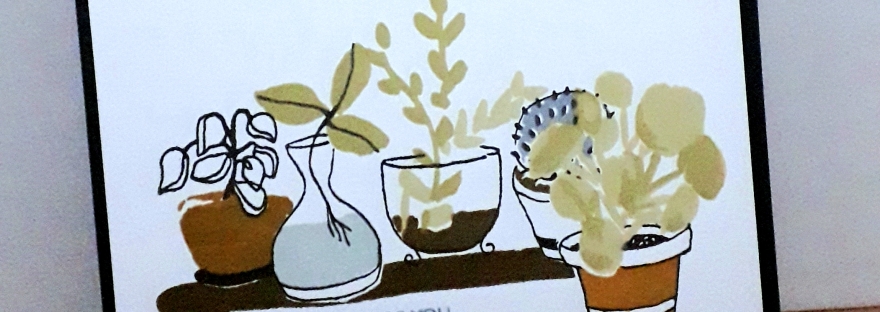
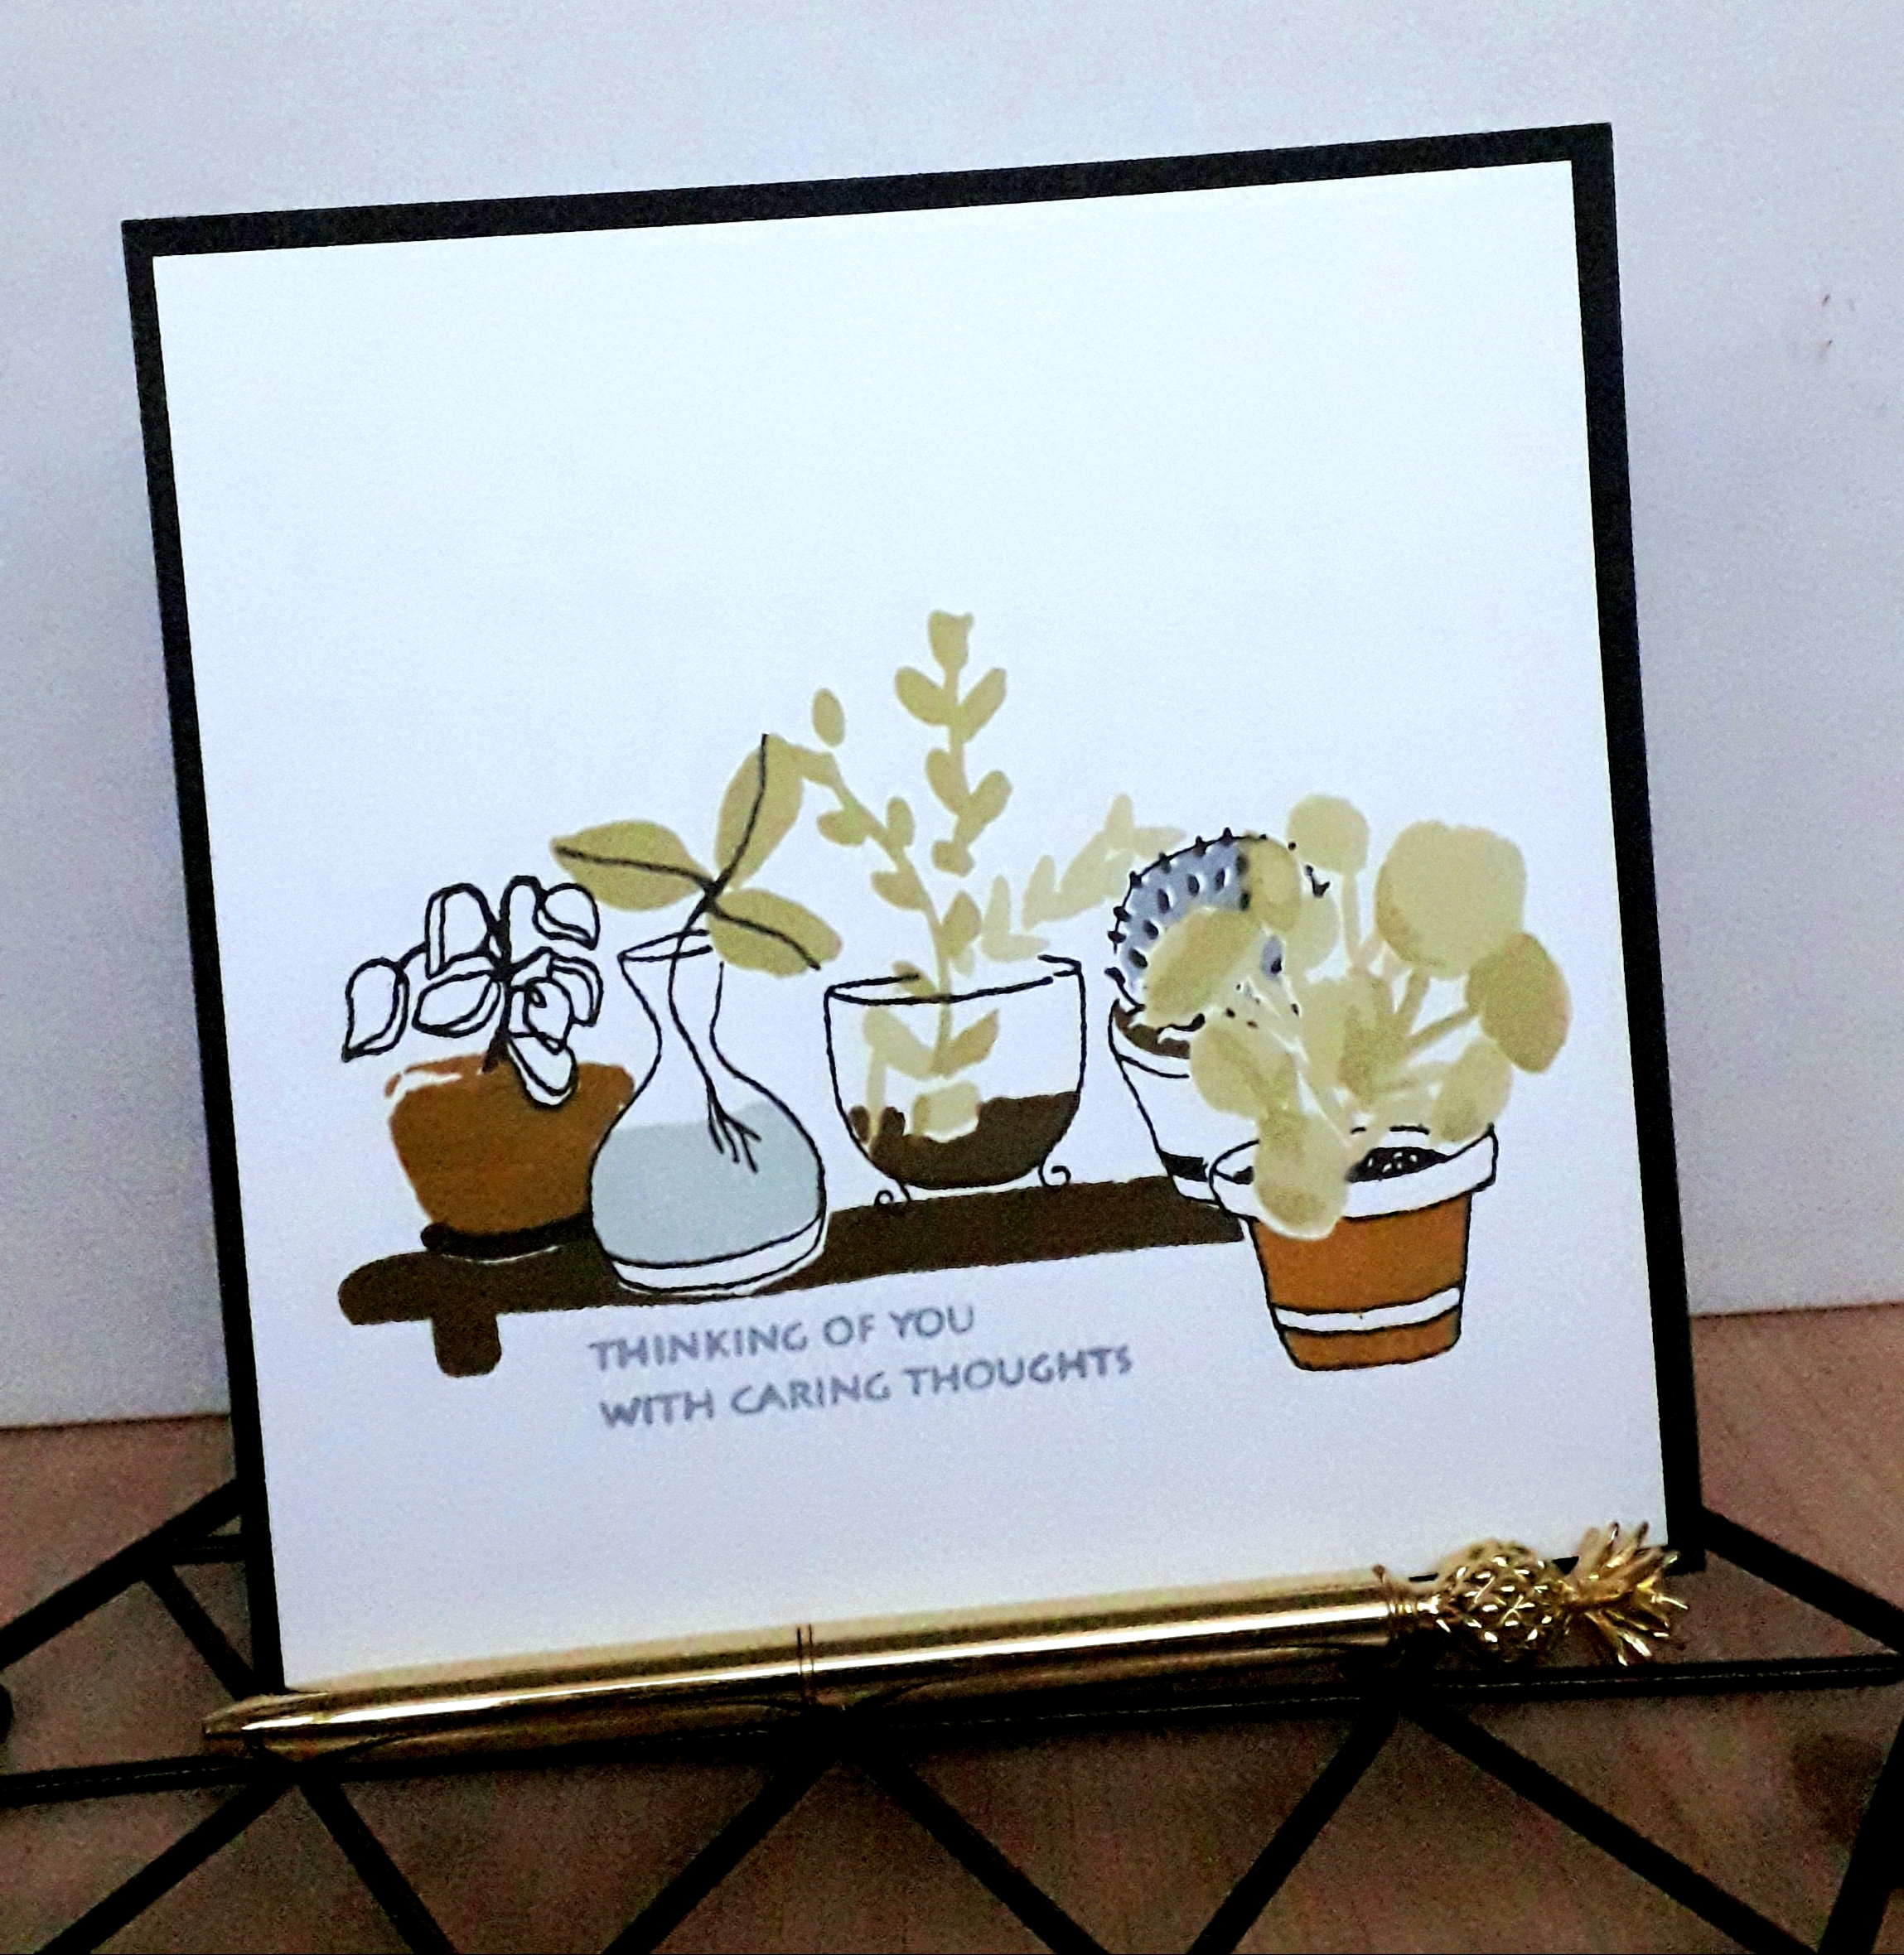
My second card uses the Indoor garden stamp set. I really love the modern look of this stamp set and it is such a useful set that can be used for masculine as well as feminine cards and a wide range of occasions.
The tips in the class for laying out the stamps to arrange my design were really useful for creating the composition and for masking off the plants in the front before stamping the plants in the background.
The inks used in this card were Marshland, Misty moor and Mangrove root from Nature’s wonder set. Pumkin pie and Yellow ochre were from Fall harvest. Misty morning and cloudy sky, from Tranquility ink set. And Jet black from green fields set. The sentiment was from Birchland stamp set and was stamped in Misty morning.
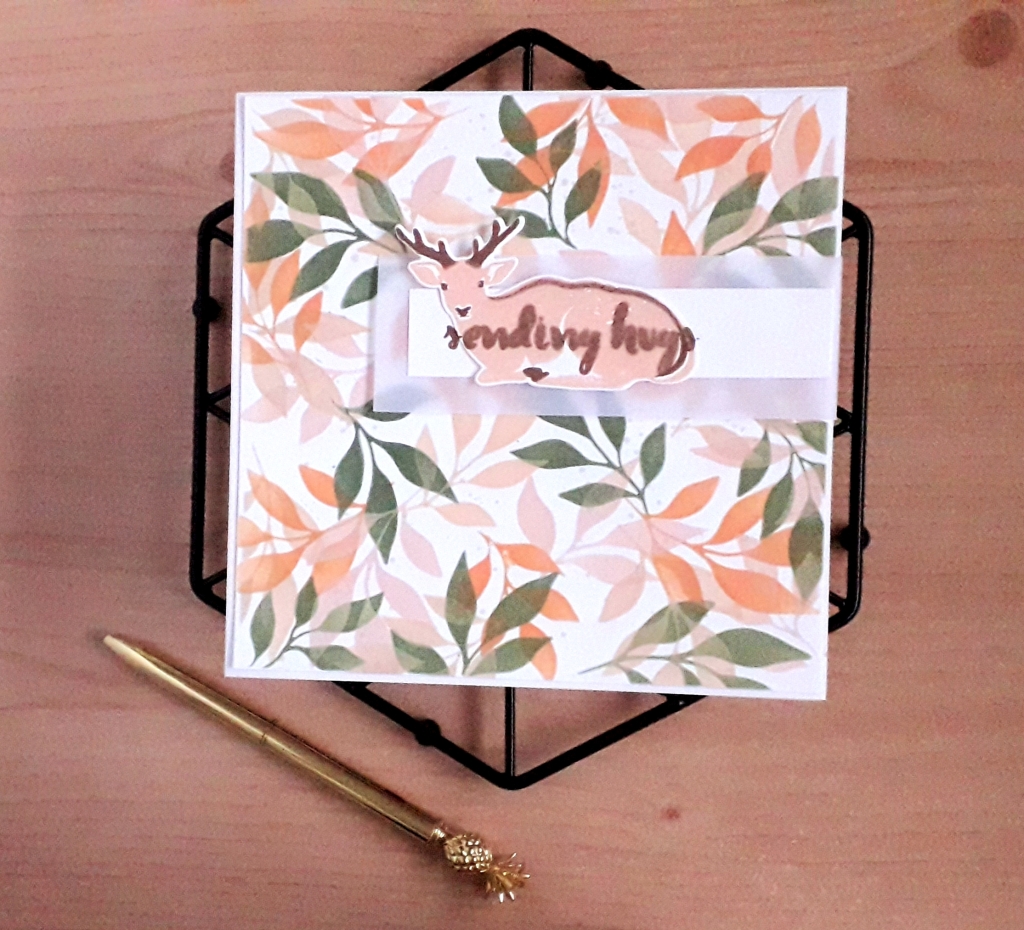
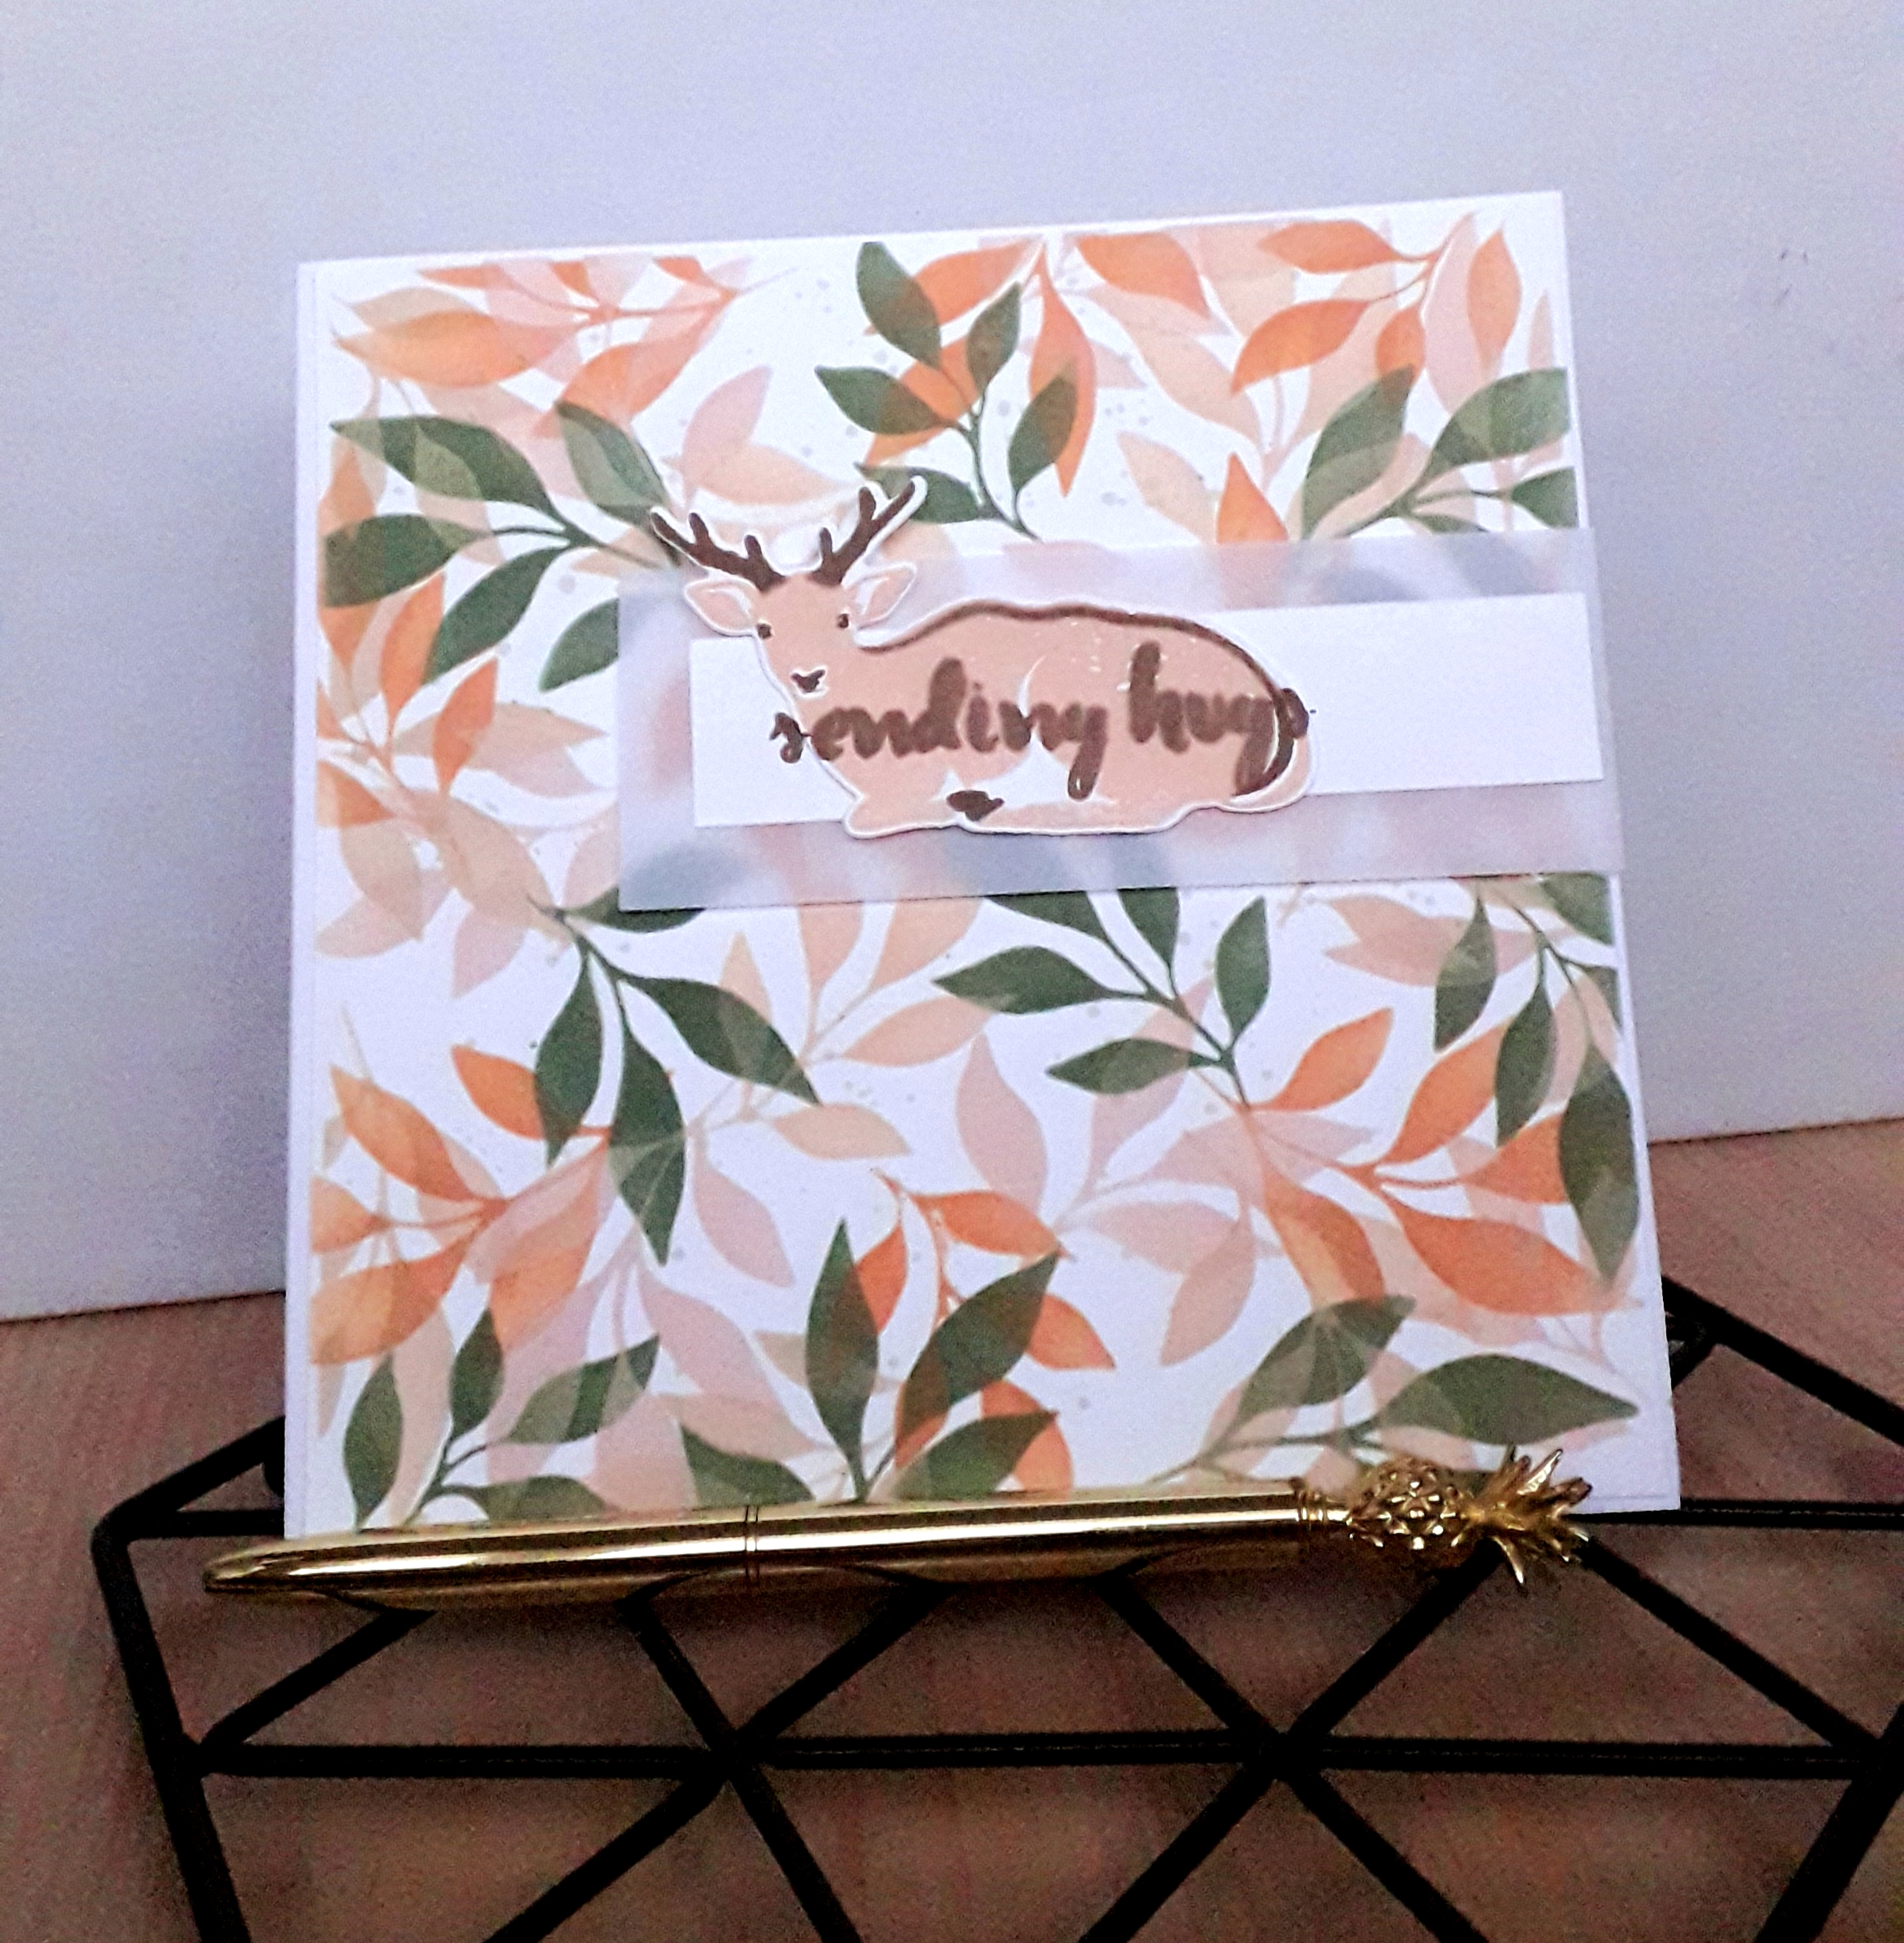
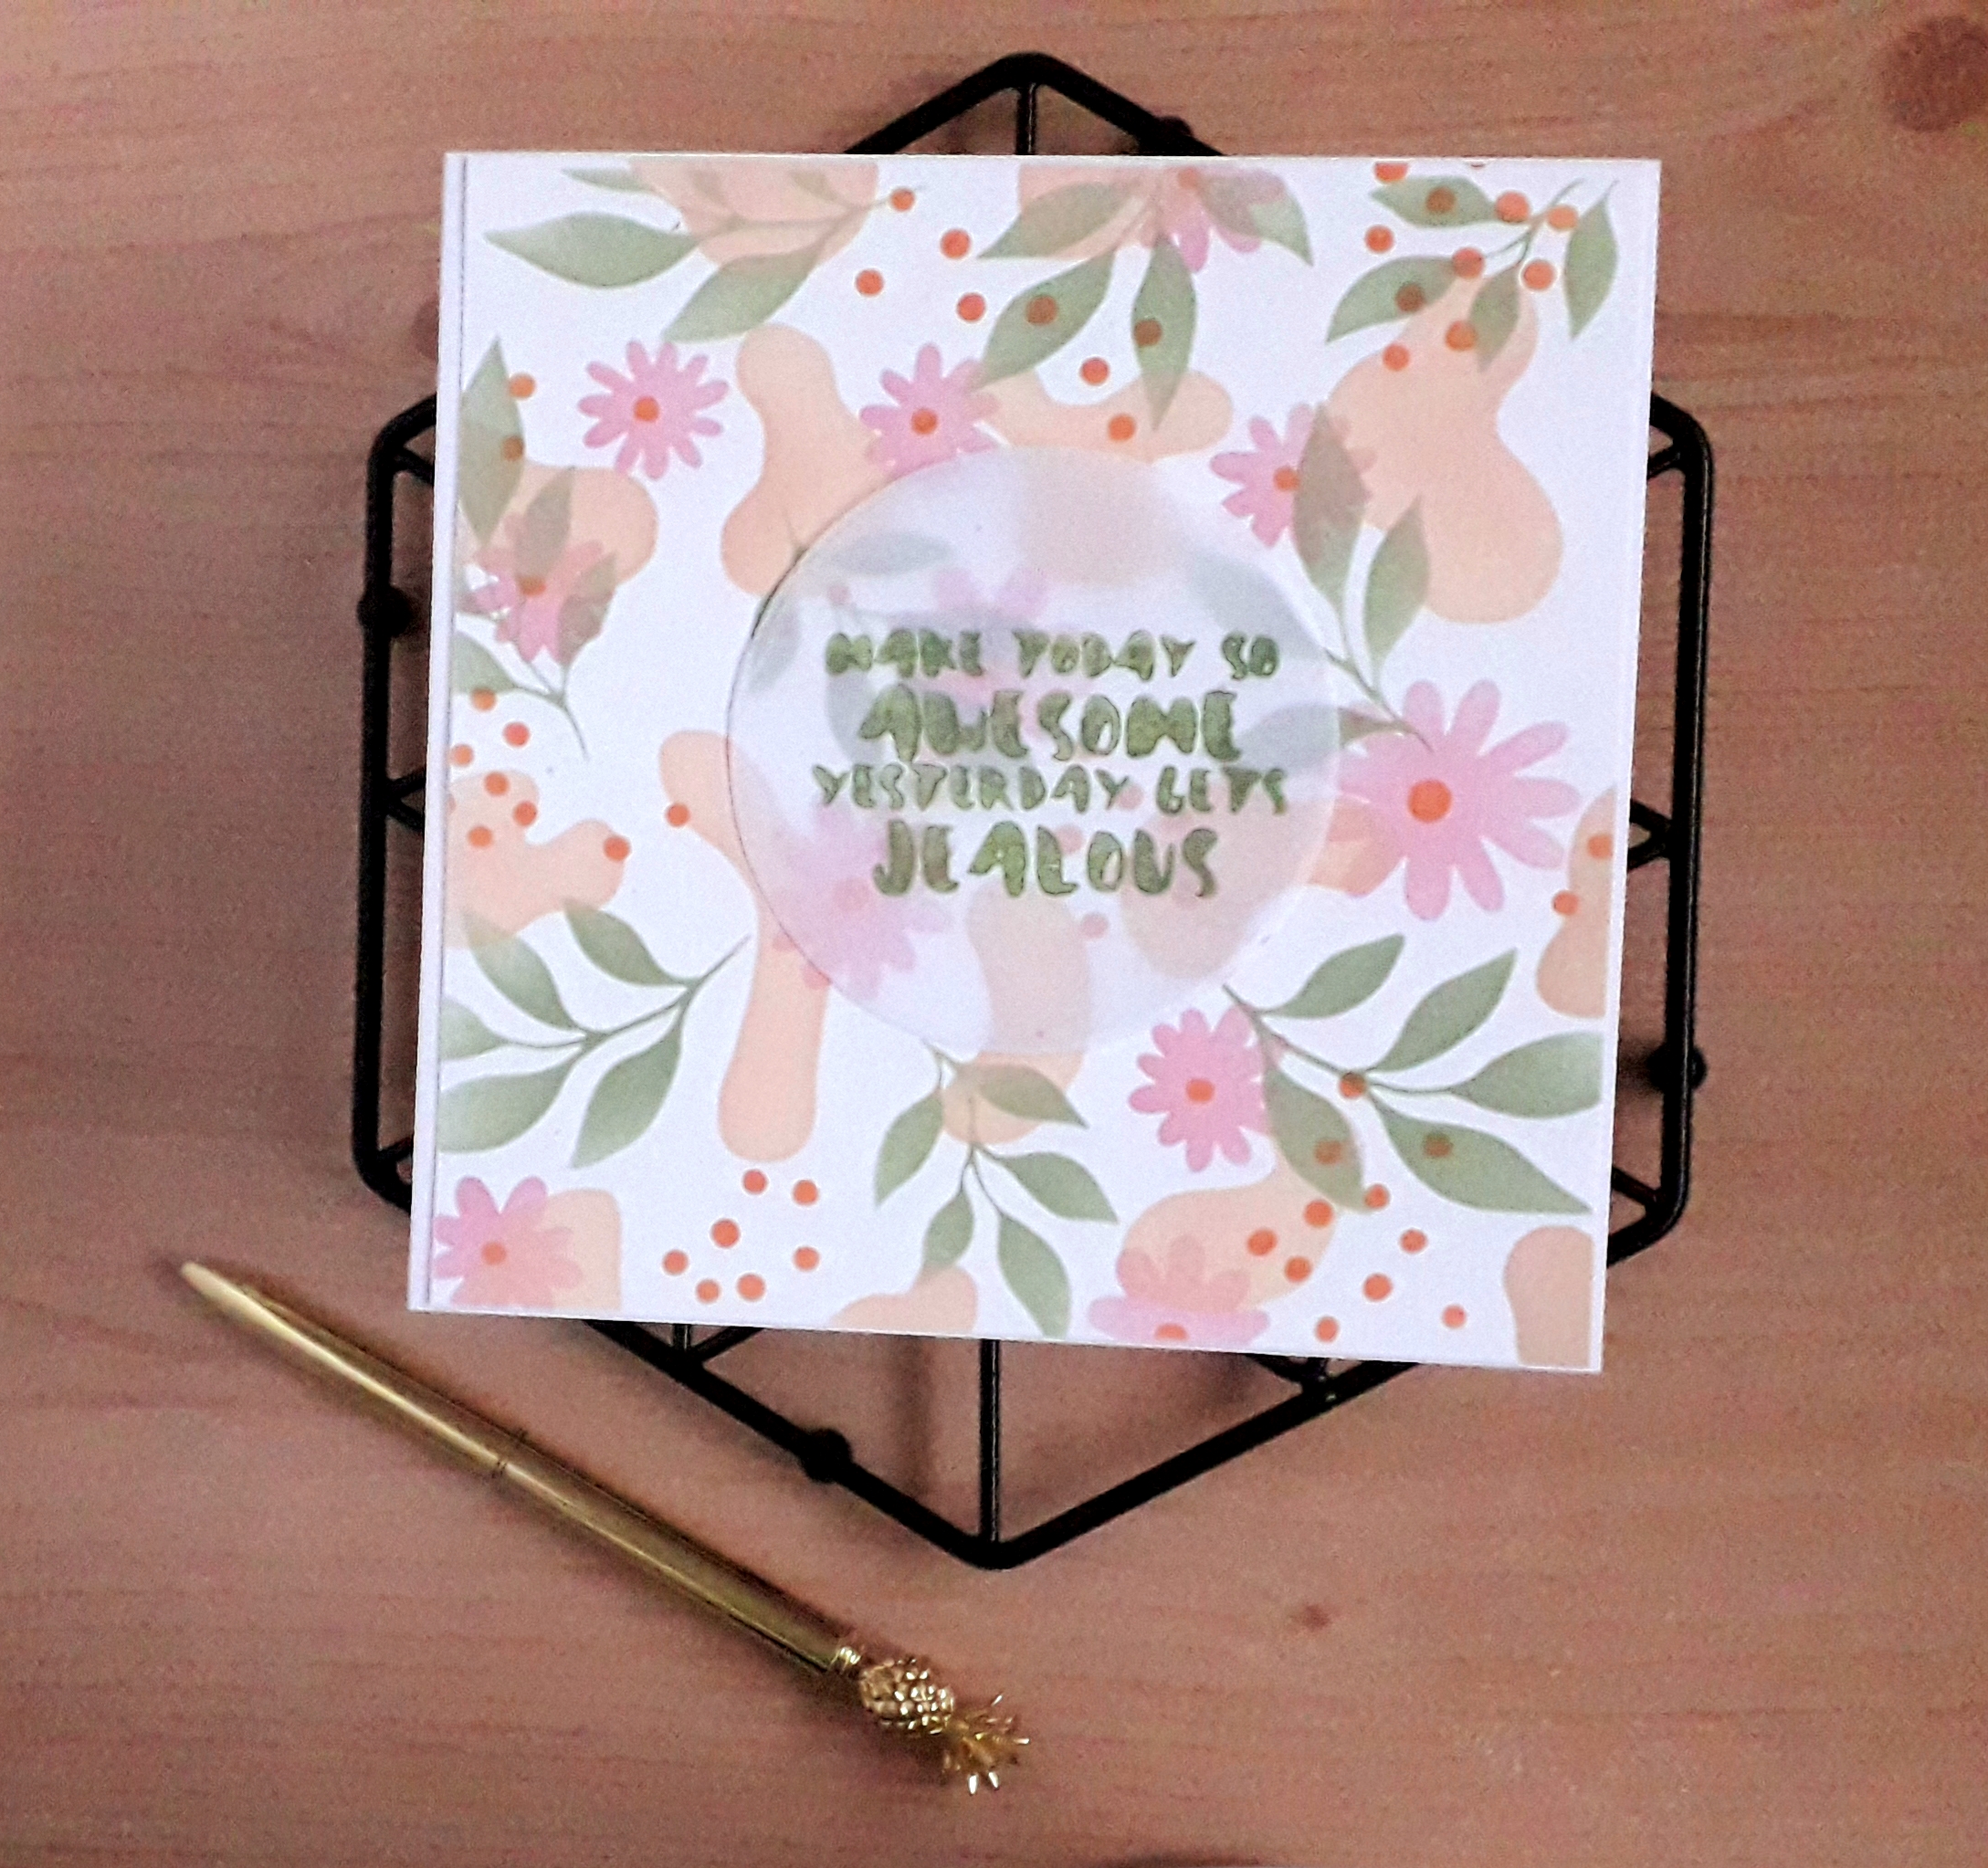
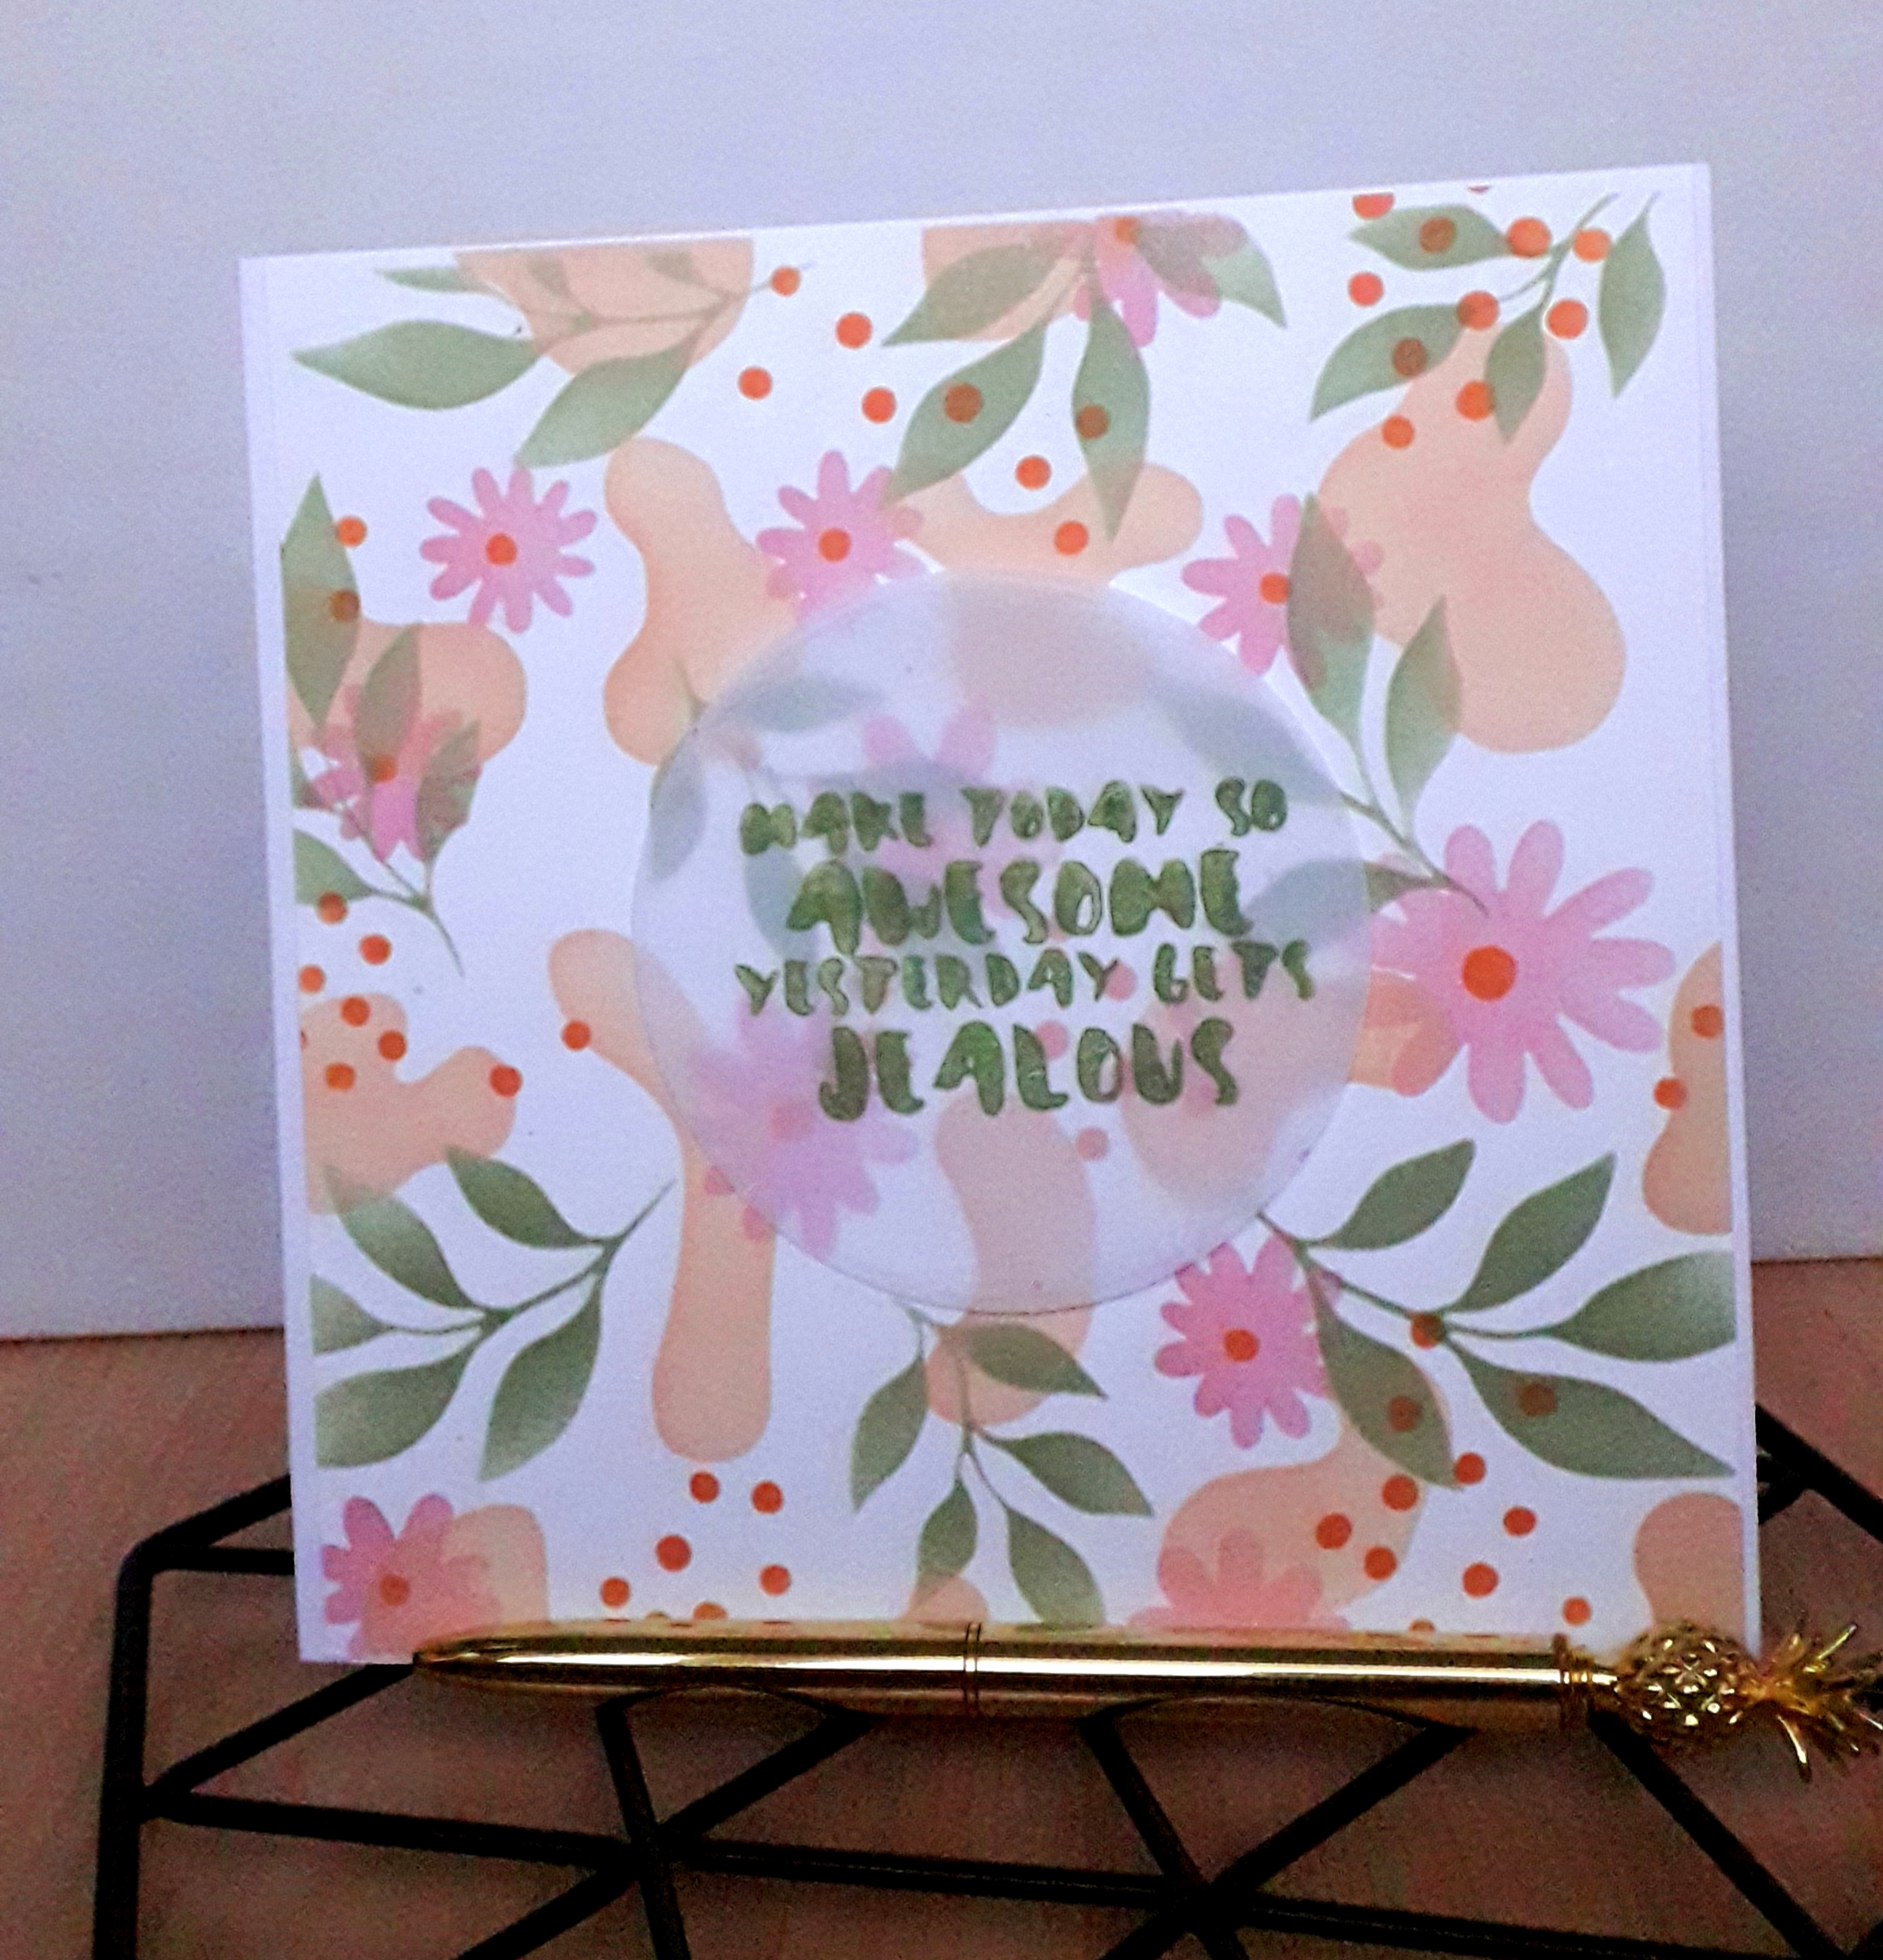
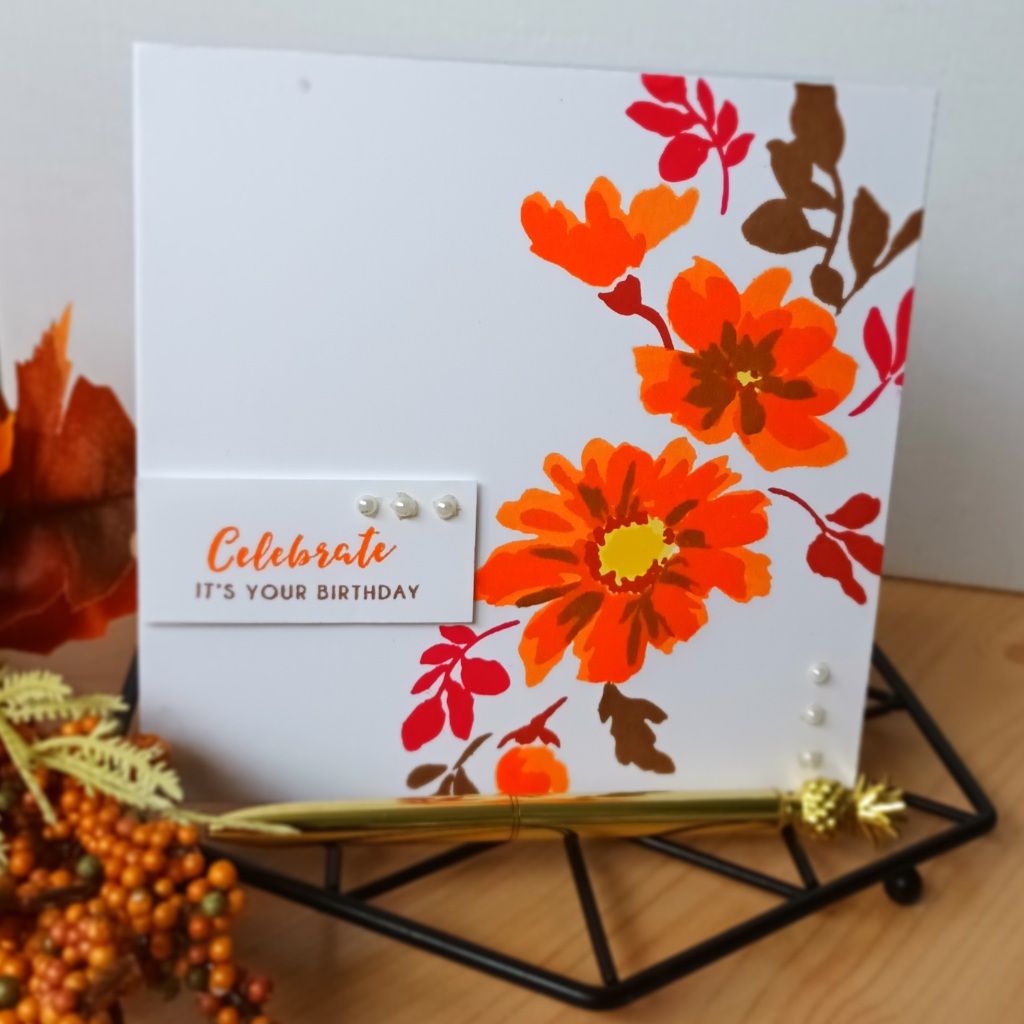
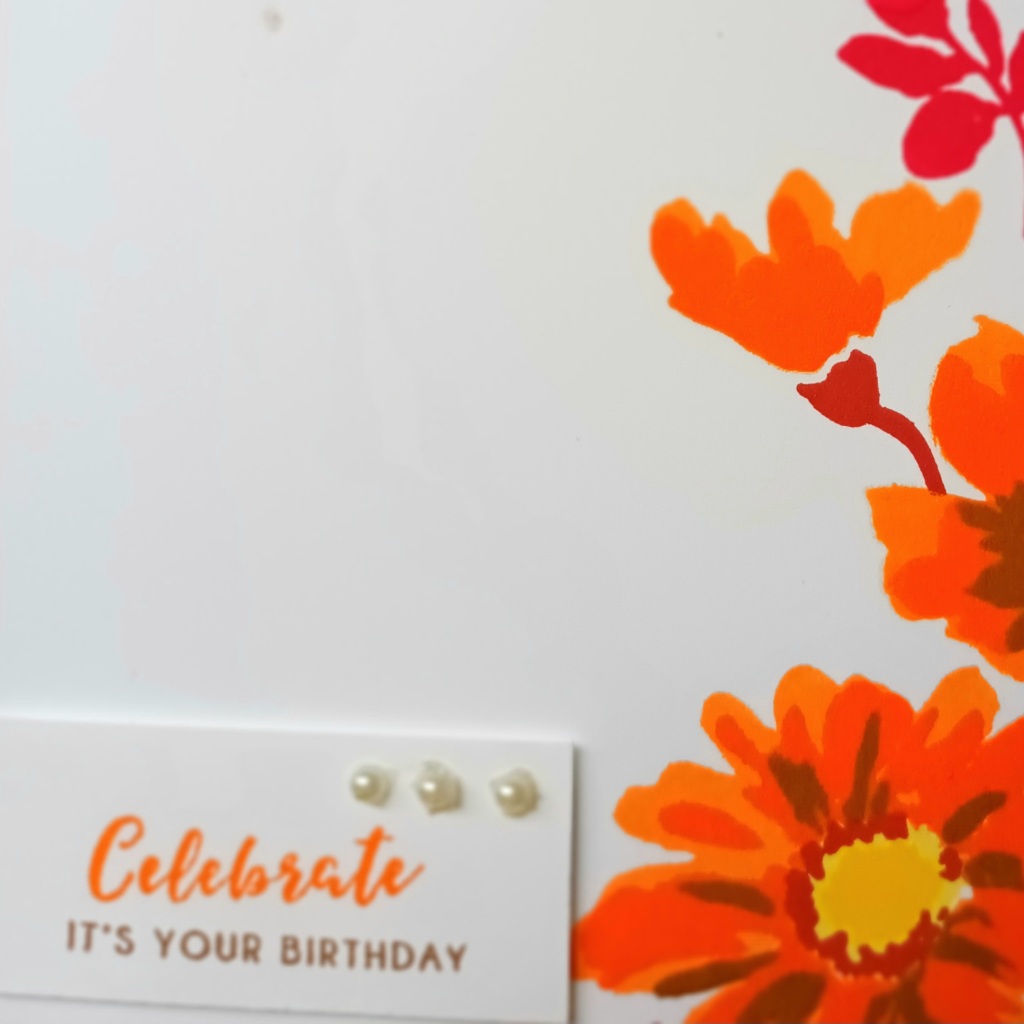
Here are my submissions for the celebration stencil technique class. This class gave me lots of ideas about how to use my stencils and I thought it was a great opportunity to play with my recent stencil purchase Altenew Playful Patterns Stencil
This is great set of four stencils that you can use together or individually and therefore gives you so many options.
For this first card I decided to just use the leaf stencil on its own, turning it around and using a different colour each time. The inks used were Blush, peach perfect, forest glades and orange creme.
I also added a few splatters and then stamped and die cut a deer from Modern deer stamp set and stamped a sentiment from painted greetings stamp set. I loved the use of vellum in this class so used a piece under my sentiment. This still lets the stencilled background show through, but it reduces the distraction from the sentiment.
My second card uses all four of the stencils. The colours used were Cotton candy, orange creme, frayed leaf, peach perfect.
The sentiment is from Painted Inspiration I stamped it with Frayed leaf pigment ink onto vellum. I then used the glue behind the sentiment to stick the vellum to the front of the card.
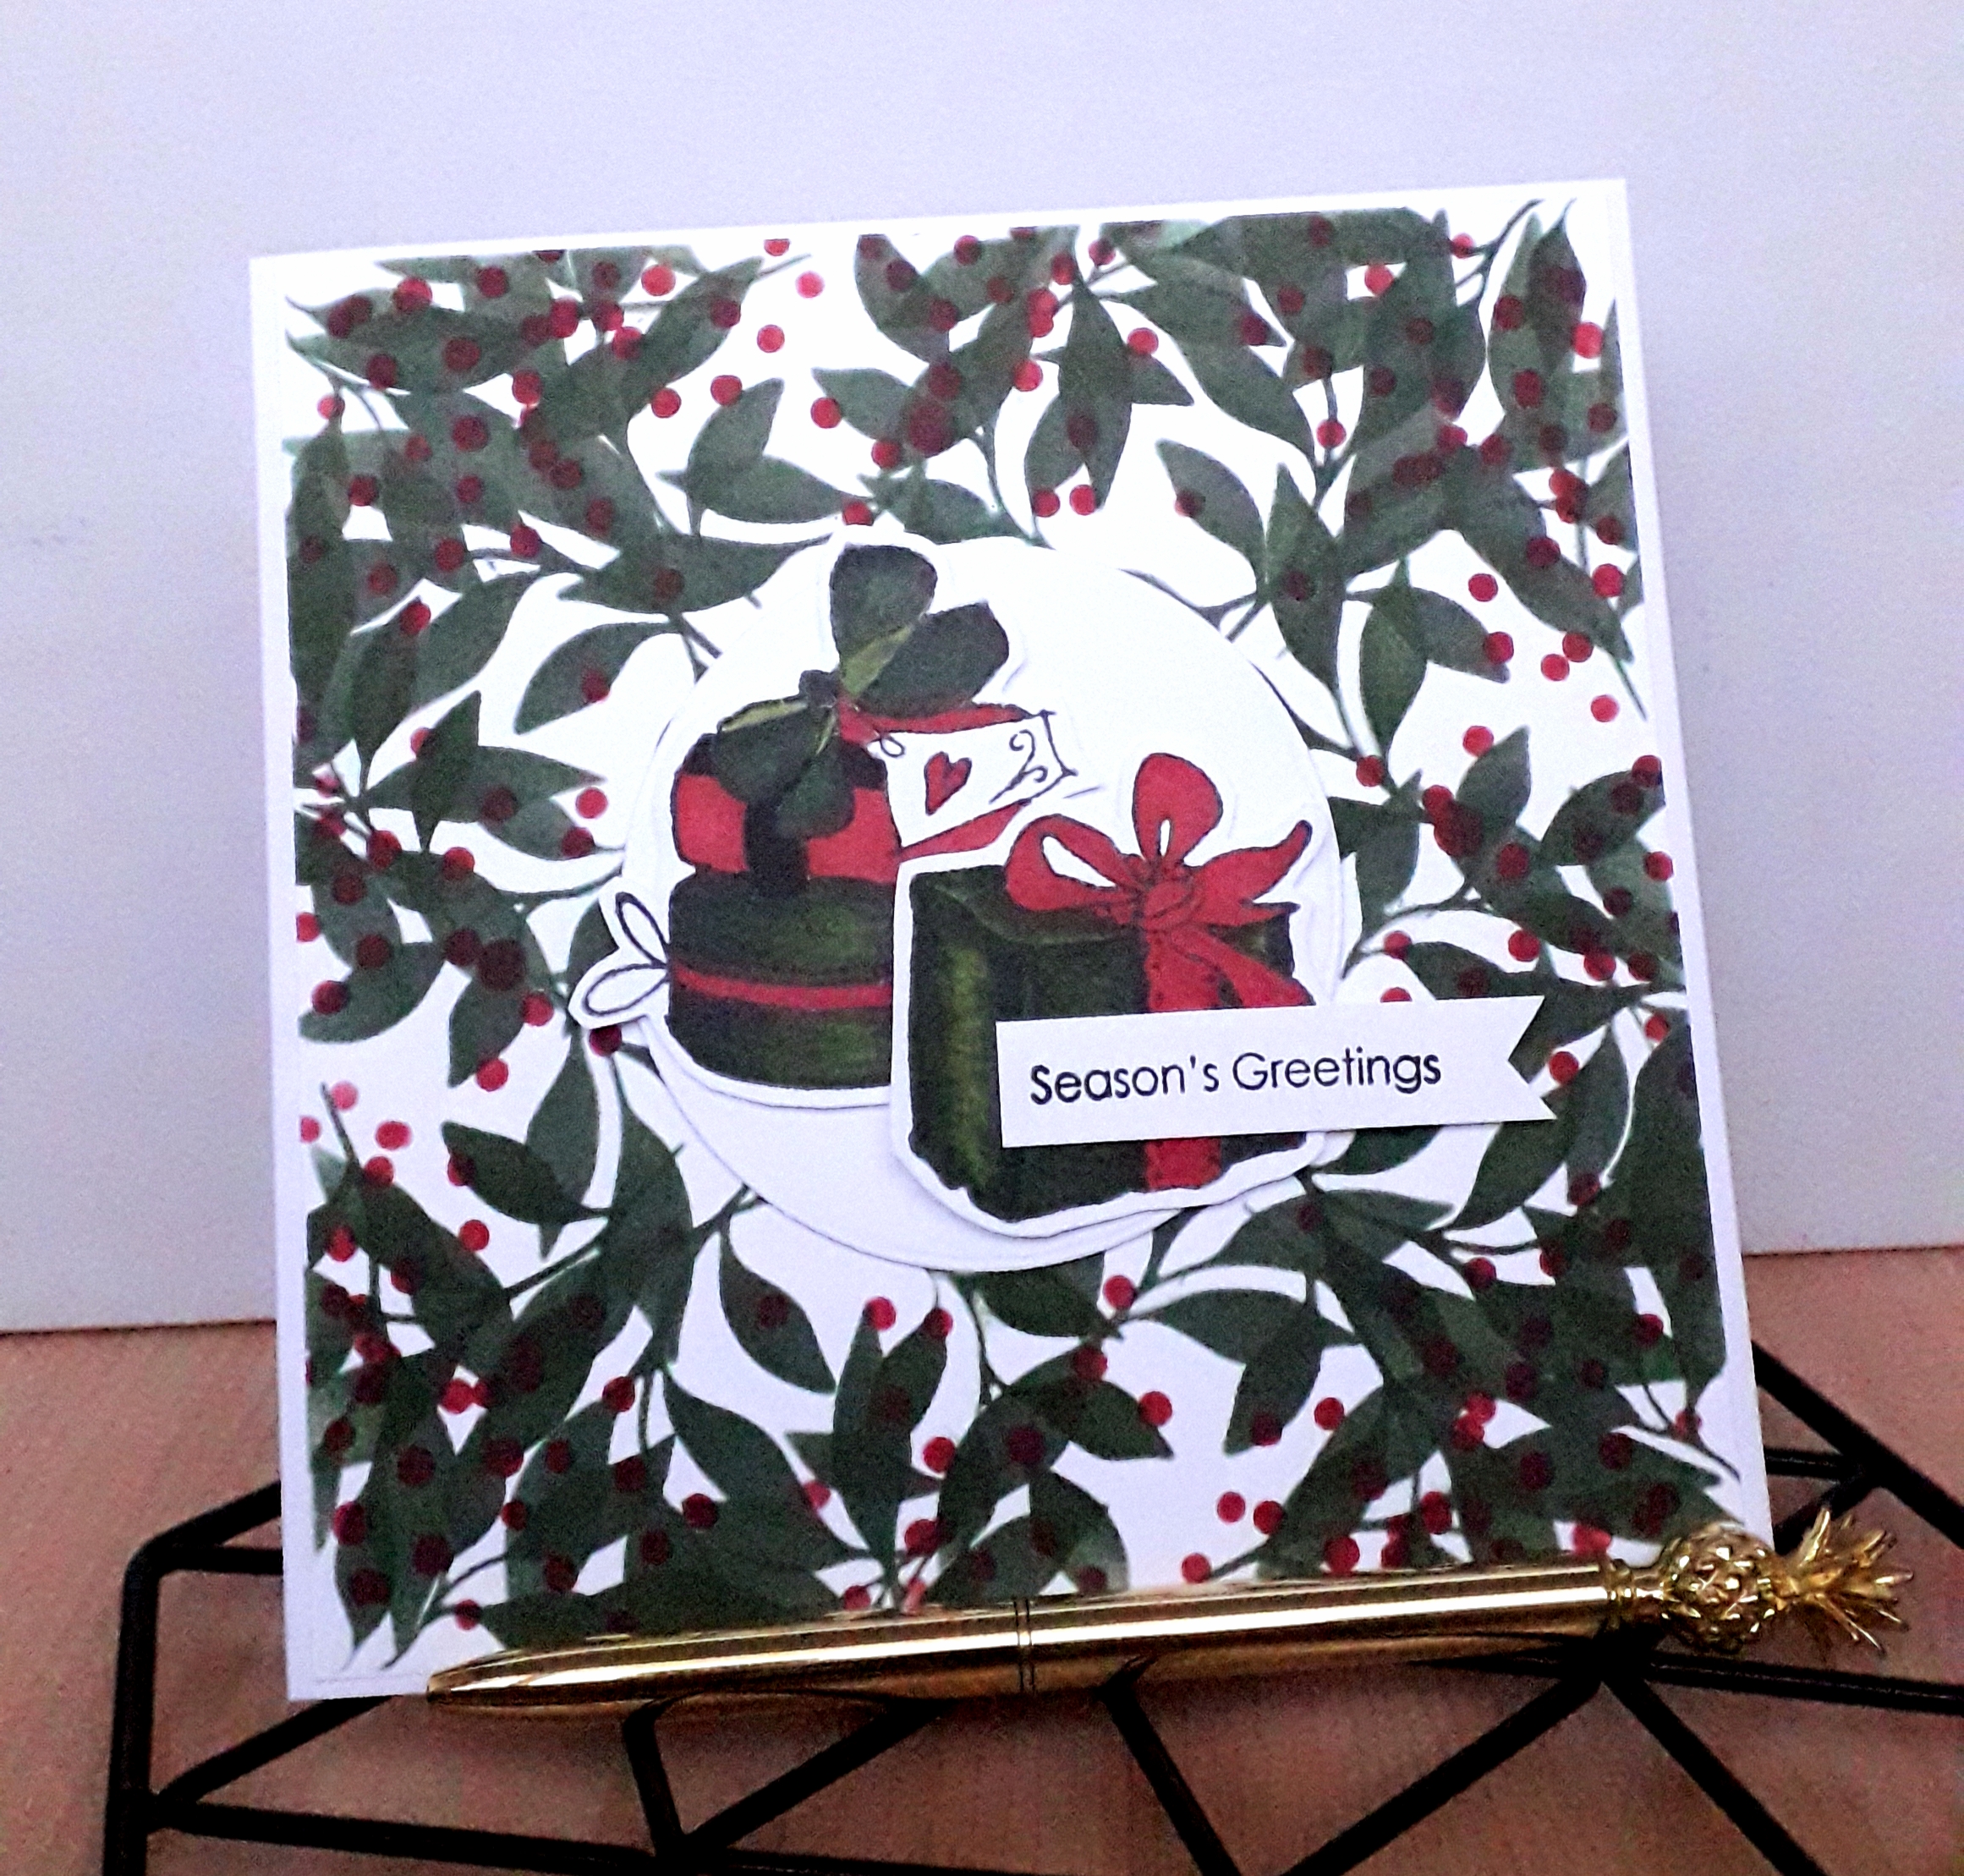
I then decided that Christmas is around the corner and this stencil set could be used for a Christmas card. I used the leaf stencil and the dot or berry stencil using Evergreen and Ruby red inks.
I liked stretching my supplies using non-Christmas stencils and stamps to make my Christmas cards.
I hope you like my cards. I would really recommend the playful pattern stencils. I am really enjoying doing the Altenew Educator Certification Programme and would also recommend The Altenew Academy classes.
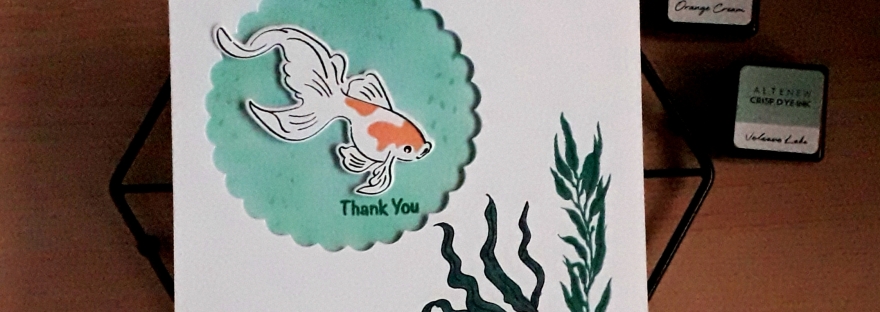
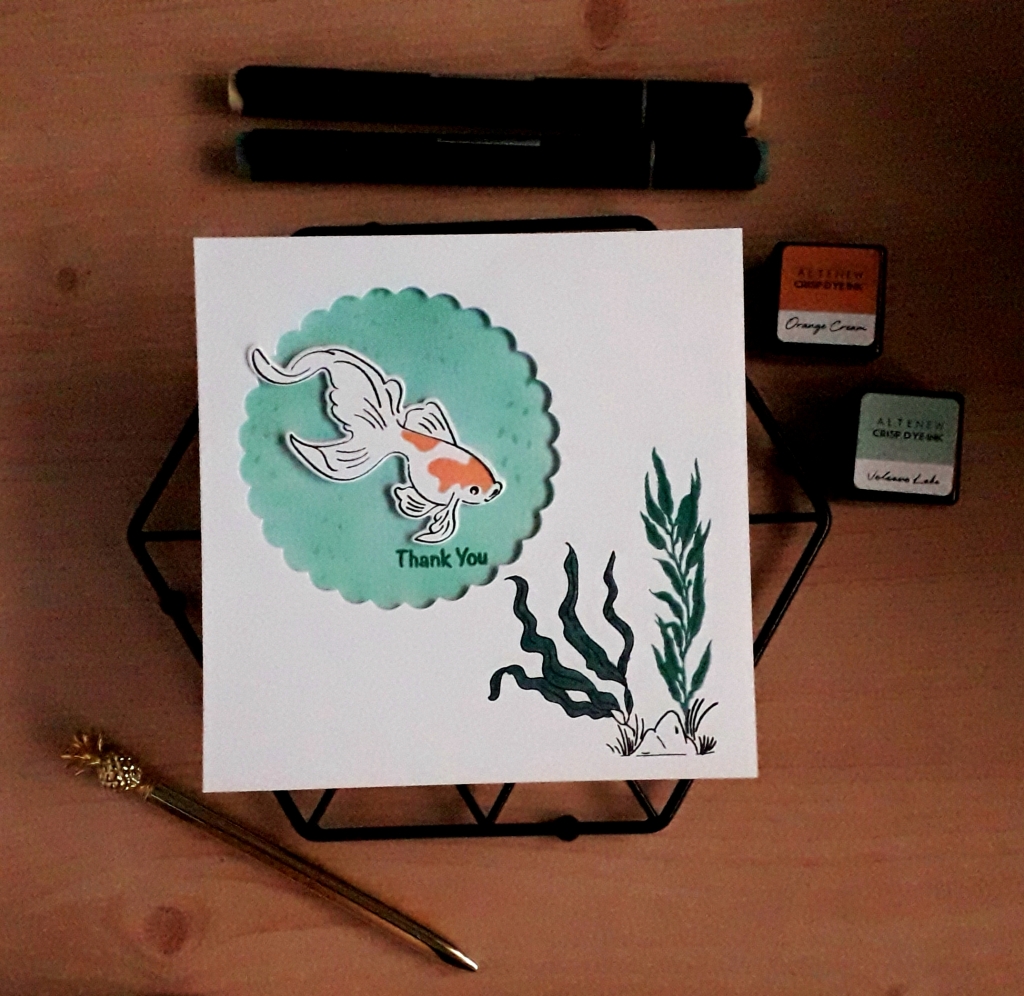
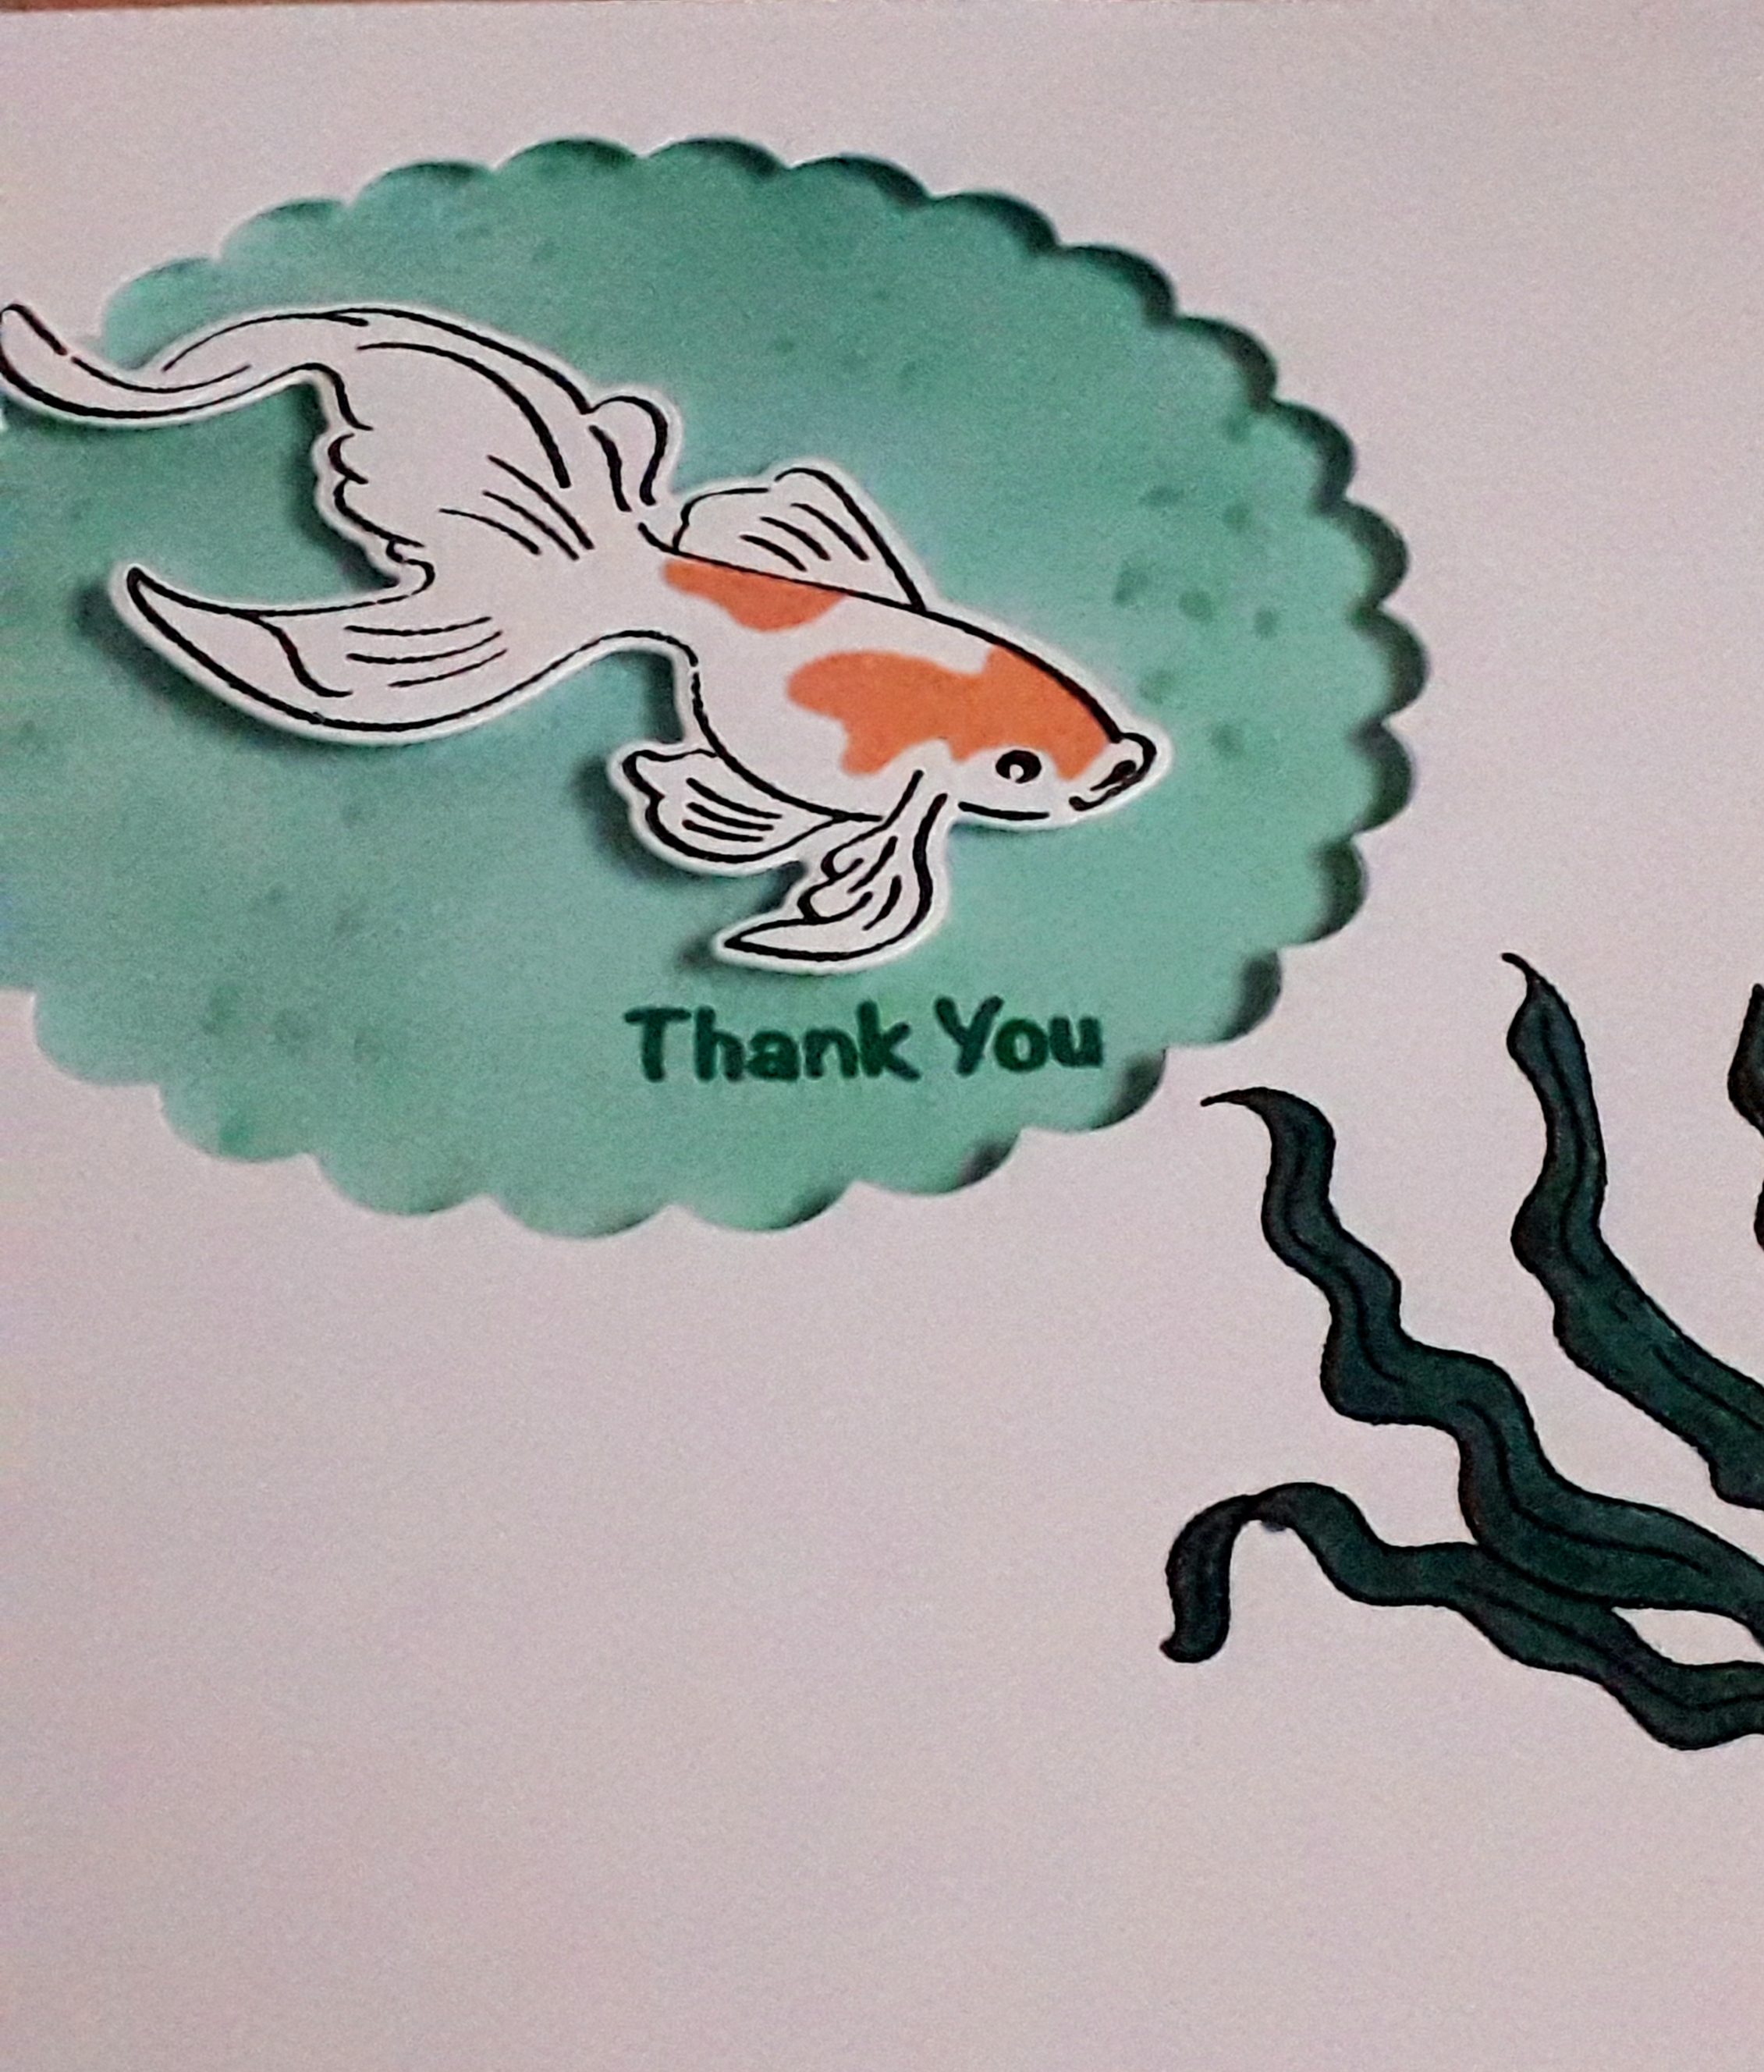
Here is the card I made inspired by the Easy ink blending Altenew academy class. After trying different card stocks to ink blend on I opted for Neenah classic crest cardstock. After cutting an aperture in a piece of card stock and then drew a pencil line onto another piece of cardstock so that I knew where the aperture would be. I then used the inks volcano lake and ocean waves to ink blend over this card stock with volcano lake blended into the centre and ocean waves more around the edge. I then used the little bubble stamp from Goldfish pond stamp set to add some texture to the background.
I then stamped the onto the piece of card with the aperture and coloured the image in with emerald artist markers. I stamped the goldfish on a separate piece of card stamped the coloured layer with orange cream and cut it out with the coordinating die. I stamped Thank you on the back ground piece with Emerald ink. The card was then put together by popping up the aperture piece and the goldfish with foam tape.
I hope you like my card. I would encourage you to do the ink blending class I got lots of tips from it to improve my ink blending.
Here is my second submission for AECP. This time I did the Altenew Academy All about layering 2. This class gave even more inspiration for using layering stamps and I got some great inspiration from this class.
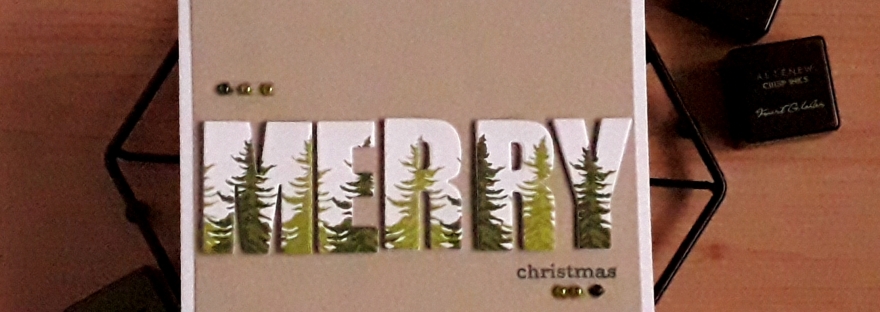
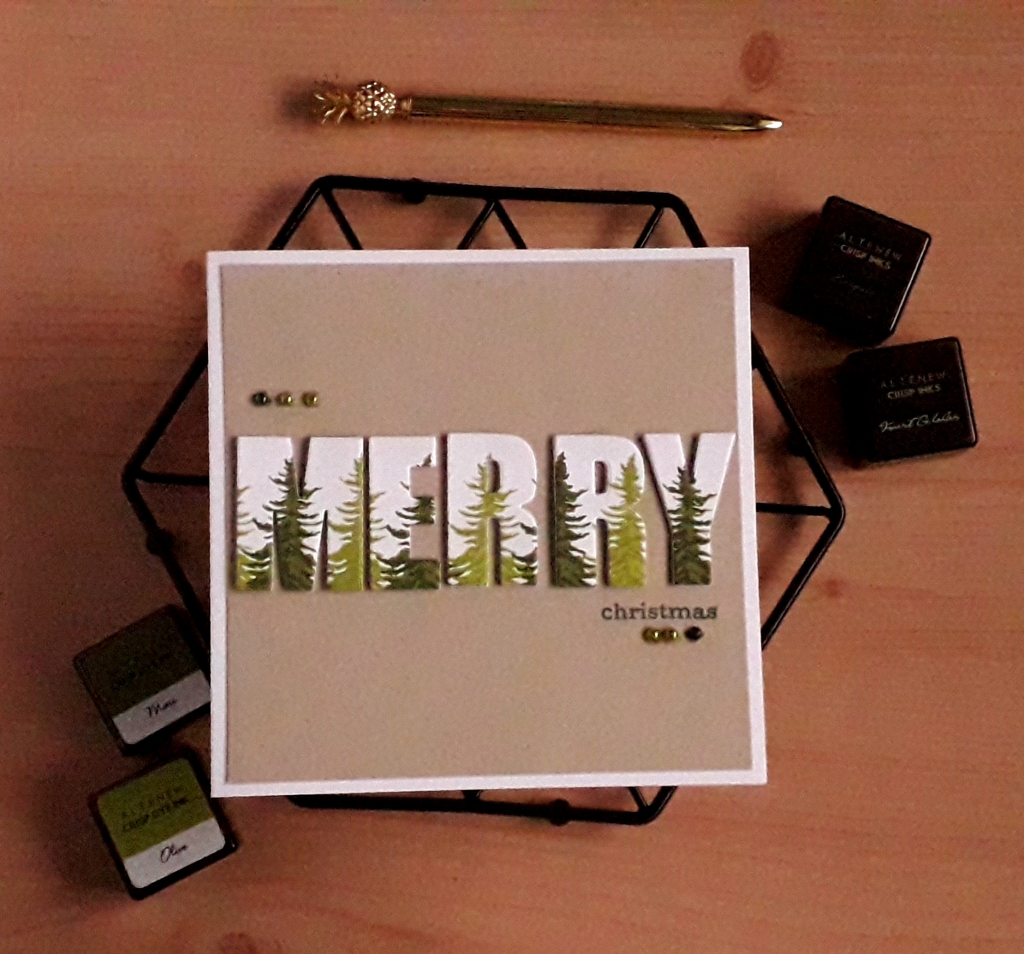
I loved the idea of stamping onto die cut letters. The card I got inspiration for this card from was a very pretty card with flowers stamped on the letters. I thought I would change it up by making it more masculine and also, making a start on my Christmas cards. There is only four months to go!
I used the pine tree stamp an old mini stamp set and stamped a row of trees. I used a mixture of green inks from green fields and tropical forest ink cube sets. With the bottom layer stamped with the ink from tropical forest (olive and moss) and the top layer from green fields (forest glades and evergreen).
I then cut the word MERRY out of them and cut out three more sets of MERRY to layer them up. I used the caps bold alphabet die set for this.
To put the card together I cut a square of Neenah desert storm card and attaching the die cut letters across the front. I then stamped Christmas from a stamp set from clearly besotted. I also attached some pearls from my stash that I coloured in to match the greens with artist markers in moss and evergreen.
I hope you like my card for the All about layering 2 class. I certainly enjoyed this class and I am looking forward to sharing cards from the next classes.